

If you’re building your first trad rack, wired nuts are usually the first real purchase that feels like safety, not just shiny gear. They’re small, light, and simple, but they’re also what turns a crack in the rock into a solid point of protection. Get comfortable with nuts early, and you’ll place faster, climb calmer, and spend less time fiddling mid-pitch.
Wild country classic rocks are classic wired stoppers: curved aluminum wedges on steel cables that you slot into cracks, then clip with a quickdraw. When you load them, they wedge tighter, which is why they matter so much for trad climbing. In other words, they’re the baseline protection you’ll use on everything from easy leads to long alpine routes.
This post breaks down what Classic Rocks are and how they’re sized, plus how to pick the right piece without guessing. You’ll also learn how to place them so they seat well, how to clean them without a wrestling match, and the situations where they shine (and where they don’t).
Finally, I will compare their feel and fit to other popular nuts, so you can choose what belongs on your harness.
What Classic Rocks are, and why climbers trust them
Wild Country Classic Rocks count as passive protection, the simplest form of trad gear. You cam them into cracks by hand, no springs or cams involved. They work because a tapered metal wedge binds against rock sides when you tug the attached cable.
These nuts shine in granite or sandstone splits. Climbers trust them after decades of real-world tests. Yet remember, all climbing carries risk. Gear demands practice, regular checks, and smart use to stay safe.
The parts of a nut, in plain English
Start with the head, the main curved aluminum wedge that grips the crack. It tapers narrow at the top and widens at the base, so it slots into spots from finger-thin to fist-sized. Sides curve gently for three contact points, unlike straight nuts that touch only two spots.
A thin steel wire cable runs from the head’s top. Climbers crimp it at the swage point, a squeezed metal sleeve that locks everything tight. Finally, anodized colors mark sizes fast: pink for tiny cracks, gold for bigger ones.
Different sizes match crack widths precisely. Grab a #4 (blue) for a half-inch slot, but skip it in a pencil-thin seam. Colors cut grab mistakes mid-climb and speed rack sorting at the belay.
How a nut actually holds a fall
Nuts catch falls through constrictions, spots where cracks pinch narrow. You tuck the wide base behind the bulge, narrow top out front. A downward pull cams it deeper, binding tighter against rock.
Placement beats brand every time. Seek uniform sides with good depth; shallow seats rip out easy. Pull direction matters too. If the rope yanks sideways, the nut walks up and fails.
Add extension with a quickdraw or alpine draw. This keeps shock straight down, stops walking, and cuts rope drag. Picture a car tire gripping pavement; the harder you brake straight, the firmer it sticks.
A quick history lesson, and what “Classic” means today
Wild Country launched Rocks in 1979 as the first curved wedge nuts. Climbers filed hardware store nuts before that, but they flopped in bumpy cracks. The curve locked around irregularities, a game switch for protection.
This design fueled clean climbing. No more pitons hammered permanent; nuts pop out clean. Rocks caught countless falls, built trust over 45 years.
Today, “Classic” signals the original shape with tweaks: slimmer walls, better taper, same reliable hold. Newer manufacturing adds lighter weight and bright colors. You gain a simple tool many learn on first, still top choice for granite trad. Beginners rack them cheap; pros pack them alpine.
Sizing and building a starter set that actually works
You need a rack that covers most cracks without wasting cash or weight. The Wild Country Classic Rocks set in sizes 1 through 10 makes sense for starters. It includes ten pieces, from pink #1 to gold #10, and weighs just 383 grams total. This range fits cracks from 13 mm to 31 mm wide, so think small finger tips up to hand-sized. Prices sit around $66 to $80 right now; check your local shop for the best deal.
This set suits new trad leaders or anyone climbing granite cracks in places like Yosemite or the Bugaboos. It skips super tiny tips or huge fist jams, but pairs well with cams later. Before you buy, run this quick checklist. First, note your rock type and crack styles; granite favors these curves. Next, check your budget; this kit stays affordable. Finally, see what cams or hexes you own already, because nuts fill the gaps best.
What sizes 1 to 10 cover, and what they do not
The full Wild Country Rocks line has 14 sizes, but 1-10 handle 90% of routes for beginners. They span 13-31 mm cracks perfectly. Anything smaller needs micro nuts; bigger spots call for hexes or cams.
Small nuts like #1 and #2 prove tricky. You must place them exact, because tiny constrictions demand precision. One slip, and they skip out. Mid sizes from #4 to #8 see the most action, however. Climbers grab them often for bomber seats in parallel cracks.
Strength ratings drop on tinies too. Check this table for details.
| Size | Crack Range (mm) | Weight (g) | Strength (kN) |
|---|---|---|---|
| 1 | 13 | 16 | 7 |
| 2 | 13.8 | 25 | 12 |
| 3 | 14.5 | 28 | 12 |
| 4 | 15.3 | 30 | 13 |
| 5 | 16.8 | 32 | 12 |
| 6 | 19 | 36 | 12 |
| 7 | 21.2 | 36 | 12 |
| 8 | 24 | 41 | 12 |
| 9 | 27.7 | 49 | 12 |
| 10 | 31 | 60 | 12 |
This data comes straight from Wild Country specs. Notice #1 holds less, so back it with bigger pieces nearby. Good placement counts double on smalls. Pull down hard to test; if it shifts, try again.
Color matching and fast racking habits for beginners
Colors make Wild Country Classic Rocks idiot-proof. Pink starts tiny; gold ends fat. Learn them once, and you grab right mid-climb.
Rack smart from day one. Clip all wires the same way on carabiners, narrow ends forward. This lets you pull fast without twisting. Order them small to large left to right on two bins. That way, your hand flows natural.
Before you place, do a quick visual scan. Match nut color to crack shade roughly; pink fits pink-thin seams. Practice at home. Soon, racking takes seconds, not minutes.
Those habits save time on lead. You focus on the rock, not fumbling gear.
Should you add extra smalls, extra mids, or offset nuts later?
Your base set works great at first. After ten pitches, think upgrades. Doubles in mids (#5-8) top the list. Routes repeat those sizes, so extras prevent running dry.
Smalls get extras less often. They place finicky anyway. Still, add a second #3 or #4 for runout slabs if you climb them.
Offsets shine in weird cracks. Flared ones or pin scars take shallow or deep-sided nuts. Wild Country makes them, but save them for after basics. They add weight without broad use.
Start simple. Buy doubles where you climb most. For example, Squamish granite loves #6-9 pairs. Test on toprope first. Your rack grows smart that way.
How to place Wild Country Classic Rocks well (and avoid the common mistakes)
You can master Wild Country Classic Rocks with practice. These nuts reward careful placement. Start close to the ground. Practice in real cracks before you lead. That builds speed and confidence. Read the crack first. Look for even sides and a clear constriction. Avoid flared openings or loose edges. A good placement feels solid, like the nut locks in place after one tug. Now follow this routine every time.
A simple 5-step placement routine you can repeat on every pitch
Pick the right size first. Match the nut to the crack width. Slide it in narrow end first. Test sizes until it slips behind a constriction easily. Next, seat it deep. Push the wide base past the pinch. Let the narrow top sit forward.
The curved shape grabs three points of contact. Then set it with a firm tug. Yank down hard on the wire. Feel it bind tight. Check the outward pull next. Bounce the rope slightly outward. Make sure the nut stays put. Inspect the rock too. Tap nearby edges for rattles. Finally, extend if needed. Clip a quickdraw or sling. This keeps the pull straight down.
A good placement resists that tug. It doesn’t wiggle or pop. The wire runs smooth without sharp bends over edges. Protect the cable by twisting it away from lips. Use your thumb to guide it. Beginners often skip the tug test. That leads to blowouts. Fix it by always pulling first. Practice this on boulders. Soon you’ll spot constrictions fast.
Placement mistakes that look fine until they fail
Tipped-out placements fool many. The nut tilts up at an angle. It looks snug until a fall yanks it free. Always orient the wide base down. Shallow seats fail next. You push halfway in. The nut lacks depth to cam. Seat it fully behind the bulge every time.
Expanding flakes trap nuts well at first. Then they peel off under load. Skip those hollow spots. Test by slapping the flake. Loose rock hides danger too. Place behind solid granite only. A rattle means walk away.
Cross-loading the wire twists it sideways. The nut spins out. Keep the cable straight down. Wet, muddy, or icy cracks worst of all. Grit packs in. Nuts slip or freeze stuck. They hold poorly because water weakens grip. Stick to dry rock. Beginners grab wrong sizes often. Too big skips constrictions. Too small skips out. Scan colors quick. Pink for tips, blue for fingers. Fix errors by downclimbing to replace.
Keeping nuts from walking, and why rope drag matters
Rope movement lifts nuts out. It walks them up the crack slowly. Then they pop on a whip. Straighten the pull to stop this. Extend every piece. Use quickdraws or double-length slings. Rope drag pulls sideways on wandering routes. Picture a zigzag pitch. The line rubs corners. That nudges nuts loose. Longer slings keep it direct.
Extend on roofs or traverses too. They angle the load bad. Clip the nut, then your rope through the draw. This absorbs shock down. On slabs, short draws work. But runouts need extras. Always check after clipping. Tug again if it shifts. Beginners ignore drag. They yard up tired. Plan placements ahead. Space them 2-3 meters apart.
How to clean a stuck nut without destroying it
Grab a nut tool for stuck pieces. It’s a hooked wire or steel pick. Slide it behind the head first. Tap the tool gently with your palm. Rock dust loosens the bind. Change direction if it sticks. Pry left, then right. Never yank the wire hard. That kinks or snaps it.
Be patient always. Wiggle while tapping. Patience saves gear. Clean your own nuts too. Don’t leave them for the second. Scarred rock annoys others. Use the tool light. No hammer blows. Practice on toprope. Remove dozens fast. Stuck mids come from grit. Shake cracks clean before placing.
Etiquette matters up high. Yell down if you need help. But try solo first. Your belayer pulls slack slow. A calm pull pops it free.
Where Classic Rocks shine, and when to reach for something else
Wild Country Classic Rocks excel in spots where simplicity wins. They save weight on long alpine days or multi-pitch routes, because each nut weighs under 60 grams. Beginners learn trad fast with them too; you place, tug, and trust without springs to fiddle. Parallel cracks suit them best, especially in granite or softer sandstone. Yet they hit limits in flares or ice. Always mix them with cams or hexes for full coverage. That way, your rack matches every crack.
Best rock and crack types for these nuts
Classic Rocks grip parallel-sided cracks well. You slot the tapered head into even walls with a solid constriction. The curve binds at three points, so it cams tight under pull. Softer rock like sandstone works nice too; the taller shape bridges small bumps better than flat nuts.
Solid granite shines brightest, however. Think Yosemite dihedrals or Bugaboos slabs. Avoid loose conglomerate; flakes peel easy. Good constrictions matter most. The pinch holds the wide base back, narrow top forward. Parallel sides prevent walking, unlike tapering spots where nuts might shift.
Real routes prove this. On alpine pushes like the North Ridge of Stuart, light nuts protect runouts without drag. Weight stays low for 50 pitches. In contrast, muddy cracks pack grit and slip. Icy seams freeze them stuck. Dry, solid rock only.
When cams, tricams, or hexes can be the safer call
Flared pods call for cams first. Nuts tip out as cracks widen; lobes expand to grip. Smooth flares or shallow seams skip nuts entirely. Cams hold there because they adjust active.
Horizontal breaks suit tricams or hexes better. Nuts slide sideways easy. Tricams toggle for hold; hexes cover odd angles with more surface. Parallel cracks tempt cams too, but if tapering starts, cams might walk out. Nuts lock in constrictions then.
Match the tool simple. In hard quartzite, hexes bite wide. Pods or roofs need active pieces. Nuts pair great, but skip solos in flares. For example, Squamish roofs mix both; cams prevent blowouts where nuts flop.
Using nuts for anchors without cutting corners
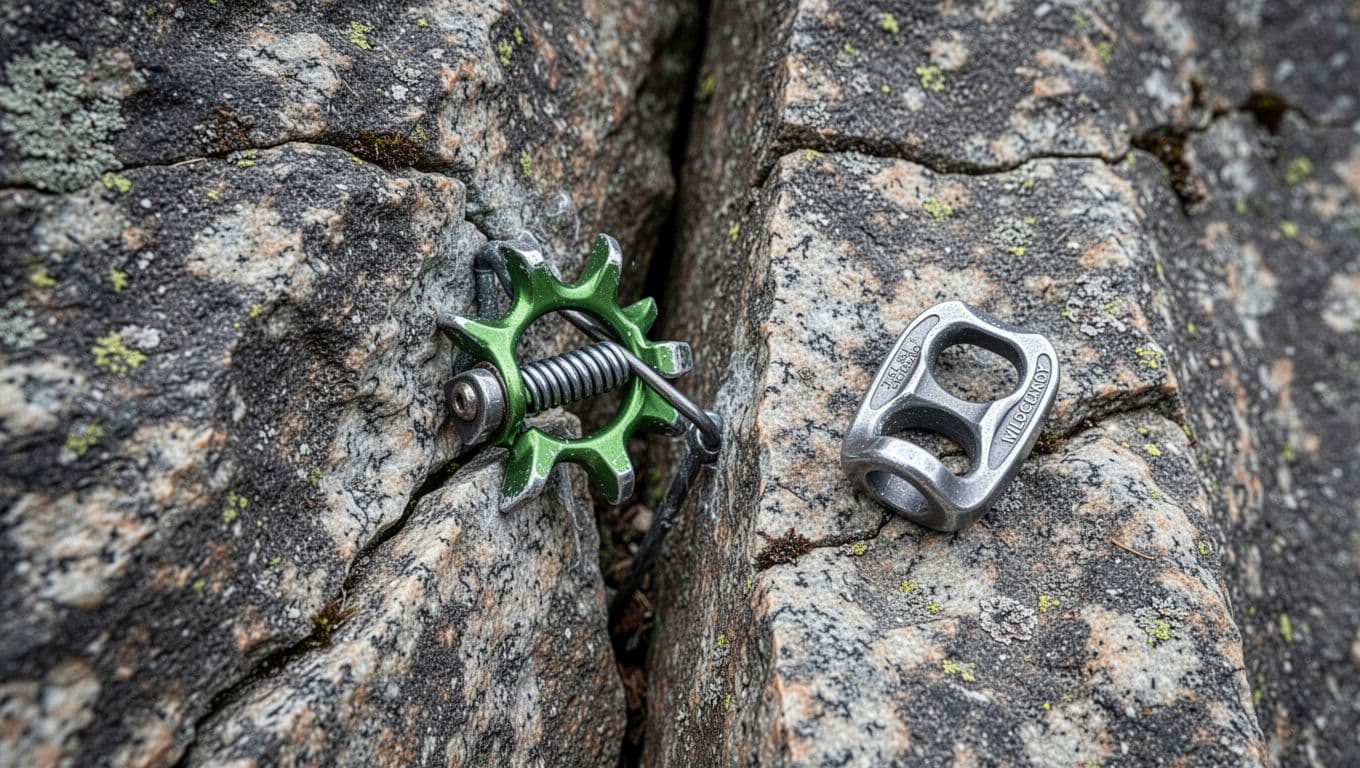
Build anchors with multiple Wild Country Classic Rocks. One nut fails under full weight; use three to eight for redundancy. Each piece stays independent, so one rip doesn’t drop the system.
Equalize basic. Clip slings to nuts, then tie to a master point carabiner. Rubberband angles even; all load shares. Place in separate constrictions. Pull test each hard.
Nuts shine at belays in solid cracks. They save cams for runouts. Yet back with rock or trees if possible. Safety demands no shortcuts. A single nut tempts fate; multiples build margin.
Classic Rocks vs other popular nuts: how to pick without overthinking it
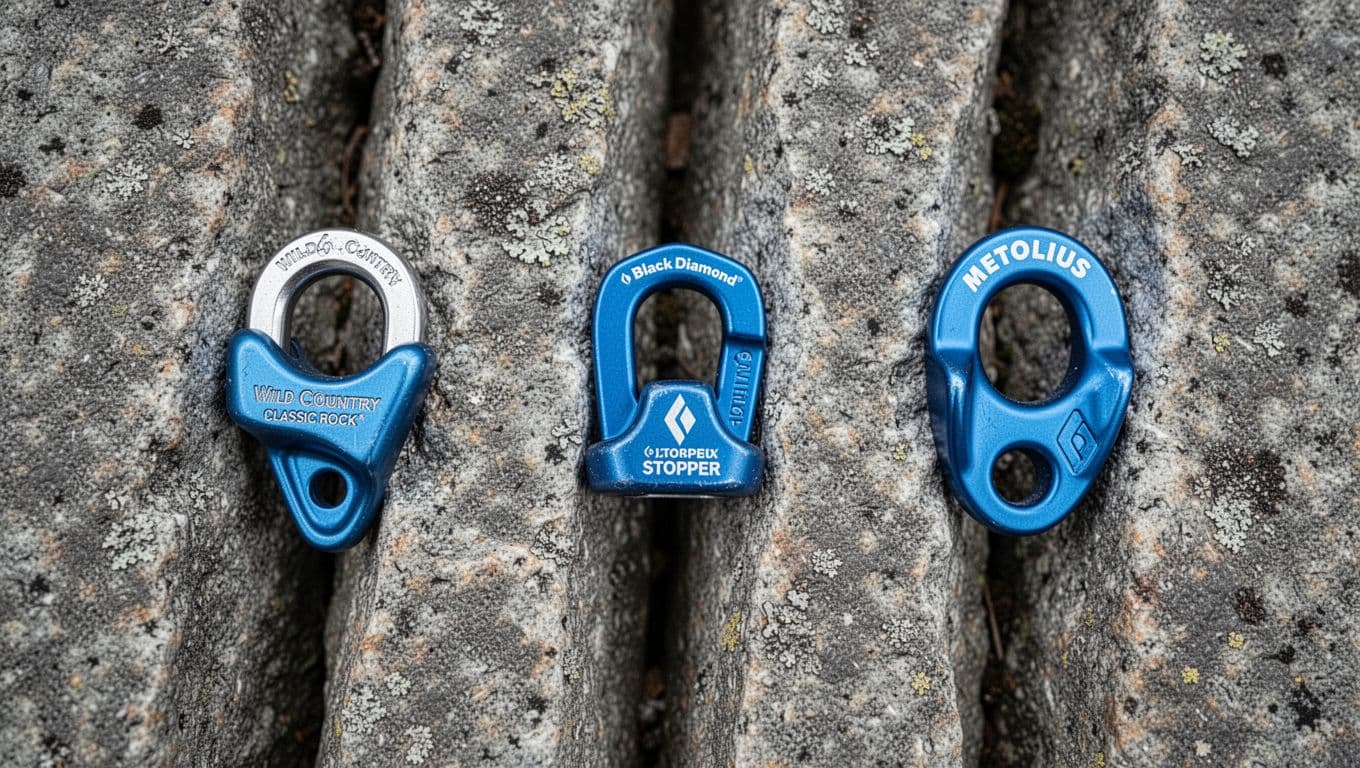
You face a rack full of choices when building your first set of wired nuts. Wild Country Classic Rocks stand out for their balance of light weight and reliable grip, but Black Diamond Stoppers and Metolius Curve Nuts compete hard. Each fits certain cracks better because of shape differences. Tapers, curves, and contact points change how they seat and clean. Your local granite or sandstone decides the winner, along with your placement style. Pick based on routes you climb most, not brand hype. A mix often works best after you master one type.
Here’s a quick side-by-side of blue-sized versions in parallel granite cracks. Notice the tapers and how they sit.
How they compare to Black Diamond Stoppers on typical routes
Wild Country Classic Rocks and Black Diamond Stoppers both handle everyday parallel cracks well. You place them the same way: narrow end in, tug down to cam. Cleaning follows suit too. Both pull free with a nut tool and light taps, because their wires flex similar. Stoppers cost a bit less for full sets, around the same $50 to $60 range as Rocks right now.
Taper sets them apart, however. Rocks narrow sharply with long curved sides for three-point contact. They slide into shallow spots easy and bind quick. Stoppers stay flatter with subtle flare instead. This makes them sit square and stable in wide-angle constrictions, but harder to seat at first in tight parallels.
On typical routes like Yosemite slabs, Rocks feel faster for runouts because they’re lighter. Stoppers shine if you climb smoother quartzite, where flat stability prevents wiggle. Beginners pick either; both teach solid technique. After a few pitches, you’ll feel the taper difference in bumpy granite.
How they compare to Metolius Curve Nuts in tricky placements
Metolius Curve Nuts grab irregular or flaring cracks better than Wild Country Classic Rocks. Their pronounced curve grips textured walls perpendicular to the wire. You seat them in pods or front-to-back angles where Rocks might tip. Cleaning takes more finesse, though. Curve Nuts stick from the radical shape, so wiggle and tap extra. Rocks clean quicker in those spots because less bevel grabs grit.
Rocks hold up fine in less constricting placements, however. Their taper fits parallel flares without drama. Curve Nuts feel odd at first; the learning curve steepens practice time. Once experienced, carry a mix. Add two Curve Nuts for weird pin scars or sandstone bumps. Rocks form your base set still, because they cover more ground. On Squamish tricks, this combo saves whips. Your technique matters too. If you place precise, Rocks suffice alone.
The simplest decision rule for your first nut set
Start with a proven, affordable set like the Wild Country Classic Rocks 1-10. It runs $50 to $60 and fits most beginner routes. Master placements first: tug every nut, rack by color, extend all. You build speed and trust that way. Then add specialties based on your rock.
Local granite favors Rocks doubles in mids. Sandstone runouts need Curve Nut offsets. Track what you grab most on ten pitches. Buy extras there. Stoppers work if budget rules and you climb wide parallels. Avoid full mixes early; they add weight and confusion. Practice one set deep. Your rack grows smart as skills do. In short, cheap and simple wins your first rack every time.
Conclusion
Wild Country Classic Rocks deliver reliable passive protection through their curved aluminum heads and steel wires. Climbers trust them after decades of catching falls in granite cracks, because they cam tight on downward pulls. You get a proven design that teaches solid trad skills without fuss.
Start with the sizes 1-10 set. It covers 13-31 mm cracks, weighs just 383 grams, and costs around $56 to $79 right now. Rack them by color, narrow ends forward. That speeds your flow on pitch. Master the five-step placement: pick right size, seat deep, tug hard, check outward pull, extend always. Avoid tipped or shallow spots, because they fail under load.
Practice builds confidence, so hit the ground level first. Find a buddy for checks and tips; fresh eyes spot mistakes. Go conservative on runouts. Build your rack slow based on real routes, like doubles in mids for granite slabs.
Back to Climbing Nut Reviews
Recommended Products for Trad Climbing
These products can support safer climbing, belaying, rappelling, and emergency readiness.
Affiliate disclosure: As an Amazon Associate, TradClimbers may earn from qualifying purchases at no additional cost to you.
Keep exploring helpful trad climbing, gear, safety, and technique resources.
- A Climber’s Guide to Rock Climbing in Thailand
- A Trad Climber’s Guide to the Isle of Skye Ridge
- Hueco Tanks Rock Climbing: hueco tanks rock climbing Essentials
- A Climber’s Guide to The Nose of El Capitan
- The Top 8 Unforgettable Climbing Routes El Capitan Has to Offer in 2026
- Yoga for Climbers: Boost Strength, Flexibility, and Recovery | yoga for climbers