
Trad Climbing Gear Guide: What You Really Need (2026 Checklist)
Trad climbing gets real the moment you stop clipping bolts and start building your own safety system. Your gear choices affect safety, speed, and how calm you feel when the pump sets in.
Trad climbing safety means you place removable protection (cams, nuts, hexes) into cracks, then clean it as you go. That freedom is the point, but it also means your rack has to match the rock, the route, and your skill level.
This trad climbing gear guide is for new leaders buying their first rack, gym climbers taking their first outdoor leads, and experienced climbers tightening up a kit that’s grown messy over time. You’ll get a simple, checklist-style breakdown of what you actually need, what’s nice to have, and what can wait.
You don’t need every shiny piece on the shop wall. You need a smart core rack, the right anchors and belay setup, and a few choices that fit your local cracks and your partner’s plan. I would say this is at the start of knowing the core trad climbing skills. By the end, you’ll know what to buy first, what to skip, and how to keep your rack light without cutting corners.
Start With the Non-Negotiables: Personal Gear You Use Every Climb
Before you buy cams and build a rack, lock in the personal gear that keeps you safe and efficient on any route. This part of a trad climbing gear guide is simple on purpose. These are the items you wear, hold, or depend on every single pitch, whether you’re cragging or heading up a long multipitch.
Helmet: What to look for, how it should fit, and when to replace it
Trad climbing has more overhead hazards than most sport routes. Loose blocks, small rockfall, and dropped gear are common, especially at crowded crags. Add awkward stances and ledges, and a helmet stops being “nice to have.” It’s standard kit for the leader and the belayer.
When you try on a helmet, use quick cues you can remember at the car:
- It should sit level on your head, not tipped back like a bike helmet.
- With the chin strap undone, it shouldn’t wobble or slide when you shake your head.
- With the strap buckled, it should feel snug under your jaw, not pressing your throat.
- If you can push the front rim up and expose your forehead, it’s too loose.
Modern foam helmets are popular because they’re light and comfortable all day. That’s great for multipitch, but if you do a lot of chimneying, offwidths, or frequent crag days, pay attention to shell durability and how easily the foam gets dinged.
Replacement rules are not complicated. Replace a helmet after a major impact, if you see cracks, deep dents, or crushed foam, or if the straps and buckles are worn out. Also remember that plastics and foams don’t love long sun exposure. If your helmet lives on a dashboard or gets baked for seasons, it ages faster. For a clear overview of fit and features, see REI’s climbing helmet guide.
Harness: Comfort for hanging at stances and hauling a rack
A trad harness has one job: stay comfortable when you’re standing, hanging, and moving with extra weight. If your waist belt bites after ten minutes, it’ll feel like a vise when you’re building an anchor and your calves are burning.
Look for:
- Supportive waist belt with enough padding for hanging belays.
- Roomy gear loops that don’t crowd cams, nuts, and draws into a single clump.
- A clean belay loop area that’s easy to clip, even with gloves or cold hands.
Sizing matters more in trad because you often climb in layers. Try the harness on over what you’ll actually wear, including a midlayer in shoulder season. You want the waist belt to sit above your hip bones and still tighten down with some tail left in the buckle.
Adjustable leg loops are helpful if you climb in varying temps, or if you switch between thin pants and heavier layers. They also make bathroom breaks easier on long days. As for models, many climbers like trad-friendly designs such as the Petzl Aquila, Edelrid Orion, and several Black Diamond options because they tend to balance padding with bigger loop layouts, without feeling bulky.
Shoes, chalk, and crack protection (tape or gloves)
Trad shoes don’t need to look extreme, they need to work in cracks. Choose a pair that can edge on small holds and also jam without folding your toes in half. Super aggressive downturned shoes that feel great in the gym often feel awful when you’re twisting your foot into a hand crack for ten minutes.
For your hands, decide between crack gloves and tape:
- Crack gloves are fast, consistent, and great for long days.
- Tape is cheaper, customizable, and can fit under tight jams.
A basic tape-glove method is: wrap the wrist, run strips over the back of the hand to the fingers, then lock it all down with a few passes around the knuckles. If you want a clear, proven walkthrough, Climbing Magazine’s tape glove how-to is a solid reference.
Chalk is personal, but trad tends to be long and sweaty. A chalk bag with a brush loop is handy because you’ll actually use it between burns, and it keeps your kit from getting lost in the pack. Also, take care of your skin. A little sanding and balm at night keeps your hands ready for the next pitch instead of splitting mid-trip.
Belay device and locking carabiners: Simple, proven systems
For trad, a tube-style belay device is the default. It’s light, handles a wide range of rope diameters, and works well when ropes get dusty. If you climb multipitch, pick a tube device with guide mode (often called plaquette mode). It lets you bring up a second directly off the anchor, which keeps the stance cleaner and the brake strand in a better position.
Most climbers carry a small set of lockers that covers the daily essentials:
- 1 locker for the belay device
- 1 to 2 lockers for anchor building and rigging
- 1 locker for a personal tether or cordelette master point, depending on your system
A larger HMS-shaped locker (pear shape) makes belaying and anchor work smoother because it has more internal space and reduces carabiner crowding. If you want a straightforward breakdown of carabiner types and why shape matters, WeighMyRack’s carabiner guide explains it well without hype.
Rope and Anchor Kit: The Stuff That Keeps the System Working
If your rack is the “protection,” your rope and anchor kit is the “system.” It’s what ties your climbing together, keeps transitions smooth, and prevents small problems (like brutal rope drag or a messy belay) from turning into big ones. In any trad climbing gear guide, this is the part that rewards simple choices you can repeat every pitch.
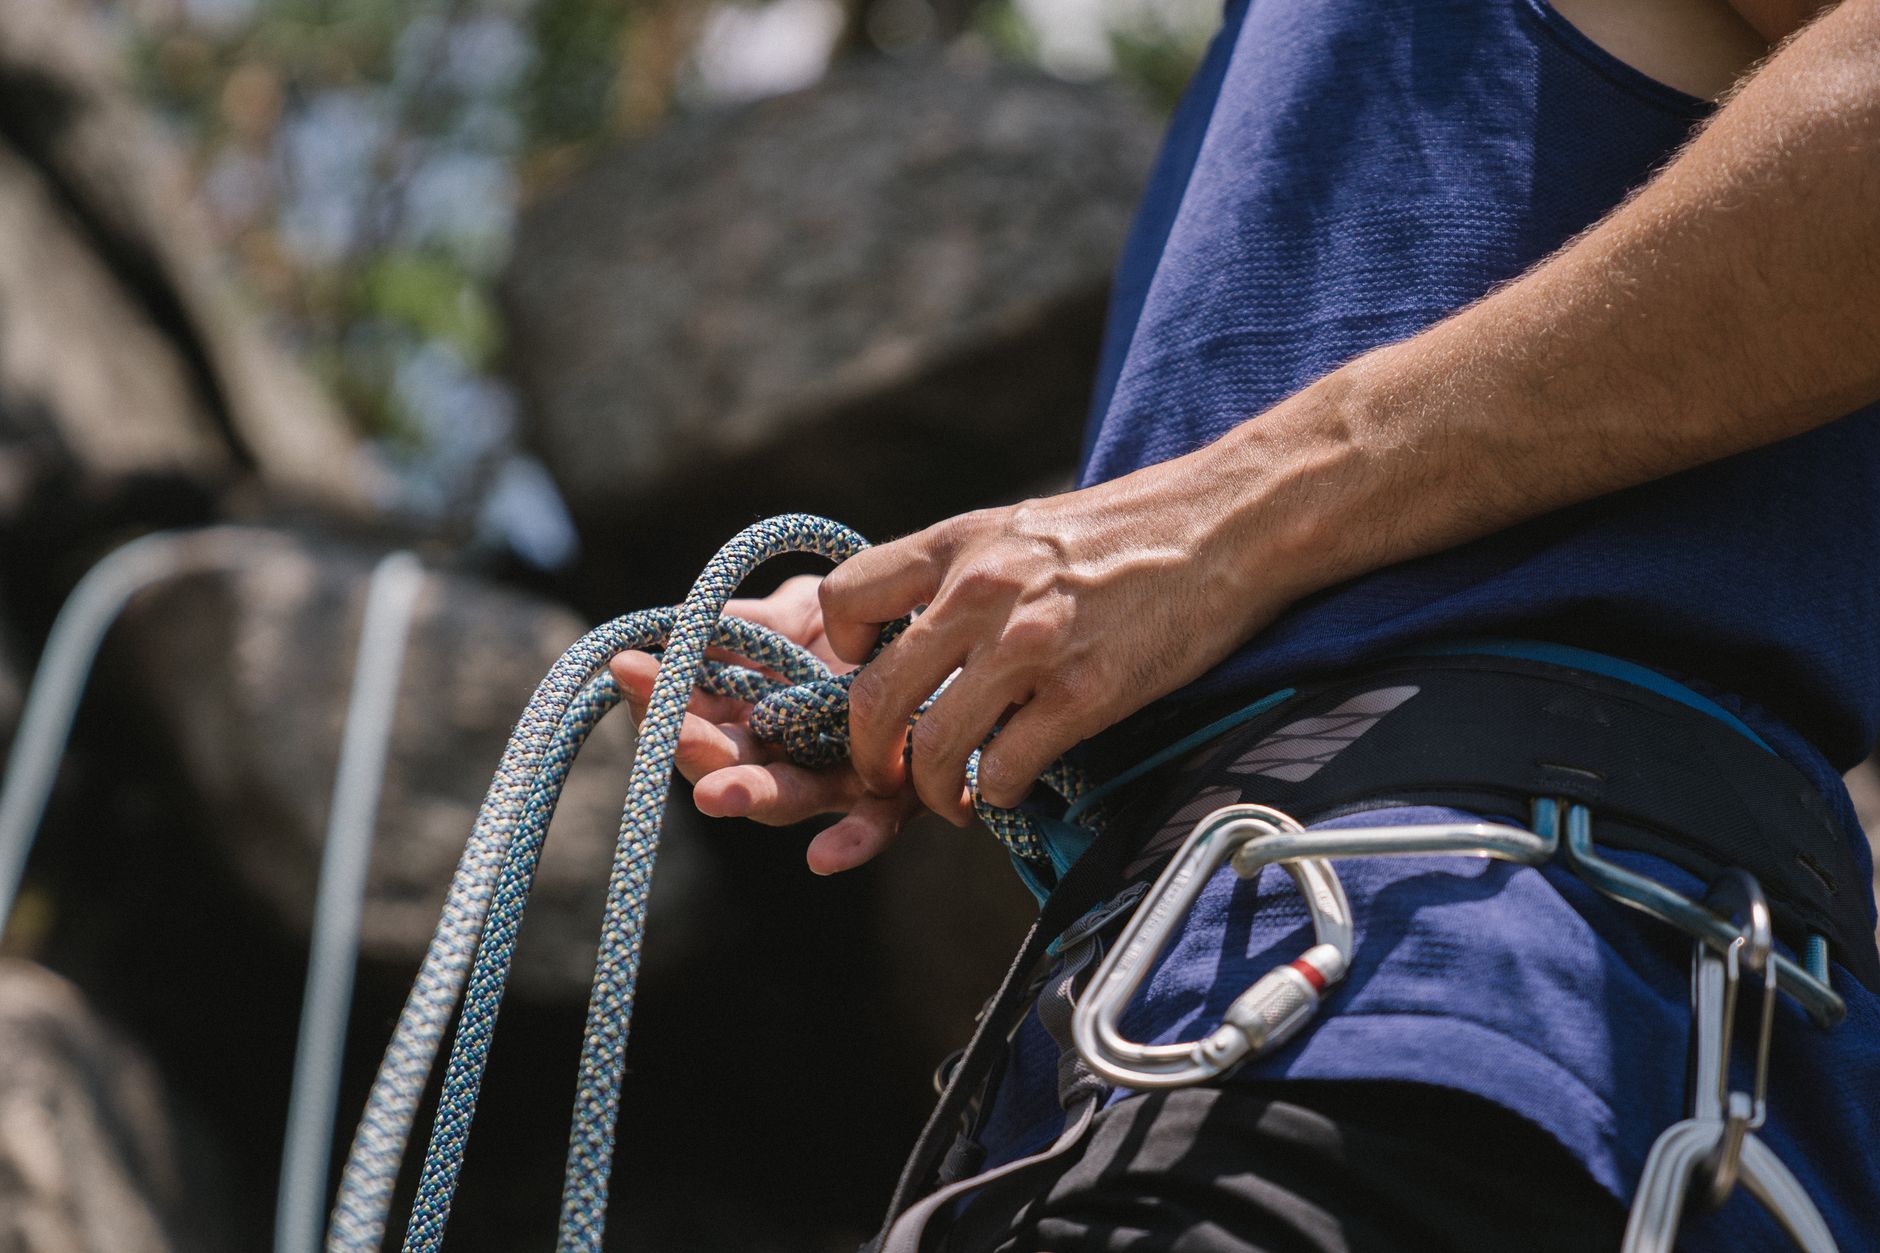 Photo by Katya Wolf
Rope choice for trad: length, diameter, and dry treatment
For most trad areas, a 60 m single rope is the default starting point. It fits common pitch lengths, keeps rappels simple, and costs less than longer ropes. Some crags and many modern “full-value” pitches are better with a 70 m, especially if descents involve long rappels or you want more linking options.
Diameter is where new trad leaders often overthink it. Many experienced leaders like a slightly thinner rope because it saves weight and handles well on long days. But going too skinny too soon can feel grabby, can slip through some devices if mismanaged, and tends to show wear faster when you’re learning.
A practical sweet spot:
- Beginners: roughly 9.4 to 9.8 mm for a calmer catch and more durability.
- Weight-conscious trad leaders: roughly 9.0 to 9.4 mm if your belay device and habits are solid.
As real reference points, ropes like the Mammut 9.0 Crag Sender Dry and the Petzl VOLTA GUIDE 9 mm show what “light but still trad-usable” looks like. The key is picking a rope your belay device handles well. Check the device’s stated rope range, then stay comfortably inside it.
Dry treatment is not just for ice climbers. It makes sense if you climb:
- Alpine routes where snow patches and wet ledges are normal
- Seepy or coastal rock where the rope gets damp often
- Dusty crags where a treated sheath resists grit and stays smoother longer
Dry-treated ropes also tend to stay nicer over time, which matters because a tired rope becomes harder to feed, coil, and manage at belays.
Alpine draws and runners: Reducing rope drag the easy way
On wandering trad lines, rope drag can feel like trying to pull a garden hose around corners. Alpine draws are the simplest fix. An alpine draw is a sling (usually 60 cm) with a carabiner on each end, often racked “short” and then extended when the rope line starts zig-zagging.
Why it matters:
- Less rope drag, so you clip and climb with less fight
- Better gear direction, since the rope pulls more in-line with placements
- Cleaner rope flow at belays, especially on traverses and corners
Most climbers trend toward lightweight Dyneema slings for alpine draws because they pack small and don’t soak up much water. You’ll also see more cams with extendable slings, which can replace an alpine draw in the right spot and speed things up.
Simple starter counts that work in many areas:
- Single-pitch trad: about 6 to 8 alpine draws (60 cm slings) plus 2 to 4 standard quickdraws for straight-up sections.
- Multipitch: about 8 to 12 alpine draws, and a couple quickdraws still earn their place for clean, fast clipping.
If you want a clear visual on when and how to extend, this alpine draw explainer from Moja Gear is a solid reference: How to Use Alpine Draws.
Anchor building basics: cord, lockers, and a simple personal tether plan
For beginner-friendly trad anchors, think in two buckets: materials (cord or cordelette, plus lockers) and habits (keep it simple, back it up, and check the pull).
A good basic carry looks like:
- One cordelette or a length of anchor cord for building a master point when needed
- A few extra locking carabiners beyond your belay-device locker (anchors get crowded fast)
- A personal tether plan you always use the same way (many people clip a tether or sling to their belay loop and a locker at the anchor)
The anchor itself should be built from the gear you placed (cams, nuts, threads), equalized for the expected load, and oriented to the direction of pull. That last part matters more than new leaders think. A piece can look perfect until the rope starts pulling sideways.
Two quick safety reminders keep you out of the common traps:
- Don’t rely on one piece when you can build a multi-piece anchor.
- Inspect every piece for direction and rock quality, then re-check once the system is weighted.
Keep the system repeatable. Simple setups reduce mistakes when you’re tired, cold, or rushed. If you want a reputable overview before practicing with a mentor, REI’s anchor basics are a clean starting point: How to Build Anchors for Climbing. For knots, it’s enough here to know the names you’ll use often, like clove hitch and figure-8 on a bight, then learn them carefully from a trusted source.
Small essentials that save the day: headlamp, knife, first aid, layers, and a pack
Trad days run long because everything takes a bit more time: route finding, gear placements, building anchors, and managing ropes. A few small items prevent minor issues from becoming time sinks.
For single-pitch cragging, keep it minimal but complete:
- Headlamp (even if you “won’t be out late”)
- Small knife or cutters (tape, cord, stuck knots)
- Compact first aid (tape, blister care, a couple gauze pads)
- Light layer for wind or shade
- Nut tool (yes, it belongs here too, and it’ll come up again in the rack section)
For multipitch, add comfort and problem-solving capacity:
- Warmer layer (belays get cold)
- More first aid basics and any personal meds
- Extra food and water
- Small pack that carries a rope-friendly load without snagging every chimney
This isn’t about packing for disaster. It’s about staying efficient so you climb well, make good calls, and still have enough in the tank for the descent.
Protection 101: Building a Trad Rack That Matches Your Local Cracks
“Protection” is the part of trad that turns a crack into a safe lead. You place removable gear into features in the rock (most often cracks), clip the rope to it, then your second removes it on the way up. A good rack isn’t about owning everything, it’s about owning the right pieces for your local style of climbing.
Rock type and crack shape decide what works. Parallel-sided splitter cracks eat cams. Pin-scar seams and constrictions love nuts. Flares and funky pods reward offsets and a patient eye. This section of the trad climbing gear guide keeps it simple: start with an affordable core rack, then add pieces only after your local routes ask for them.
Nuts and hexes: Affordable pro that belongs on almost every rack
A nut (also called a wired nut or stopper) is a wedge-shaped piece of metal on a wire. You place it in a crack where the rock narrows (a constriction), then it “locks” when weighted. Nuts shine when the placement is straight in, has a clear taper, and the rock is solid.
Why nuts earn a permanent spot on almost any trad rack:
- They’re light for how many placements they give you.
- They’re cheap compared to cams, so you can build range fast.
- They fit where cams can’t, like thin seams, shallow constrictions, and pin scars.
- They can be surprisingly “confidence inspiring” once you get good at reading constrictions.
A simple way to think about it: nuts are like doorstops that work because the doorway gets smaller. Put them where the crack narrows, then set them with a firm tug.
Starter set for newer leaders: aim for about 6 to 10 nuts covering small to medium sizes. That usually means skipping the tiniest pieces at first (hard to place well), and focusing on sizes you’ll actually find and trust.
Fuller set for regular trad leaders: plan on 15 to 20 nuts, plus a few specialty shapes. A common add-on is offset nuts, which are shaped to bite better in flared, worn, or irregular cracks. Pieces like DMM Offsets are popular because many real-world cracks aren’t perfectly symmetrical.
Where hexes still make sense: Hexes are the old-school, big, hollow protection pieces that can be passive (like a big nut) or sometimes cammed in a pinch. They’re not “dead,” they’re just more niche now. Hexes still earn their keep when you want wide crack coverage on a budget, you’re packing for alpine routes where weight and simplicity matter, or you expect icy, dirty, or rough rock that can chew up cams.
Cams: Core sizes, doubles, and what features matter in 2026
A cam is a spring-loaded device that expands inside a crack. When the rope pulls, the cam lobes try to rotate and press into the rock, which creates holding force. In plain terms, cams are the fast, forgiving option when the crack walls are more parallel and there isn’t an obvious constriction for a nut.
Cams are your go-to when you need:
- Quick placements from awkward stances
- Parallel cracks where a nut would slide
- A piece you can place and trust without perfect rock geometry
Most climbers build a core cam rack around finger to hand sizes, because those sizes show up constantly. As a rough starting range, think about covering what many brands label as small through medium units (often around the territory from “thin fingers” up to “hands”). Once you know your crag, you decide if you need more tiny pieces, more wide pieces, or more duplicates.
When do doubles make sense? Doubles are not a beginner requirement, but they’re common because many routes repeat the same crack size for long sections. If your local classics have 30 feet of hand crack, a single hand-size cam starts to feel like bringing one water bottle to a marathon. The clean approach is to let your climbing decide:
- Climb a handful of routes at your home crag.
- Notice what sizes you run out of first.
- Add doubles in those sizes before buying random “nice-to-have” pieces.
You’ll see plenty of racks built around models like Black Diamond Camalots and Wild Country Friends, but it’s smarter to focus on features than logos. In 2026, the things that matter most are still the basics:
- Range: Wider range can mean fewer cams for the same coverage.
- Trigger action: Smooth triggers help you place precisely, even pumped.
- Stem feel: Some cams feel more stable in weird, tipped-out placements, others feel more flexible in wandering cracks.
- Sling length: Cams with extendable slings help cut rope drag fast, and they can reduce how many alpine draws you burn early in a pitch.
If you want a practical overview of how climbers think about building a cam rack, Andy Kirkpatrick’s breakdown is still a useful framework: How to Build a Cam Rack.
Micro gear and specialty pieces: When you need them, and when you don’t
Micro gear is where new leaders can spend a lot of money and still feel unsure. Micro-nuts, tiny cams, and tricams can be excellent, but they demand solid judgment and solid rock.
Here’s the honest tradeoff: small placements hold less margin for error. The rock needs to be strong, the piece needs to be set well, and the direction of pull matters even more. If you’re placing gear in soft rock, grainy cracks, or funky exfoliating flakes, small gear can give you a false sense of security.
A practical way to add micro and specialty protection without wasting money:
- Borrow first (or share racks with a partner) and see what your routes ask for.
- Add slowly after you’ve led enough pitches to know what you’re missing.
- Practice on the ground: place pieces, bounce-test gently by hand, then have an experienced partner critique.
Tricams sit in the “optional but brilliant in the right place” category. They can work well in pockets, solution features, and certain horizontal placements where other gear feels awkward. They also take practice to place and clean cleanly.
It’s also normal at some crags to carry doubles in small sizes, especially where routes are protection-dense and thin. That said, it’s not universal, and you don’t need to buy a tiny-gear double rack until your local routes clearly demand it.
Nut tool, racking carabiners, and keeping your rack organized
A nut tool is mandatory for most trad teams because nuts get stuck. Cams walk, nuts weld, and a tool saves time, saves gear, and keeps your second from having a miserable day. If you’re leading, assume you’ll need to clean your own pieces at some point too (retreats happen).
A simple racking system makes you faster and calmer because you stop hunting for the right piece. The goal is consistency, not perfection. One clean method that works for many climbers:
- Rack nuts on one carabiner (or two if you have a big set).
- Rack cams by size on separate biners, in the same order every time.
- Keep alpine draws together so you can grab them without thinking.
- Keep locking carabiners separated (belay locker, anchor lockers), so you don’t hand your partner the wrong one mid-pitch.
A gear sling is optional, but it can feel great on long routes or when you’re carrying a heavy rack. It spreads weight and can reduce harness clutter. It can also snag in chimneys or tight corners, so it’s not an automatic upgrade.
One final habit that matters: avoid cross-loading carabiners. Clip gear so the load sits along the spine, keep gates clear of rock, and don’t let slings twist a biner sideways. A consistent rack system also helps partners find gear fast, which matters when you’re pumped, on a small stance, and trying to keep the rope moving.
How Much Gear Do You Really Need? Starter Racks, Upgrades, and Buying Smart
A good rack is like a good toolbox, it matches the job. If you buy protection before you know what your local cracks look like, you’ll end up with duplicates you don’t use and missing pieces you actually need.
A simple planning process works well for most new leaders in this trad climbing gear guide: check a few local route descriptions (guidebook notes and recent comments), see what sizes get mentioned, then compare that to what your partner already owns. Many beginner teams split the rack (one person buys nuts and slings, the other buys cams and draws), which keeps costs down and gets you climbing sooner.
A realistic first trad rack for single-pitch leading
This is a practical starter rack that covers many single-pitch leads without turning your harness into a yard sale. Think in ranges, then adjust based on your crag.
Bring this as a baseline:
- Nuts: 1 set of stoppers, roughly 8 to 12 pieces, focused on small to medium sizes you can place cleanly.
- Cams: a “handful,” roughly 4 to 8 cams, covering common finger to hand sizes for your area.
- Alpine draws: roughly 4 to 8, built from 60 cm slings with two non-lockers each.
- Slings/runners: roughly 2 to 4 total in mixed lengths (60 cm and 120 cm is a simple start).
- Locking carabiners: roughly 3 to 5 (belay device, anchor work, and one spare for problem-solving).
- Nut tool: 1, always.
Budget tip: if you’re buying one category first, start with nuts and alpine draws. They cost less, teach good placement habits, and stay useful forever. For a solid sanity check on what “first rack” means in the real world, compare your plan to this breakdown: The Evening Sends guide to building your first trad rack.
Upgrades for multipitch days: More pieces, more systems, more margin
Multipitch changes the problem. You’re managing rope drag across corners, building anchors multiple times, and you can’t walk back to the base when you drop something or get cold.
Upgrades that matter, and why they matter:
- More draws and slings: you extend more often to keep rope drag from stealing your energy and messing with placements.
- More lockers: multipitch anchors get crowded fast, and having one extra locker can prevent awkward (and risky) improvising.
- More protection in the sizes you burn: doubles in the common cam sizes make sense when cracks stay the same size for long stretches.
- More nut options: a fuller nut range helps when cams walk, crack walls flare, or placements are shallow.
- A headlamp, extra layers, and a small pack: the simplest “benightment insurance” is light, warmth, and the ability to carry it comfortably.
If you want a big-picture look at how multipitch systems affect gear choices, this overview is a useful companion: Essential gear for multi-pitch rock climbing.
Buying used vs new: What’s safe to buy secondhand (and what isn’t)
Used gear can save serious money, but only if you’re picky.
Usually OK used (from a trusted source, inspected carefully):
- Cams
- Nuts and hexes
- Non-locking carabiners (if not bent or deeply grooved)
Skip used soft goods with unknown history:
- Ropes
- Slings and runners
- Harnesses
- Helmets
Quick inspection checklist before you buy:
- Cams: smooth trigger action, no sticky lobes, no bent stems, no cracked plastic, no obvious axle wobble, sling looks clean and not fuzzy.
- Nuts: wires not kinked or frayed, no sharp edges, no deep corrosion.
- Carabiners: gate snaps shut, no sharp burrs, no major rope grooves.
Common trad gear mistakes that waste money or add risk
Most beginner mistakes are fixable, and they’re usually buying and packing problems.
- Buying random sizes that don’t match local cracks. Fix: write down what you placed on your last three leads, then buy to fill gaps.
- Skipping alpine draws, then fighting rope drag all pitch. Fix: start with a small set and add a couple more before buying specialty pro.
- Carrying too many lockers. Fix: keep a “daily lockers” mini-kit, add more only for multipitch.
- Not labeling rope length (and not tying knots in rope ends). Fix: mark the rope and make end knots a habit.
- Forgetting the nut tool. Fix: clip it to the same place every time, treat it like your belay device.
- Buying micro gear too soon. Fix: borrow micro pieces first, then buy only what your routes actually demand.
More Articles on Trad Climbing Gear
Trad climbing gear list for beginners
Affordable trad climbing rack essentials
Best cams for trad climbing 2026
Choosing nuts for trad climbing
How many quickdraws for trad climbing
Trad climbing helmet safety tips
How to build trad anchor with gear
Lightweight trad gear for alpine
Trad climbing sling setup guide
Best cams vs nuts for trad protection
Trad climbing gear checklist printable
Trad climbing gear for single pitch
Trad routes rope recommendations
Essential trad protection pieces
Trad climbing belay device guide
Trad gear care and maintenance
Conclusion
A solid trad climbing gear guide always comes back to the same three pillars. First, personal safety gear you trust every pitch, a well-fitting helmet, a comfortable harness with usable gear loops, a simple belay device, and enough lockers to keep the system clean.
Second, rope and anchor basics that stay repeatable, a rope that fits your terrain, a real plan for managing drag (alpine draws and runners), and an anchor kit you can build without improvising when you’re tired.
Third, a rack built for local rock, nuts for constrictions, cams for parallel cracks, and only the specialty pieces your routes demand. Keep consistency in how you rack and build anchors, it cuts mistakes and saves time.
Practice placements on the ground, then test your judgment on easy leads with experienced partners. Add gear slowly, based on what you run out of, not what looks useful online.
Before your next day out, build a checklist for your home crag and do a pre-climb gear check at the car. Be sure to also check out our trad climbing gear reviews to add to know your knowledge.
Recommended Products for Trad Climbing
These products can support safer climbing, belaying, rappelling, and emergency readiness.
Affiliate disclosure: As an Amazon Associate, TradClimbers may earn from qualifying purchases at no additional cost to you.