

Ever faced a razor-thin crack on a trad route and thought, “No way gear fits here”?
RP climbing nuts solve that. These tiny brass micronuts, born in the 1970s, protect seams, pin scars, quartz crystals, and thin granite cracks where cams won’t go. Climbers still rack them in 2026 because they bite rock hard, stay light and cheap, and handle flared or shallow spots better than aluminum options.
They’re specialty gear, though. Not magic bullets. You need solid rock and precise placements to make them work. Brass grips well, but cables can snap if you yank hard, so practice matters.
In this guide, you’ll learn how RP climbing nuts function, tips for placing and removing them, how to pick the right sizes for your rack, when to skip them entirely, and how they stack up against Ballnuts, offsets, or Dyneema slings. You’ll build confidence for those runout sections. Let’s get into it.
What RP climbing nuts are, and how they became a trad classic
RP climbing nuts started as a backyard invention by Roland Pauligk in 1969. He crafted them in Melbourne, Australia, first from scrap aluminum, then switched to brass for the tiny sizes. Climbers called them RPs after his initials.
These micros fit cracks under a quarter-inch wide, places where nothing else worked. Before RPs, folks jammed machine nuts or early iron chocks into rock. Pauligk’s design changed that. His brass versions bit into seams, pin scars, and crystal pods. They let climbers tackle bold slabs and runouts that felt sketchy before.
By the mid-1970s, RPs hit the US through Chris Peisker. He sold them at spots like Tahquitz and the Gunks. Yvon Chouinard saw them in 1977 and sparked his own micro-nuts. Pauligk handmade thousands over decades, shipping worldwide from his shed. Even after his death in 2017, true RPs stay a trad staple. Modern climbers rack them because they handle shallow, flared cracks better than cams or bigger nuts. Small protection shifts the lead’s feel. You clip one, and that airy exposure drops a notch. Brass molds to rock, so it grips where aluminum slips.
The basic design in plain English: brass head, wire, and a tiny contact patch
RP climbing nuts look simple. A curved brass head sits on a thin silver wire. The head flares out, almost like a shallow spoon. You taper it narrow at the thin end and wider at the thick end. That curve helps it wedge tight when you tug the wire.
Surface area counts big here. The head touches rock on a tiny patch, often smaller than a dime. Less contact means higher pressure. Rock deforms under it instead. Brass stays soft, so it bites in and mushrooms slightly.
That creates friction. Most holds come from two ways. First, it jams in a constriction, like a narrowing crack. Second, the metal conforms and grips edges. Pull parallel to the crack, and it locks. Yank it out at an angle, though, and it pops easy.
Smaller sizes drop strength ratings. A #1 might hold 2 kN, while bigger ones hit 5 kN or more. Numbers guide you, but placement rules. Nail the spot in solid granite, and even a micro shines. Miss it, and no rating saves you. Test pulls build your eye for good ones.
When “RP” means the original brand, and when it means any micro nut
People toss “RP” around loosely today. It nods to Pauligk’s originals, handmade brass beauties with wire silver-soldered inside the head. That keeps cables from snapping on falls. True RPs feel narrow and precise, perfect for the tiniest seams.
But “RP” often means any brass micro nut now. Brands like Black Diamond, DMM, or Wild Country make copies or rivals. Their micros mimic the shape, with curved heads and thin wires. Offsets add a twist, one side thinner for irregular cracks. You might borrow a partner’s “RP #2,” and it’s a BD Stopper, not Pauligk’s. No big deal. They all work similar.
Check labels when you buy. Originals carry a premium because supply dried up post-2017. Mass-produced ones cost less and rack uniform. Climbers still say “place an RP” for any small brass piece. It saves words on the crag. Know your gear’s brand, though. Test it on toprope first. That way, you match strength to rock type without surprises.
Where RPs shine (and where they are a bad idea)
RP climbing nuts excel in spots where bigger gear fails. They grip thin features because of their small size and soft brass. Success comes down to three factors: good rock, the right crack shape, and a clean pull direction. Clean granite lets them bite deep. Pair that with a solid constriction, and you get reliable holds. But skip them in weak rock or bad shapes. A poor placement wastes rack space and builds false confidence. Let’s break it down.
Best rock and crack shapes for RP climbing nuts
Look for clean, solid rock first. Granite works best because it holds firm without flaking. Clean surfaces let the brass deform and grip edges. Avoid gritty, sandy, or hollow spots. Those crumble under load and ruin even perfect seats.
Certain crack shapes make RP climbing nuts shine. Shallow seams with a small constriction top the list. The nut wedges in tight when you pull down. Straight-sided cracks take narrow placements well. Turn the nut sideways for max contact. Pin scars with a subtle choke offer great holds too. The brass mushrooms into the offset, locking solid.
Quartz seams and crystal pockets shine next, as long as the rock stays solid. Crystals give extra bite points. The nut nests between them, creating friction.
Here is a quick rundown of top shapes:
- Shallow seams: Small choke below holds the taper.
- Straight cracks: Sideways placement boosts surface contact.
- Pin scars: Subtle offsets let brass conform.
- Quartz pockets: Solid crystals add grip edges.
Test each one with a firm tug. Good ones feel bomber.
Red flags: flares, shallow pods, soft rock, and sideways loading
Some features spell trouble for RP climbing nuts. Outward flares let the nut walk out fast. The taper pushes it loose on any downward pull. Shallow pods tip the nut over an edge. It sits unstable, ready to cam out.
Soft rock crumbles under the small contact patch. Gritty sandstone or hollow flakes fail quick. Sideways loading bends thin wires too. Rope drag shifts the angle, and the piece shocks out.
If you can wiggle it free with two fingers, skip it. That simple rule saves time. Always check for these red flags before clipping.
How to think about falls on micros without scaring yourself into bad choices
Micro RP climbing nuts rank weakest in strength. A #1 holds maybe 2 kN in a lab. Real falls test them harder. Big drops shock the piece. Rope drag twists the pull direction too. What starts parallel turns outward. Unlike cams, micros don’t expand. They rely on shape alone.
Set realistic goals. Use them to cut runouts, not hold whips. Build a chain of protection instead. Place a micro, then back it with a bigger nut or cam soon after. That spreads the load.
Practice on toprope. You gain feel for good pulls. In short, RPs cut exposure smartly when you pick spots right.
How to place an RP that actually has a chance of holding
You spot a thin seam on solid granite. Your RP climbing nuts can protect it right, but only with careful steps. Think of placement like threading a needle: pick the spot, seat it snug, and set it firm. Good ones cut your runout and hold falls when backed up. Practice these moves on toprope first. Then take them to lead. Here’s your field guide to placements that stick.
Step-by-step placement: find the constriction, seat it, then set it
Start by scanning for a constriction. You want a crack that narrows deeper in, like a subtle choke or taper. Clean it first. Blow out dirt or brush loose flakes away. That lets brass contact rock directly.
Grab the right size RP climbing nut. Slide it in by the wire, narrow end first. Aim to seat it about three-quarters deep. It should feel secure yet removable. The brass head wedges against edges now.
Give a firm tug downward after. Set it that way. The nut cams in tight. Over-seating binds it too much, though. You risk damaging the wire or struggling to clean it later. Wires snap under side load from poor pulls.
Follow these steps every time:
- Clean the crack with a quick blow or brush.
- Match nut size to the constriction.
- Insert by wire, seat three-quarters in.
- Tug firm in load direction to lock it.
Get the direction of pull right: stance, rope line, and extensions
Pull direction makes or breaks an RP climbing nut. Orient it so a fall drives it deeper into the constriction. Match the nut’s curve to the crack’s shape. Wide side out if that fits best.
Your stance matters too. Stand so the rope runs straight down. That keeps pull parallel. Rope drag twists it outward fast, though. Traverses worsen this. The nut walks out under angle.
Use extensions to fix it. Clip a longer sling or alpine draw. It straightens the rope line. Avoid sharp edges that lift the piece.
Common fixes include:
- Longer slings: Reduce drag on traverses.
- Alpine draws: Straighten pull on slabs.
- Stance tweaks: Clip before moving far.
How to test a micro placement without yarding it into failure
Test smart, not hard. Skip yarding on it. That risks failure or wire damage. Use a progressive check instead.
Wiggle it gently first. No movement means promise. Tug firm next, in fall direction. Feel it settle deeper. Re-check after. Solid ones stay put.
Good feels bomber: no shift, rock-solid grip. Bad ones go spongy, slide, or rotate. Skip those. Bounce tests destroy micros, so don’t.
Your quick checklist:
- Gentle wiggle: Stable?
- Firm tug: Deeper set?
- Re-wiggle: No shift?
Tiny pieces, smart backups: stacking options that keep you safer
One micro RP climbing nut rarely stands alone. Stack it with backups for safety. Judgment counts here; no piece is perfect.
Place a micro, then add a small cam nearby. It catches if the nut walks. Or pair two micros in separate features. One in a seam, another in a pin scar.
Traverses need directionals higher up. A larger nut above keeps pull in. Equalize two marginal ones, sure. But it beats nothing. Two solid pieces spread load better.
In short, build chains. Micro plus cam, or micro plus micro. Always back them up. That keeps you safer on runouts.
Sizing, racking, and buying RPs without wasting money
RP climbing nuts range from #0 to #12 across brands. Most climbers stick to the smaller brass sizes, like #0 through #8. These fit cracks from 3mm to about 18mm wide. That’s thinner than a pencil lead for the tiniest ones. You save cash by buying smart. Focus on your local rock first. Then build from there without a full rack overload.
Understanding RP sizes and what “micro” really means on the wall
Micro means very thin seams on the wall. Think cracks where you barely fit a fingertip nail. Sizes start at #0 for 3mm widths. They go up to #12 at 18mm. Each step covers a narrow range, often just 2mm wider than the last.
Strength climbs with size, but even the smallest hit 8kN. That’s plenty for short falls on solid granite. Larger ones like #8 push higher. However, the tiniest pieces cut runouts. They don’t always guarantee a full catch. Instead, they reduce deck potential. Place them in pin scars or quartz seams. There, they shine best.
For example, a #1 suits 4-6mm cracks. It grips thin granite lips. But test it. Good ones feel solid after a tug.
A simple starter rack: what most climbers actually use most often
Most climbers rack mid-micros like #1 to #4. These cover thin cracks, pin scars, and aid ladders on granite. Start with six pieces from Black Diamond RPs or DMM Wallnuts. Add Wild Country Rocks #4 to #8 later. That setup costs under $100.
Singles work for most routes. But carry doubles in #4 to #6 sizes. They fit common seams on runouts. For example, local granite slabs need extra #3s. Check guidebooks first. Thin crack routes demand more mids.
Skip the full #0 to #12 run. Many skip #0 to #2 unless aid climbing calls. Test on gym boards. Buy used from shops too. That keeps it budget-friendly.
Here’s a basic starter rack:
- #1-2: One each for tips and scars.
- #3-5: Doubles for frequent seams.
- #6-8: Singles for wider spots.
In short, match your area. Partial racks save weight and cash.
Racking tricks so you can place them fast with pumped hands
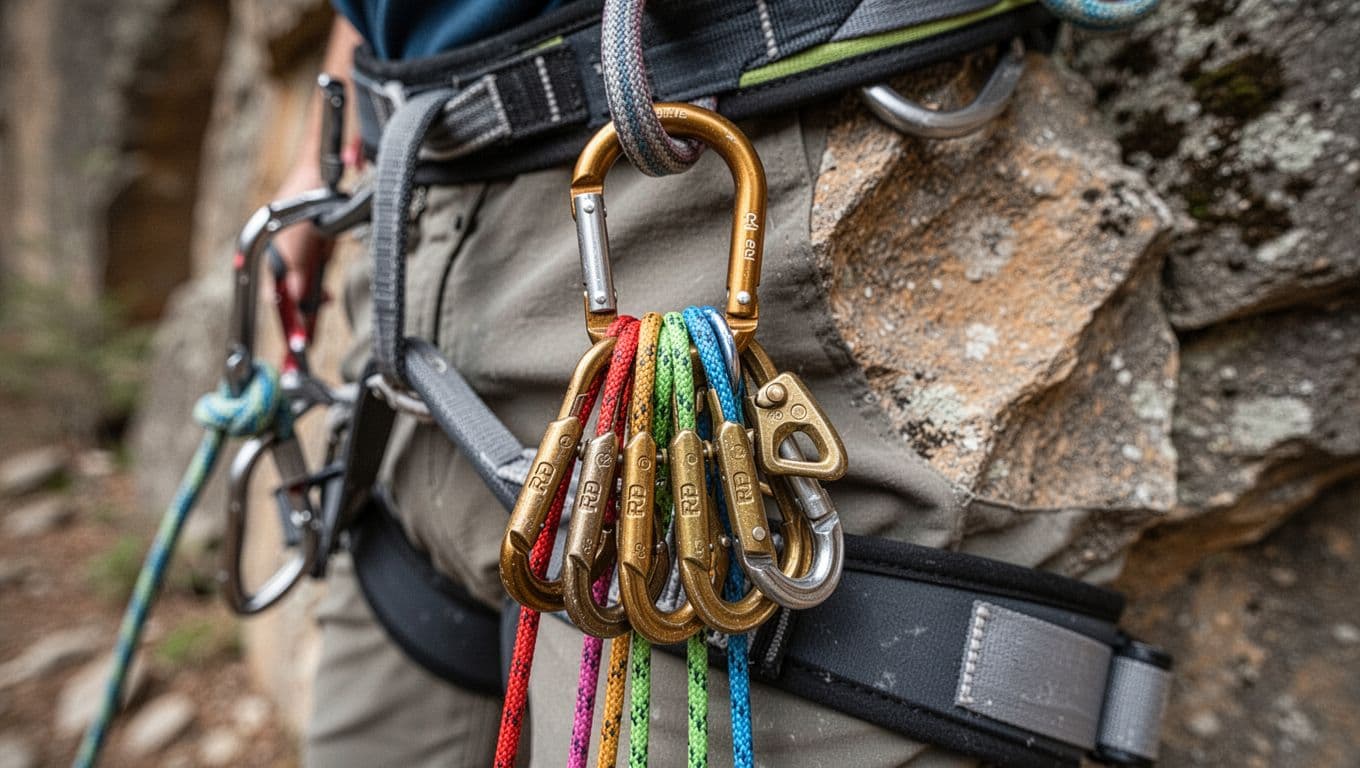
Pump hits hard mid-route. Rack RP climbing nuts for quick grabs. Group by size on 3-4 biners. Colors match across brands: purple for #1, green for #4. Small ones on one biner, mids on the next.
Use a dedicated micro biner with a smooth nose. Limit to five nuts per loop. That avoids tangles. Spread across gear loops too. Grab the whole biner off. Snag a nut. Clip it fast. Replace.
Keep wires straight. Twist them out before racking. Dropping one happens easy with sweaty hands. So clip discipline counts at stances. Rack them cable-down on the harness. They deploy smooth.
Practice this at home. You’ll place micros without fumbling. As a result, you stay calm on lead.
RP climbing nuts vs other small protection: what to choose and why
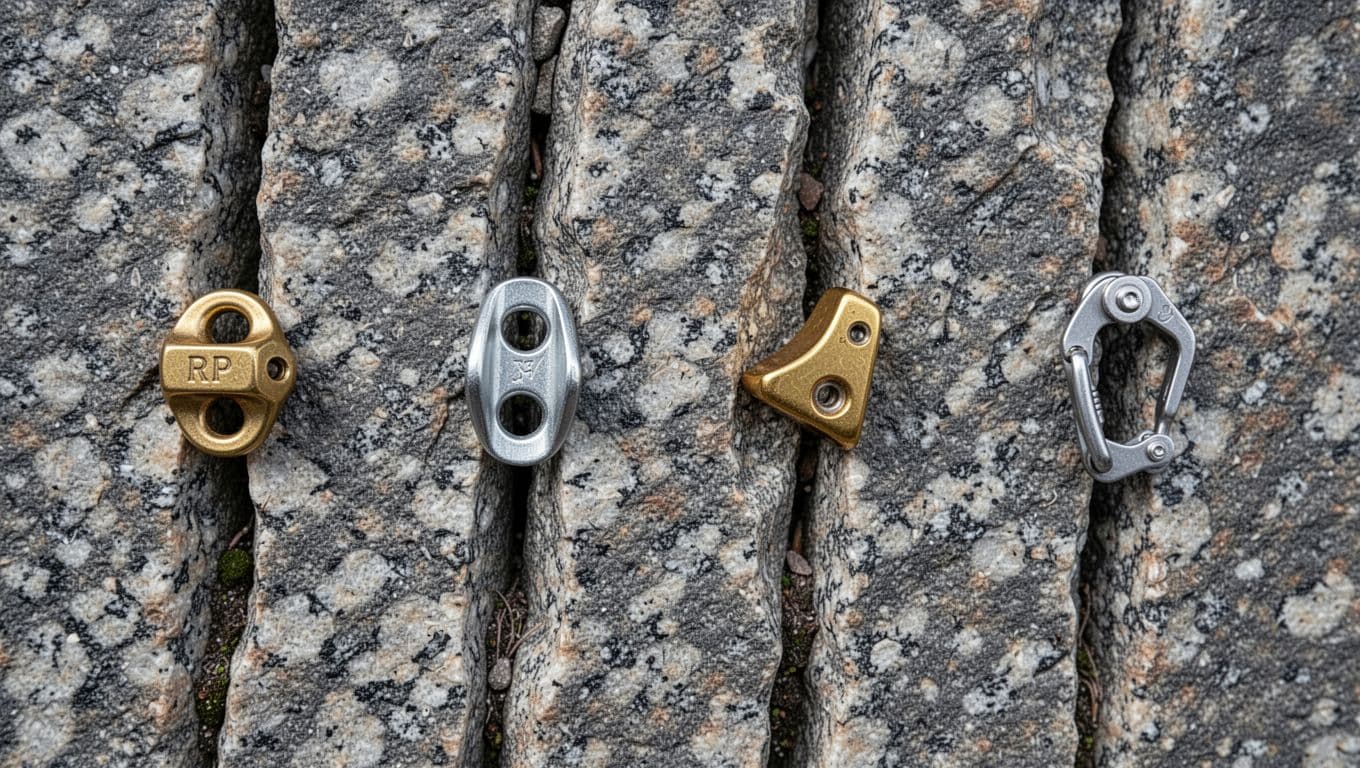
You stare at a thin seam mid-pitch. Do you reach for an RP climbing nut, a regular stopper, offset brass, or micro cam? Each shines in spots the others miss. Regular stoppers handle straight cracks well, yet skip the tightest ones. Offsets grip scars and flares better because they conform. Micro cams expand fast, but they demand more depth. RPs fill the niche for razor seams on solid rock. Pick based on shape and rock. That keeps you protected without extra weight.
RPs vs regular stoppers: why the tiny brass niche exists
Regular stoppers work great in larger cracks. They boast higher strength ratings, often 10 kN or more, and slide in easy. However, they skip the thinnest seams under 5mm. Those demand a micronut like an RP climbing nut.
Brass wears faster than aluminum too. Stoppers last seasons of abuse. RPs mushroom after a few solid catches, so replace them often. Still, the tradeoff pays off. You gain placements where stoppers fail. A #1 RP fits a 3mm quartz seam. No stopper does that.
In short, pack stoppers for mid-sizes. Grab RPs to bridge the tiniest gaps. Both cut runouts when you match the crack.
RPs vs offset brass nuts: pin scars and flares change the game
Offset brass nuts excel in uneven rock. Their angled heads seat deep in pin scars or flares. The thin side slips into narrow spots first. Brass bends to match the shape, so it bites firm.
Classic RPs work best in straight seams with a constriction. You orient the taper right, and it locks parallel. However, offsets handle asymmetry better. A scarred crack favors the offset’s bite.
Choose offsets for pin-heavy routes like the Gunks. They conform without cracking edges. RPs suit clean granite tips instead. Test both on toprope. As a result, you build feel for each.
RPs vs micro cams: speed and range vs seam-only protection
Micro cams place quick and hold flares well. They expand to grip parallel sides or widenings. You cam them in seconds, and they resist walking on downward pulls. Strength hits 6-14 kN too.
RPs beat them in shallow seams, though. Cams need 20mm depth minimum. Thin tips or quartz pods stay too narrow. Nuts weigh less, around 10g each, and stay tough on gritty rock. Cams feel fragile there.
Besides, RPs cost half as much. Pack cams for runouts with depth. Use nuts for pure seams. That balances your rack smartly.
A quick decision guide you can remember mid-pitch
Spot a thin feature? Run this flow fast. First, check for a constriction. No choke means skip the RP.
Next, test rock quality. Solid granite grips best. Flaky stuff fails quick.
Then, orient for fall line. Can you turn it so pull drives deeper? If not, pass.
Extend with a sling now. Straight rope keeps it stable.
Back it up soon after. Add a cam or bigger nut below.
If those fail, grab an offset for scars or a cam for flares. Or climb on to better gear. Practice this, and decisions stick mid-route.
Care, inspection, and safe use habits for a long life (and fewer scares)
RP climbing nuts last longer when you treat them right. Quick checks and smart habits prevent failures on the wall. You avoid close calls because small damage turns big fast. So build these routines now. They keep your micros ready for thin seams.
Before every climb: fast checks for wires, kinks, and sharp edges
Inspect your RP climbing nuts at home in good light. Damage hides in dim belay spots. Look close at the wires first. Spot frayed strands, kinks, or loose swage points where cable meets head. Those weaken fast and cut ropes.
Next, check brass heads. Deep grooves, deformed shapes, or burrs spell trouble. Push wires aside for hidden wear. Feel for sharp edges too. Sand minor burrs smooth with fine paper. However, skip climbs if you see cracks or big dents.
Common mistake: yanking sideways to clean them. That bends thin wires quick. Always pull parallel. Do these checks before and after routes. As a result, you catch issues early.
Here are your fast checks:
- Wires: Frayed, kinked, or thin?
- Swage: Loose or bent?
- Brass: Grooves, dents, burrs?
Cleaning and storage: keep them smooth, dry, and untangled
Clean RP climbing nuts after salty cliffs or dirt routes. Rinse with fresh water and mild soap if gritty. Brush gently, then dry fully on a towel. Never store wet; moisture rusts brass and frays wires.
Wipe light corrosion with a soft cloth. Avoid harsh chemicals. Keep them separate from sharp gear like ice tools. That prevents nicks. Rack on the same biner by size order. Wires stay straight and tangle-free.
Store in a dry, cool bag away from sun or fuel. Besides, check dates: retire after 10 years max. Proper care doubles their life.

When to retire a micro nut, even if it “still works”
Retire RP climbing nuts at clear signs. Visible wire damage tops the list. Major head deformation reduces grip too. Heavy wear shrinks the contact patch, so strength drops. A hard catch that bent it means it’s done.
Small gear runs small margins. Don’t test luck. Common errors speed this: hammering them in deforms brass. Repeated whippers on #1s grind them down fast. If unsure, retire it. Drill a hole or cut the wire to mark it.
In short, treat these as precision tools. Inspect often, retire without doubt. You climb safer that way.
Conclusion
RP climbing nuts handle thin seams, pin scars, and quartz pockets where cams and bigger nuts fail. They stay popular because soft brass grips solid granite tight, cuts runouts, and keeps your rack light. Placement quality matters most, though. Nail the constriction, seat it three-quarters deep, and tug in the fall direction for a bomber hold.
Always manage pull direction next. Your stance and rope line twist it outward fast, so orient the curve right. Extend with alpine draws to prevent lifting on slabs or traverses. Back them up quickly too. Stack a micro with a small cam or another nut. That spreads load and boosts safety on bold leads.
Practice on the ground first. Toprope local cracks to feel good spots. Your rock type changes everything; granite loves them, sandstone skips them.
Build trust in RP climbing nuts step by step. Grab a starter rack of #1 to #5 sizes from Black Diamond or DMM. Practice placing and cleaning at home. Then rack them for thin-crack routes like Gunks slabs, not every pitch.
Back to Climbing Nut Reviews
Recommended Trad Protection and Rack Essentials
These products can support safer climbing, belaying, rappelling, and emergency readiness.
Affiliate disclosure: As an Amazon Associate, TradClimbers may earn from qualifying purchases at no additional cost to you.
Keep exploring helpful trad climbing, gear, safety, and technique resources.
- A Climber’s Guide to Rock Climbing in Thailand
- A Trad Climber’s Guide to the Isle of Skye Ridge
- Hueco Tanks Rock Climbing: hueco tanks rock climbing Essentials
- A Climber’s Guide to The Nose of El Capitan
- The Top 8 Unforgettable Climbing Routes El Capitan Has to Offer in 2026
- Yoga for Climbers: Boost Strength, Flexibility, and Recovery | yoga for climbers