
Prusik Loop Cord Tips
Back to Trad Climbing Gear Reviews
Creating your own prusik loop cord is a simple, money-saving skill that pays off on every tiny home project. With about 10 feet of cord, you can whip up multiple secure loops sized for different tasks, from tarps to ladder anchors. This hands-on guide focuses on the double fisherman’s knot, a reliable choice for a durable, load-bearing loop. Follow along, visualize each move, and you’ll have a loop that grips confidently and releases smoothly when you need it.
Mastering the Double Fisherman’s Knot for Bombproof Loops
Visualize tying a doubled loop that sits cleanly on your rope. The double fisherman’s knot is the anchor for a safe, reusable prusik. Here are steps 1 through 5, written for quick, repeatable execution.
- Prepare the cord and anchor rope. Take your 10 feet of cord and lay it flat. Overlap the two ends about 3 to 6 inches in opposite directions to form a small X with each end pointing away from the other.
- Start the first wrap. Take the working end on top and wrap it around the standing portion once, then again to create an X. Bring the end back into the bottom loop formed by the wraps.
- Cinch the first knot tight. Pull the standing ends in opposite directions while guiding the knot with your fingers. You should see an X on one side and parallel strands on the other side.
- Repeat on the other side. Flip the cord and tie a second double wrap in the same way with the other end. This creates two mirrored knots that will converge.
- Seat and secure. Pull the two standing ends apart hard to bring the knots together into a compact, barrel-like shape. Leave at least 5 cm tails beyond each knot. Trim any excess later.
Tips for tight pulls and clean seating:
- Wet the cord just a bit to reduce friction for the initial pull. This makes the knot seat more evenly.
- Use gloves or thick-soled gloves to protect your hands during the tight squeeze.
- Pull the standing ends apart steadily, not with jerks, to avoid distorting the knot.
- Keep tails at about 5 cm to maintain enough length for inspection and future reties.
For a compact 10 feet of cord, you can make loops in the 40 to 60 cm range. If you need a longer loop for loft work or climb-like access, you can create a 1 m loop as well. The key is consistent wraps and neat tails so the knot sits squarely on the host rope.
Sealing the ends is essential. After tying and trimming to the 5 cm tails, melt the ends with a lighter quickly and press them flat with a damp fingertip or a smooth tool. This prevents fraying and keeps the loop tidy in wind and rain.
Common mistakes to avoid:
- Uneven wraps or messy tails. Keep each side neat for consistent bite.
- Tails shorter than 5 cm. They wear faster and can fail inspection.
- Not seating the knot. If it won’t pull tight, rework the wraps.
Strength test advice:
- Start with a light test on a known good line. Load the loop gradually to about 50% of your expected maximum before moving to heavier loads.
- Check for any slippage or creep after a few minutes of steady load.
- Do a quick dynamic test by applying a gentle load and then a small shock load to confirm the bite holds under movement.
- Retest after any impact or noticeable change in performance. Regular checks keep your setups reliable.
This DIY approach saves money and gives you a reliable, familiar tool ready for a range of tiny home tasks. You’ll feel the difference when tarps stay put without constant reties, or a rope ladder adjusts with a simple pull.
Sealing and Testing Your New Loop Before Use
With your knot complete, it’s time to seal, test, and store. Use a lighter to seal the cord ends, keeping the flame about an inch away and moving quickly to prevent melting too far into the fibers. Once sealed, perform a controlled load test on the ground.
Set up a safe, low-stress test: Clip the loop onto a sturdy anchor or a fixed line and apply a gradual load that mimics real use. Observe the bite as you increase tension. The loop should grip firmly without slipping, then release smoothly when you ease off. If the bite feels inconsistent or the loop sticks, re-examine the knot with fresh eyes, check the tail length, and ensure the wraps are uniform.
Storage tips keep you ready for the next task. Keep a small assortment of loops in different lengths and diameters, stored in a dry pouch or small box. Label each with the intended use and rope compatibility to avoid guesswork when you’re in a rush on a windy day.
Photos in mind for the post:
- A close-up of the two knots seated together like a compact barrel.
- The five-centimeter tails clearly visible on each side.
- A hand actively seating the knot with a light pull, showing how the bite tightens.
- A test scene with a rope and weight on solid ground, illustrating the load test.
Why DIY saves money for tiny homers:
- Minimal equipment, low cost, quick results.
- You can tailor loop lengths for every task, from tarps to roof ladders.
- Fewer trips to buy specialized hardware, less clutter, more space in tiny homes.
If you practice with a few scraps, you’ll build confidence fast. The double fisherman’s knot gives you a durable, repeatable prusik loop that performs when you need it most.
Tying and Using Prusik Hitches Like a Pro Around Your Tiny Home
Prusik loop cords are small tools with big impact in tight spaces. They let you adjust lines, climb ladders, or secure tarps quickly without constant reties. In a tiny home with limited storage and shelves, a reliable prusik setup can save time and reduce risk on windy days. Below you’ll find two focused sections that cover the essentials you’ll actually use day to day: a simple, solid basic hitch you can learn fast, and a French Prusik variation that frees you up for rapid releases in cramped spots. Both rely on a lightweight loop, the right cord choice, and careful testing before trust.
The Basic Prusik Hitch Setup That Anyone Can Learn
This is the core technique you’ll reach for most mornings when tarps flutter, or you need an adjustable anchor on a rope ladder.
- Start with the loop behind the host rope. Feed the free end through the loop to create a small anchor point.
- Wrap the loop around the host rope 3 to 4 times, keeping wraps parallel and stacked next to each other. Do not let wraps cross or tangle.
- Bring the free end back through the mouth of the wraps, forming a clean bite that sits just to the side.
- Pull the standing part tight to seat the knot firmly against the host rope. The knot should look like a neat barrel when seated.
- Test under light load first. If the bite holds, you can apply more tension gradually. If it slips, re-seat with even wraps and check for frayed ends.
- When using a carabiner, clip to the rope attached to the loop itself, not the joining knot. This keeps the bite consistent and reduces the chance of snagging during movement.
- Common sizes work best with soft accessory cord in the 4 to 7 mm range. For most tiny home tasks, a 5 or 6 mm loop around a rope 8 to 11 mm works reliably.
Practical uses in a tiny home: securing a tarp over a doorway, creating a movable anchor for a rope ladder, or quickly adjusting lines for off-grid setups. Always carry a small assortment of loop lengths, and keep a few test runs in a safe place before you rely on them in bad weather.
French Prusik Trick for Quick Releases in Tight Spots
The French Prusik, sometimes called a Bachman variation, is designed for faster release when space is tight or loads shift unexpectedly. It differs in how the wraps and the release direction are arranged, which makes the bite release more predictable under load.
- The fundamental idea remains the same: a smaller cord loops around a larger host rope to create friction. In the French version, the wrap pattern is adjusted so the release action comes with a simple lift or a slight twist rather than a hard pull.
- In practice, set up with 3 to 4 neatly aligned wraps, then feed the free end through in a way that positions the release knot away from the main bite. This arrangement reduces the chance of the knot sticking when you need to move quickly.
- Off-grid value is clear. When you’re dealing with a tarp, roof access, or a ladder in a tiny space, the French Prusik lets you free the bite with minimal effort. It’s especially handy if you’re wearing gloves or dealing with dew on the rope.
- Safety note: always test the release under light load before you rely on it in a windy scenario. The key is clean, even wraps and a release that works with your chosen cord.
Tiny home setups shine with this variation when the task is tuning a line, then stepping away fast. It makes adjustments faster, reduces fiddling, and keeps your space compact and organized.
Remember these essentials across both methods:
- Use a soft, supple accessory cord in the 4 to 7 mm range for predictable bites and smooth releases.
- Ensure wraps are neat and parallel; misaligned wraps can cause uneven bite or jam.
- Inspect cords before each use and retire any loop with visible wear or fraying.
- Practice drills in a safe area. Repetition builds confidence when you need a quick, safe setup on a windy day.
Genius Ways to Deploy Prusik Loop Cords in RVs, Trailers, and Off-Grid Spots
Your tiny space thrives on smart, adjustable setups. Prusik loop cords offer a simple, reliable way to secure loads, create movable anchors, and reach rooflines without drilling or heavy hardware. In RVs, trailers, and off-grid nooks, these little loops become big solutions. In this section you’ll find practical, field-tested ideas you can apply today, plus a few 2026 trends that amplify how you live in small spaces.
Secure Loads on Trailers Without Endless Knot Fumbles
Trailers are a constant wind test. Prusik loop cords shine because they bite when you pull and release when you ease off. For securing cargo, start with a soft, flexible accessory cord that pairs well with your main trailer rope.
- Quick tarps or windbreaks: Create a ridge line with a fixed rope and run a prusik loop cord along it. A second prusik acts as a backup, ready to tighten if gusts hit. This two-loop setup lets you adjust tension in seconds rather than retying while rain pounds on the tarp.
- A fallback anchor for loads: Use the prusik as a movable anchor to shift weight as you load or unload. It stays in position until you pull again, giving you control with gloves on.
- Demo sequence you can try: Loop the cord around the host rope, apply 3 to 4 wraps, and pull the standing ends to seat. Test with light weight, then add a heavier load to confirm the bite.
Key tips for reliable performance: pick a cord in the 4 to 7 mm range and keep wraps neat and parallel. Avoid overly thick loops on thinner host ropes, and always test under light load before full use. In real-world rigs, a 40 to 60 cm loop works well for temporary tarps and small wave-loads on a trailer cargo net.
Hang Clever Storage That Won’t Sag in Your Tiny Space
Ceiling hammocks and gear slings are dream features in a compact home. Prusik loop cords let you suspend items without drooping shelves or heavy hardware.
- Ceiling hammocks: Install a lightweight rope line along the ceiling with a few prusik loops spaced evenly. You can raise or lower the hammock for access, and the bite remains steady under load.
- Gear slings: Create adjustable slings for packs, cameras, or tools under overhead cabinets. Move items from a wall to a shelf in seconds, then lock them in place with a simple tug.
- Real-world use: In modular tiny homes, rope systems with prusiks adapt as you reconfigure spaces. A single loop can handle multiple items by shifting the attachment point along a fixed line.
Practical approach: keep the loop lengths practical for small hands, typically around 40 to 50 cm for quick adjustments, and stash a longer option around 1 m for taller ceilings or loft access. Use soft accessory cord that grips well yet releases cleanly when you lift tension.
Safe Roof Access and Tarp Setups Made Simple
Roof work is where a trustworthy friction hitch earns its keep. Friction for fixed lines and adjustable shelters are the two core benefits you’ll notice in the field.
- Roof access lines: Run a rope ladder with prusik steps. Each step is a small loop that slides up or down the host rope as you climb, making adjustments feasible from the ground.
- Tarp ridgelines: Use prusik loops on the ridgeline to adjust height and tension quickly. A second loop provides a backup in windy weather, keeping the tarp tight without constant retying.
- 2026 off-grid trend: modular tiny homes bring more rooftop and exterior living spaces. Rope systems with prusik loops offer flexible, removable attachments for solar panels, rain catchment, or outdoor workstations.
Best practices for safety: choose a cord in the 5 to 6 mm range to balance bite and slide, keep wraps neat, and test each setup under light load before going live. Inspect cords regularly for wear, especially after storms or repeated climbs.
Inline visuals you can imagine:
- A rope ladder with several evenly spaced prusik loops gripping a static rope.
- A tarp secured along a doorway with a backup prusik line ready to tighten.
- A roof access line where gentle tension adjusts a light anchor point.
Real-user vibe and quick wins:
- A weekend warrior shares how a couple of prusik loops let them bring in solar panels and gear without tools, saving setup time on windy days.
- An RVer notes the ceiling hammock system kept their gear off the floor during a sudden storm, and the loops still released smoothly when needed.
In short, your prusik loop cord toolkit should be compact, versatile, and tested. The payoff is clear: faster setups, safer holds, and more usable space in a small home on wheels.
Prusik Loop Cord: Pitfall-Free Prep for Tiny Homes
In a tiny home, a small tool can prevent big headaches. The prusik loop cord is that kind of helper. It grips when you pull and releases when you ease off, letting you adjust tarps, ladders, and gear without retying every time. But to keep it reliable in windy days and tight spaces, you need to know the common slips and how to care for it. This section covers the top slip-ups to avoid and the straightforward upkeep that keeps your prusik loops ready for action.
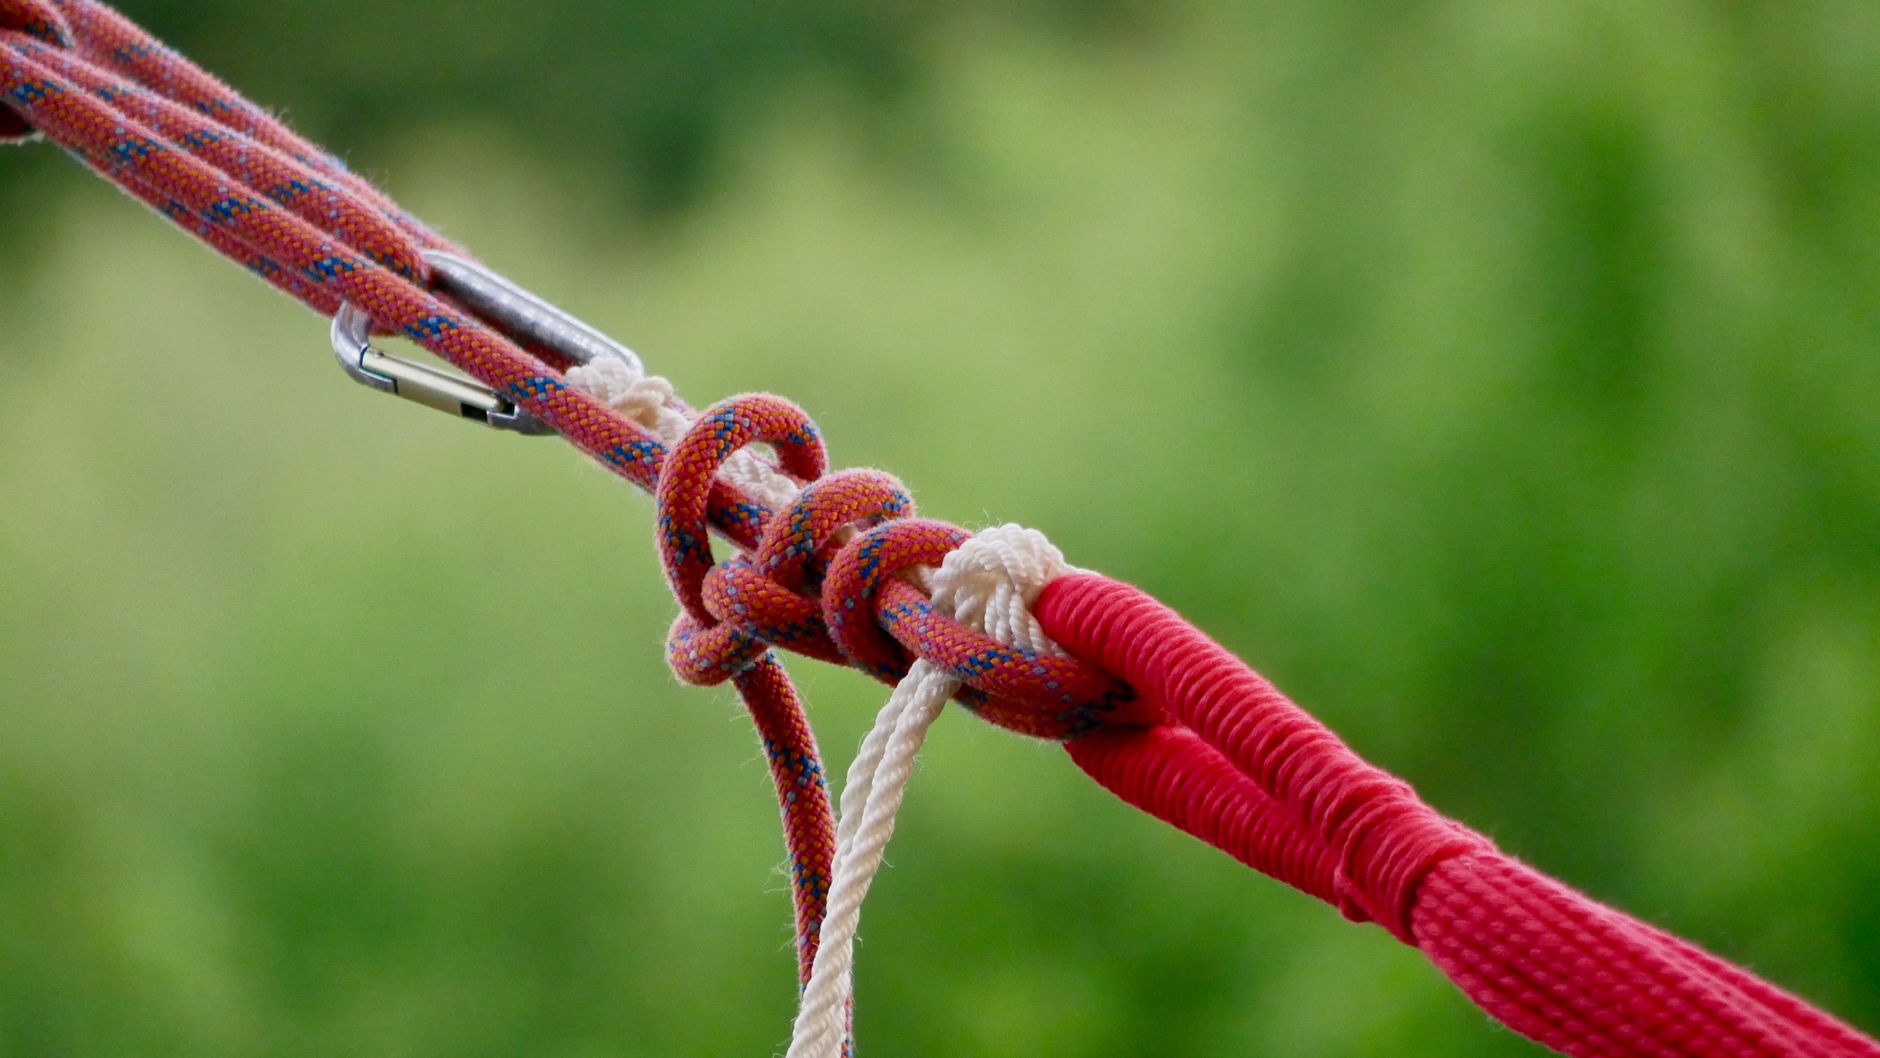
Photo by Carl H. McBublo
Top Slip-Ups That Could Ruin Your Day
Avoid these common missteps that turn a quick setup into a frustrating delay or a risky moment.
- Messy wraps: Uneven or crossing wraps jam the bite. Keep wraps neatly aligned and parallel.
- Wrong size for the host rope: If the prusik loop is too thick, it won’t slide; if too thin, it won’t bite. Match cord diameter to rope diameter and purpose.
- Carabiner placement mishaps: Clip the rope to the loop’s own attachment, not the joining knot. Poor placement can cause side loading and failure.
- Long tails that shed life: Tails longer than 5 cm are prone to fraying and catching on hardware. Trim with a clean finish.
- Inadequate testing: Don’t rely on intuition. Test with light loads, check for creep, and rework if it slips.
- Overlooking wear: Visible fuzz, flat spots, or color fading signal retirement soon. Inspect before every use.
Beyond these, a failure to dry store, sun exposure, and neglecting regular checks quietly shorten life. The goal is simple: consistent bite, smooth release, and a setup you trust when you need it most.
Quick Check When You First Set Up
- Inspect the loop for fraying and uneven wraps.
- Confirm the loop diameter sits at the right proportion to your host rope.
- Do a light-load test before you depend on it in wind or rain.
Simple Maintenance to Make Them Last Years
With a tiny bundle of prusik loop cords, you can stretch years of service out of a few simple habits. The results show in quicker setups, fewer knot fumbles, and safer holds.
- Dry storage: Keep cords in a cool, dry place away from direct sun. Moisture and heat race fibers apart and degrade grip.
- Regular fray checks: A quick visual every few uses catches wear before it bites the dust. Look for thinning fibers, fuzz, or broken strands.
- Sunlight avoidance: Prolonged sun exposure breaks down strength. When not in use, store in a shaded spot or a bag.
- Prolong life tips: Rinse if dirty, avoid chlorine exposure, and dry thoroughly before storage. If you notice stiffness, run a gentle bend test to confirm flexibility.
- When to retire: If you see cuts, deep fuzz, permanent stiffness, or noticeable loss of bite after reties, retire that loop.
- Quick inspection checklist:
- Check wraps are neat and parallel
- Check tails are at least 5 cm
- Confirm the loop slides with light tension
- Look for any discoloration or thinning fibers
In practice, you’ll keep a small set of loops in 40–50 cm and 1.0–1.2 m lengths. Pair these with 8–11 mm host ropes for most tiny home tasks. That balance gives you fast adjustments for tarps, roof ladders, and overhead gear without adding clutter. A little proactive care keeps your prusik loop cord ready for the moment you need it most.
Conclusion
Prusik loop cord tips clean up a lot of tiny living headaches. When you pair the right soft cord with the correct host rope, you get quick adjustments, reliable holds, and less clutter on your in-closet toolbox. The key is matching diameter to rope and keeping wraps neat, so the bite stays strong without locking up when you need to slide.
A few practical takeaways to keep in mind: use 4 to 7 mm accessory cord, aim for about 3 to 4 wraps on most tasks, and choose loop lengths that fit your space and tasks, typically 40 to 60 cm for quick work and 1 m or more for loft access or roof work. Test under light load before relying on the setup in wind or rain, and inspect for wear after each use. A little upfront care saves time and trouble when you’re on a windy day or mid project.
DIY or store-bought, the emphasis stays the same. If you’re crafting your own prusik loop cord, a clean double fishermans knot keeps the ends tidy and the bite predictable. For field use, a couple of ready loops clipped to your pack or harness can speed up tarp setups, rope ladder adjustments, and gear hoists. In tight spaces, the French Prusik offers a quicker release for rapid changes without fighting a stubborn bite.
Safety matters, and practice is essential. Don’t treat a prusik setup as life-safety critical without proper training. Run light tests, verify grip with real weights, and retire any worn cord. A well-maintained loop makes a real difference in how smoothly you live off grid or on the move.
Back to Prusik Loop Tips
Recommended Products for Trad Climbing
These products match the equipment and gear topics covered in this article.
Affiliate disclosure: As an Amazon Associate, TradClimbers may earn from qualifying purchases at no additional cost to you.