
How to Use Prusik Knot
Back to Trad Climbing Gear Slings
Ever slipped on a rope when you needed solid grip? The Prusik knot solves that. It’s a simple friction hitch made from a thin cord loop that slides freely along a thicker rope until you load it. Then it grabs tight, no matter the pull direction.
Climbers use it as a rappel backup to catch falls. Arborists rely on it for tree work and hauling loads. You’ll also find it perfect for climbing fixed ropes, adjusting tarp lines in camp, or even quiet gear ties.
This guide shows you how to use Prusik knot right. We cover picking the best cord size (thinner than your main rope, like 5-6 mm), tying it step by step, checking for grip, and dodging common slip-ups. Expect clear photos and tips for real setups.
Safety first: Practice low to the ground, slow and steady. Never trust it for life-saving falls without pro training and backup gear. Master it here, and you’ll add reliable control to your rope skills.
What you need before you tie a Prusik (rope, cord, and a few smart choices)
Getting the Prusik right starts before you even wrap the cord around the rope. The materials you choose and how you size them will determine how well the knot grips when loaded and how easily it slides when you don’t need it. Pick thoughtfully, test under safe conditions, and you’ll have a reliable helper in your rope toolbox.
Pick the right Prusik cord size so it grips, but still slides
The rule of thumb is simple: pick a Prusik cord that’s about 60 to 80 percent the diameter of your main rope. For example, if you’re using a 12.7 mm rope, an 8 to 9 mm cord typically works well. This balance lets the Prusik grip when loaded but still release when you ease off.
If the cord is too thick, it won’t bite as cleanly and can slip under load. You’ll feel a soft grab at best, and the knot may not hold your weight reliably. If the cord is too thin, it bites too hard, wears faster, and can be hard to release, especially for heavier climbers or when you’re moving quickly. In practice, slick ropes, stiff cords, or new ropes may need extra wraps to achieve a reliable hold, so be prepared to adjust.
If you’re using a particularly slick rope or a long friction hitch, consider adding one or two extra wraps. This gives the Prusik more bite without making it impossible to slide when you want to move. A quick test with a gentle load will tell you if you’re in the right ballpark.
Make a Prusik loop the right length and material for the job
The loop length matters as much as the cord size. For most setups, a loop of about 3 to 5 feet of cord before tying into a loop gives you enough room for wraps and a confident clip. That translates to flexibility when you clip the Prusik to a anchor or harness and enough slack to slide along the main rope without binding.
Common loop materials are strong, flexible nylon or other kernmantle accessory cords. Premade sewn loops exist for pro use, but a well-tied, properly sized loop works well for practice and many non professional setups too. If you’re just learning, start with a simple 4-foot length and test different wrap counts to see what feels best in your hands and on your rope.
Image: Prusik loop being prepared for use Photo by Carl H. McBublo
Other basics that help: carabiner, gloves, and a clean working area
Attach your Prusik with a locking carabiner to keep the loop from twisting or slipping as you load it. A smooth, appropriately sized carabiner helps the Prusik move freely when you need to slide it and stay secure when you don’t.
Gloves aren’t mandatory, but they make a big difference. They protect your hands from the cord bite when sliding and releasing a loaded Prusik, especially on rough or dirty ropes. They also help if you’re working with multiple wraps and need to adjust quickly.
Keep your working area clean and dry. Sand, sap, ice, or mud can dramatically reduce friction and degrade performance. The Prusik loves clean rope, and it behaves best when the rope is dry. If you’re in damp or frozen conditions, expect to add wraps or switch to a slightly different cord size for better grip.
How to tie a Prusik knot step by step (with a quick check that it is dressed right)
Learning how to use a Prusik knot starts with a reliable loop. The double fisherman’s knot is the go-to way to join the ends of your Prusik cord because it’s strong, simple, and easy to inspect.
When you tie the loop this way, you get a dependable base that grips the main rope when loaded and cleans up neatly when you don’t need it. Practice the technique at ground level first, then test it with light loads before you rely on it in the field. Now, let’s walk through the steps in a clear, repeatable sequence.
Step 1: Tie your Prusik loop (double fisherman’s knot is the go to)
The double fisherman’s knot creates a solid, compact loop that stays together under load. Here’s how to do it in a straightforward way:
- Take the two ends of your Prusik cord and align them parallel, pointing away from each other.
- With one end, wrap it twice around the other end, forming a small X on one side and two diagonal lines on the opposite side.
- Pass the free end back through the coils under the X.
- Repeat the same wrapping process with the other end around the first, then pull tight so the two knots sit next to each other and the loop forms a clean circle.
- Leave reasonable tails on both ends and pull hard to test. If the knots bite and the loop holds its shape, you’re in good shape.
Two things to keep in mind: the double fisherman’s knot is trusted because it’s simple and very unlikely to slip when dressed correctly, and the loop length should give you enough room to wrap without crowding the main rope. Alternatives exist, like using a pre-made sewn loop or a different knot, but the double fisherman’s knot is reliable for most practice and field scenarios.
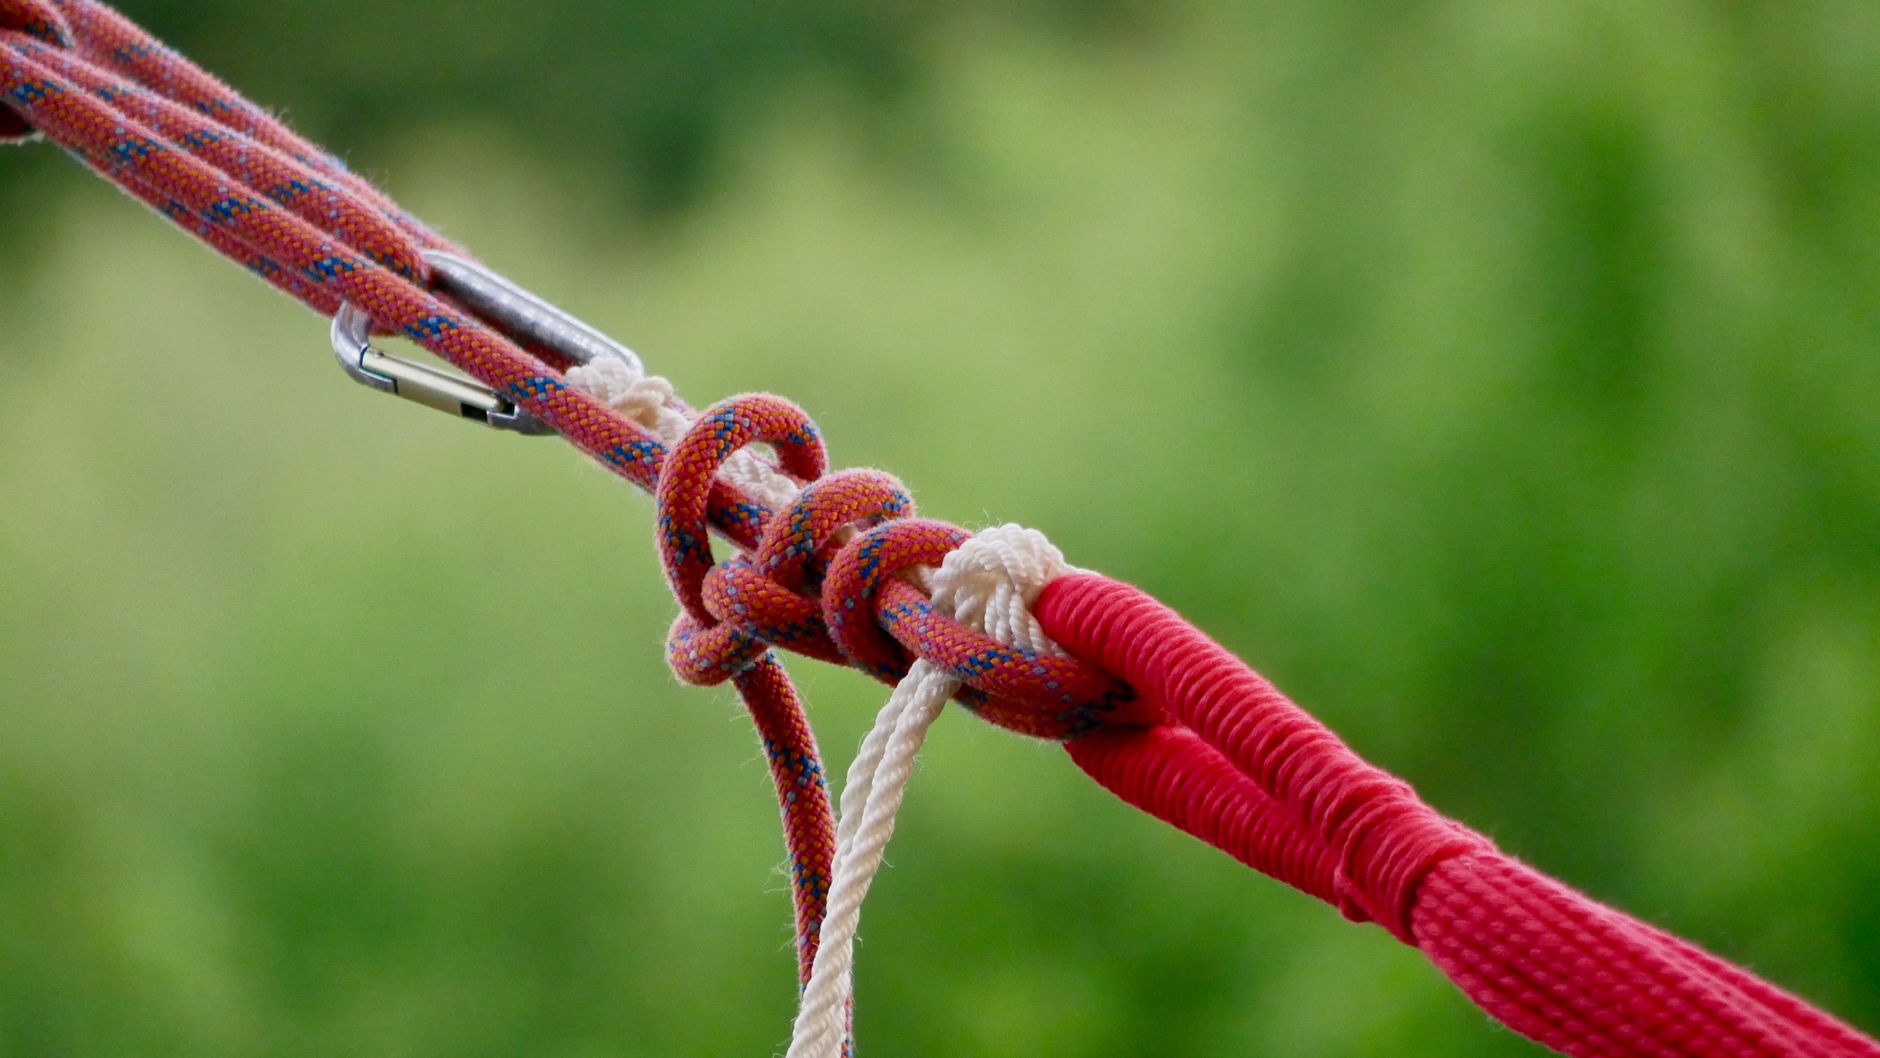 Photo by Carl H. McBublo
Step 2: Wrap the loop around the main rope to form the Prusik hitch
Now you’ve got a loop, you’ll form the hitch around the standing rope. Use this simple sequence:
- Place the loop behind the main rope, so the loop sits on the far side of the standing line.
- Pass the double fisherman’s knot end through the loop, similar to a girth hitch.
- Wrap the end around the main rope 2 to 3 times, keeping wraps neat and parallel.
- If you’re using a larger rope or you need more bite, you can add 4 to 6 wraps, but be mindful of how it feels to slide when you move.
- Keep the connecting knot off to the side, not inside the wraps, so the T-shaped hitch sits cleanly.
This step shapes the Prusik hitch so it bites when weighted but remains free to slide when not loaded. If the rope is slick or you’re working with a long friction hitch, extra wraps help, but you’ll want to test the setup to ensure it still releases as needed.
Step 3: Dress it and set it, so it grabs when you need it
Dressing means making the wraps neat and aligned. A well-dressed Prusik bite is easy to test and trust.
- Ensure the wraps lie flat, parallel, and do not cross each other.
- Keep the double fisherman’s knot tucked to the side, not inside the wraps.
- Check that the center loop forms a neat horseshoe shape on the outside.
- Gently pull on the loop to snug the wraps, then perform a bite test by loading it lightly. It should lock under weight and slide when unloaded.
The idea is simple: the Prusik should move freely when you’re not pulling, but grab the rope firmly when you apply load.
Quick safety check before you trust it with weight
A quick pre-load check helps you avoid surprises in real use. Do a light test to verify the setup, then proceed with larger loads only after you’re sure it behaves as expected.
- Correct cord size relative to the main rope
- Enough wraps without crowding or binding
- Wraps that are parallel and neatly dressed
- Knot_end kept off to the side
- Carabiner used correctly if you’re clipping the loop
- Test under a light load first to confirm it bites and releases as intended
Checklist you can use before loading the Prusik with weight:
- Is the Prusik cord about 60 to 80 percent the diameter of the main rope?
- Are there 2 to 6 wraps, depending on rope size and conditions?
- Are wraps parallel and evenly spaced?
- Is the double fisherman’s knot clear of the wrap area?
- Is the carabiner clipped correctly and secured?
- Does a light pull cause the Prusik to grip, while a gentle push allows it to slide?
Stock image If you want a quick visual reference, a photo like the one above can help you confirm the loop structure and wrap alignment. Photo by Carl H. McBublo
Final note: with practice, tying a Prusik knot becomes quick and reliable. Use these steps as your baseline, then adjust wraps for rope type and conditions. Your goal is smooth operation under load and quiet, predictable release when you lighten the load.
How to use prusik knot in real situations (and when to add more wraps)
A Prusik knot is a small, smart tool in your rope toolkit. It behaves like a tiny helper that slides freely when you don’t load it and bites when you do. In real life, the Prusik serves as a backup, an aid to climb or haul, and a simple clamp for camp setup. Below you’ll find practical applications, clear steps, and the cautions that keep you safe while you work with rope.
Using a Prusik as a rappel backup (third hand)
The basic idea is simple: you place a Prusik on the brake strand of your rappel line, below or near your descent device. This arrangement gives you a “third hand” that can grab if you lose control. In practice, you clip the Prusik to your leg loop or belay loop as part of your system, depending on what you’re using. When you push the Prusik along the rope, it slides freely. If you let go or if a load increases suddenly, the friction grips and the rope is held.
Key cautions to keep in mind:
- Keep the Prusik away from the main device so it doesn’t get sucked in during a fast descent.
- Test the setup with a light load before relying on it in a real rappel.
- Always follow your training and use a backup system you trust.
In real use, this means you can descend with confidence, knowing the Prusik can catch a slide or momentary loss of control. It’s not a substitute for proper technique or protective gear, but it adds a reliable layer of safety when practiced and understood.
Ascending a fixed rope with two Prusiks (basic prusiking)
Ascending a fixed rope with two Prusiks is a simple, repeatable pattern. One Prusik acts as a waist attachment, the other as a foot loop. The motion is straightforward: stand up in the foot loop to unweight the upper hitch, slide the upper Prusik up, sit to load it, then slide the lower Prusik up, and repeat.
In practice:
- Start with the waist Prusik clipped to your harness and the foot Prusik below it, with your foot inside.
- Stand up in the foot loop to move the waist Prusik higher on the rope.
- Sit back to load the waist Prusik, then slide the foot Prusik up.
- Repeat the stepping and sitting as you ascend.
A note on wraps: more wraps can help on thick or stiff ropes, but too many wraps slow you down. Test how it feels on the rope you’re using and adjust accordingly. This method is steady and reliable for shorter pitches or when mechanical ascenders aren’t available, but you’ll move slower than you would with a purpose-built ascender.
Making an adjustable hold or tension point for camping and hauling
Prusiks aren’t just for climbing. They make handy, adjustable tension points for camping and light hauling as well. For example:
- Tensioning a tarp ridgeline so you can tighten or loosen without pulling the rope out of place.
- Creating an adjustable guyline that you can inch along for the perfect stance.
- Light hauling where you need a progress capture that prevents rapid movement if the line slips.
The key behavior is direction-free grip: the Prusik holds when loaded in either direction. It’s a simple friction hitch that can be moved along the rope to set the right tension. A caution here: don’t use unknown rope or very tiny cord for heavy loads. For light loads or general adjustments, it’s a convenient, repeatable method.
How to release a loaded Prusik without fighting it
Prusiks bind when heavily loaded, but releasing them is doable with a deliberate approach. If you can, reduce the load first so the knot isn’t under strong tension. Then push on the top coils to break the friction, and wiggle the knot until you feel it loosen. Once it’s sliding again, you can move it down or off the rope as needed.
Wearing gloves helps, especially when you’re manipulating a snug Prusik. A quick reminder: yanking hard can tighten the knot further, so use steady, controlled movements. If the rope is wet or icy, take extra care and proceed with slow, deliberate actions.
Final thought for this section: practice the hand motions you’ll use in the field. The Prusik is a powerful helper, but it only works when you understand how it moves with your grip, how to load it, and how to release it safely.
Common mistakes, safer habits, and smart alternatives to the Prusik
When you’re learning how to use the Prusik knot, a few simple missteps can turn a trusted tool into a hassle or even a hazard. This section flags common mistakes, shares safer habits that reduce risk, and points to smart alternatives you can reach for when a Prusik isn’t the best fit. Keep these points in mind as you move from theory to real-world setups.
Mistakes that make a Prusik slip or jam
- Too few wraps: If you wrap the cord only twice or three times, the knot can fail to bite under load, especially on slick ropes.
- Crossed or uneven wraps: Wrapping in different directions or letting wraps cross disrupts even pressure and can cause slippage.
- Wrong cord size: A cord that is too thick grabs too hard or too thin releases poorly. Aim for roughly 60 to 80 percent of the main rope diameter.
- Joining knot inside the wraps: Placing the double Fisherman’s knot inside the wraps creates binding points that hinder release and grip.
- Using it on wet, icy, or muddy rope: Slippery surfaces demand more wraps or a different cord to maintain bite.
- Shock loading: A sudden heavy load can cause a Prusik to slip or fail if the knot isn’t dressed neatly or the cord is worn.
Each of these mistakes reduces control at the exact moment you need it. The fix is straightforward: keep wraps neat and in the same direction, choose a proper cord size, keep the joining knot clear of the wraps, and test under moderate load before trusting the knot with weight.
Best practices for inspection and wear (cord can fail quietly)
Friction hitches generate heat, and that heat wears the cord over time. A drop in performance can sneak up on you, so regular inspection is essential. Look for glazing, melted spots, fuzzing, cuts, or stiff, inflexible sections. Any sign of wear means the cord is closer to failure and should be retired.
- Glazing and melted spots signal heat damage from repeated use.
- Fuzzing or fraying shows the outer fibers are thinning and likely to fail.
- Cuts or deep nicks weaken the loop and can propagate under load.
- Stiff sections indicate internal damage or water ingress that altered the cord’s properties.
When in doubt, retire the cord and replace it. For critical work, keep redundancy in your system: always have a backup friction hitch or an alternate method ready. A damaged cord is not something to risk in the field.
When a different friction hitch may be a better fit
Different friction hitches suit different jobs. A Klemheist is directional and tends to bite well on slick fibers like Dyneema, and it can be easier to manage when you’re working with webbing. Blake’s hitch and other arborist style hitches are popular in tree work because they can release more predictably after loading. They’re often more directional and may require adjustments to suit the rope type.
The Prusik shines because it grips in both directions, which is handy for sliding climbs or dynamic loads. But it isn’t always the easiest to release when you’re under heavy load. If you’re facing sticky rope, slick cordage, or frequent releases, testing a few hitch variations on the ground can save you real trouble in the field.
Conclusion
Mastering how to use prusik knot comes down to three practical habits: size, wraps, and dress. Use a cord about 60 to 80 percent the diameter of your main rope, then add enough wraps to bite without binding. For most ropes, 3 wraps offer a clean balance, while more wraps help on slick or heavy loads. Dress the wraps neatly so they sit parallel and don’t cross.
Always test before you load. A light pre-load confirms it grips when needed and releases when you ease off. Practice tying and sliding until the motion feels automatic in your hands.
Choose the right use case for your knot. The prusik shines as a backup or adjustable helper in climbing, arborist work, and camping tasks, but it isn’t a substitute for proper training or other safety gear. Know when another friction hitch or ascent method fits better.
Practice is your best ally. Work on the hand motions, load testing, and release technique in a safe spot. Safety first: get hands on instruction for climbing and rescue applications, and never rely on a single knot for life safety without proper training.
Back to Prusik Loop Tips
Recommended Products for Trad Climbing
These products can support safer climbing, belaying, rappelling, and emergency readiness.
Affiliate disclosure: As an Amazon Associate, TradClimbers may earn from qualifying purchases at no additional cost to you.