

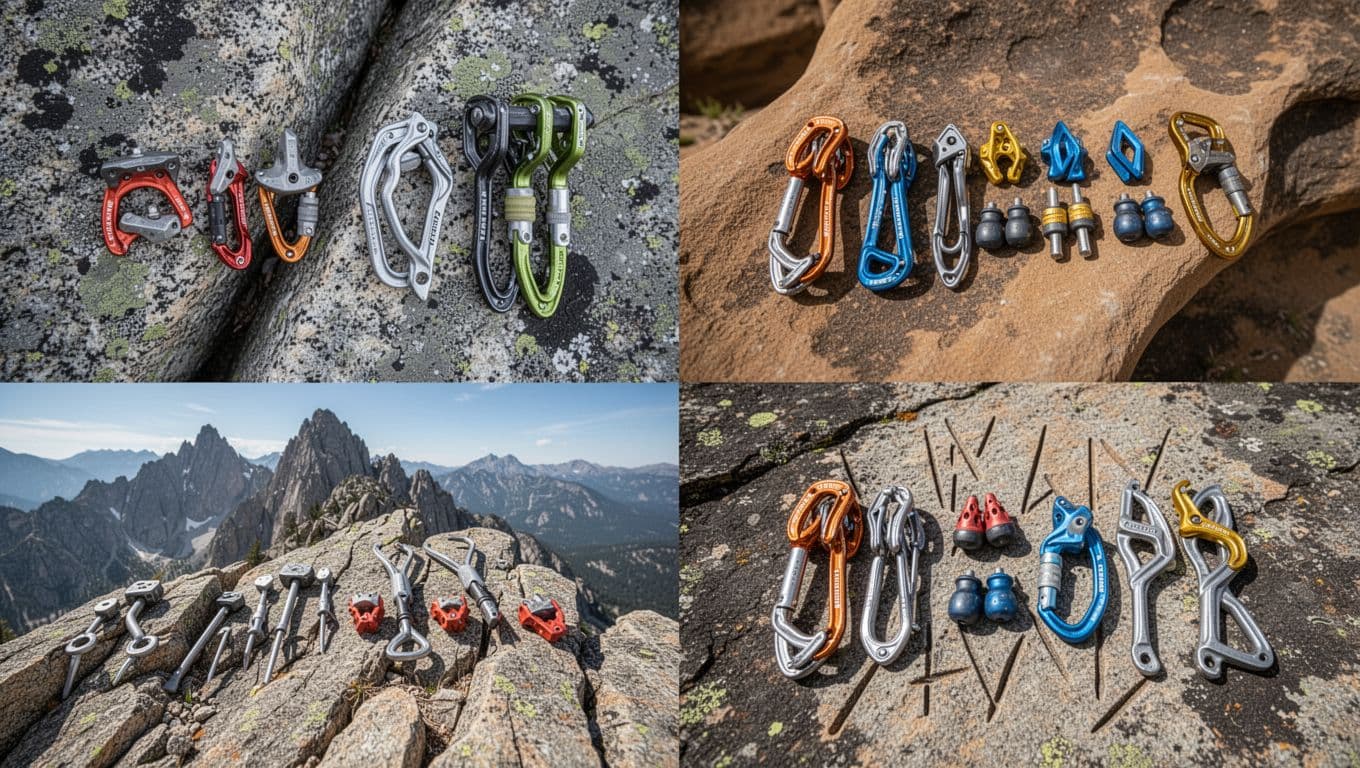
You’ve watched your standard nuts skate right out of that stubborn flared crack one too many times. Metolius Curve Nuts fix that. They’re passive protection pieces you wedge into cracks, with a curved rail shape that grabs rock bumps for three solid points of contact.
This design shines in flares and pin scars, where regular stoppers often fail. In this post, you’ll learn exactly what they are, how to place them right, which sizes to rack, when they outperform standard nuts, and tips for cleaning them without a fight. Grab your rack; let’s build some confidence.
What makes Metolius Curve Nuts different from regular stoppers
Regular stoppers work fine in parallel cracks. They taper simply from top to bottom. Metolius Curve Nuts stand out because they curve side to side. Flat rails bite into small rock bumps. Curved faces hug convex and concave spots. This setup creates three solid contact points. Regular nuts often slip in flares or pin scars. These hold firm. You get stability where others walk out
The curve, the rails, and the three solid contact points
Think of a curved wedge settling into a rounded pocket. It nests perfectly. A straight wedge might wobble. Metolius Curve Nuts do that. Their side-to-side curve matches irregular rock. One face bulges out (convex). The other dips in (concave). Flat rails run along the edges.
These rails grab tiny bumps. You often get two rail contacts plus one from the curved face. That’s three points total. Regular nuts rely on taper alone. They press walls evenly. But in bumpy or flared spots, they shift. Curve Nuts lock in. They resist pulls from odd angles.
In short, the design fits real rock. No perfect parallels needed. You place with confidence.
Ultralight Asymmetric Curve Nuts, what changed and why it matters
The current model stays the Ultralight Asymmetric Curve Nut. No big changes hit shelves by early 2026. Builders refined it for lighter weight and better fit. Heads weigh 30% less than before. CNC machining cuts precise shapes. Press-fit straight steel cables skip heavy swages.
Stiff cables make placement smooth. They stay put in small sizes. Asymmetric taper shines here. One side flares more. This hugs pin scars or widening cracks. Regular symmetric nuts cam out. These bite deeper.
Plus, the top-to-bottom taper runs straight-sided. Pull the cable. If it seats snug, you know. No guesswork. These tweaks matter on lead. You rack less weight. Placements stick. Flares turn safe.
Materials, ratings, and what the strength numbers mean on lead
Metolius builds these by hand in Oregon. Heads use 7075-T6 aluminum for sizes 1-5. Larger 6-10 get 6061-T6. Both anodized and color-coded. Steel cables run straight and strong. They proof-test each one.
Ratings hold UIAA and CE certs. Smaller nuts (#1-5) pull at 7 kN. Bigger ones (#6-10) hit 10 kN. These numbers mean real-world strength. A good 7 kN placement catches factor-two falls on lead. Always place right, though. Numbers set the floor. Your skill decides the hold.
Check this quick size rundown before you rack:
| Size | Strength | Range (inches) | Weight (oz) |
|---|---|---|---|
| #1-5 | 7 kN | 0.36-0.63 | 0.8-1.0 |
| #6-10 | 10 kN | 0.63-1.25 | 1.0-1.9 |
Placement trumps ratings every time. Nail the spot. Nuts protect.
Choosing sizes and building a rack that actually covers your routes
You face tough choices when racking Metolius Curve Nuts. Do you grab the full #1 to #10 set? Or pick a few sizes that match your routes? The full set covers cracks from about 9 to 30 mm. That’s a wide range for most trad lines. Colors match Metolius cams, so you spot sizes fast on your gear sling. Singles work for testers. Full sets suit committed trad leaders. Start with mids like #4 to #7. They fit common constrictions. Build from there based on your climbs.
Do you need the full #1 to #10 set, or just a few key sizes
New trad leaders on single pitch often start small. You climb short routes with mixed cracks. Grab #3 to #8 first. These cover 11 to 25 mm cracks. That’s plenty for granite sport-trad or sandstone. Add #1-2 later for tips. Or #9-10 for pods. Test one of each. Buy more as you learn your rock.
Multipitch or alpine climbers pack light. Weight kills long days. Take #1 to #6. Under 160 grams total. They handle thin cracks up to 20 mm. Perfect for alpine quartzite or splitter dihedrals. Skip big sizes. Cams cover wider spots. You move fast. No bulk slows you.
Owners of Stoppers mix in Curve Nuts. You already have parallels covered. Add Curve #2-5 and #6-8. Fill flare gaps. Total rack stays under 400 grams. Colors align, so you rack quick. Full sets beat piecemeal buys for overlap. But singles let you test routes first. Match your terrain. Granite needs mids. Limestone favors smalls. Buy what fits your next crag.
How Curve Nuts pair with other passive pro like offsets and micro wires
Metolius Curve Nuts shine in flares and scars. But they don’t replace everything. Build a mixed passive rack for full coverage. Offsets handle pin scars best sometimes. Their uneven taper hugs blown cracks. Brass micro wires grab tiny tips under 10 mm. Standard Stoppers lock parallels tight.
Curve Nuts fill the middle. Use them for bumpy flares where symmetrics walk. For example, pair Curve #4 (green) with a brass offset #6. You cover 12 to 18 mm irregularities. Add Stoppers #6-9 for clean sides. No gaps in your pro.
Here’s how climbers mix them on a sling:
- Curve Nuts (#1-10) for curves and bumps.
- Offsets (like Metolius brass) for deep scars.
- Micro wires for sub-#1 tips.
- Stoppers for parallel runs.
This combo weighs light. It protects runouts. Curve Nuts add curve power. Others plug straight spots. Rack doubles in overlaps like #5-7. You stay safe across crack types.
Weight and bulk, why some climbers carry Curve Nuts even when they own stoppers
Full #1-10 set weighs just 331 grams. That’s ultralight for wide coverage. Stoppers #5-11 run heavier at 254 grams for less range. You save ounces on big walls or links. Packability counts too. Stiff cables clip neat. No tangles fill your pack.
Long routes demand this edge. Carry Curve Nuts beside Stoppers. Use Curves in flares. Save Stoppers for sides. Total rack slims down. You climb farther without fatigue.
Tradeoffs exist, however. Curves stick more in rock. Cleaning takes tugs or nut tools. Stoppers pop easier sometimes. But lighter weight wins for most. Plus, they grip stickier thanks to rails. Rack them anyway. The savings add up over pitches.
How to place Metolius Curve Nuts so they feel bomber
You want every Metolius Curve Nut to inspire trust on lead. A bomber placement starts with the right spot. Look for a constriction where the crack narrows. The nut’s curve needs room to hug bumps on both sides. Orient the convex side toward the wider flare. Slide it in straight, top first. Rails should catch rock edges right away. Rock it side to side if needed. Then give a gentle downward tug on the cable. It settles with three firm contacts. Bounce the rope lightly. No movement means it’s bomber.
Test the pull direction next. Imagine your fall line. Clip so the load hits straight back into the crack. Rotate the nut if the cable rubs an edge. Walk away from “kinda” fits. They fail under weight. Practice these steps close to the ground first. Toprope gear or gym cracks build your eye. Safety comes before speed. Soon, placements feel natural.
A simple placement checklist you can run in 10 seconds
Run this quick check before you clip. It saves time and builds confidence. Each step confirms a solid hold.
- Correct size: Match the straight top-to-bottom taper to the constriction. Too big wobbles; too small skips.
- Solid constriction: Pick a narrow spot with bumps for rails to bite. Smooth walls won’t hold.
- Aligned with expected fall line: Orient so the load pulls straight back. No side angles.
- Nut not perched on crystals that can break: Avoid fragile flakes. Rails need real rock.
- Cable not over an edge: Keep it hanging free. Rubs cause walking.
- Firm set: Tug down gently. Three points grip tight with no shift.
Extend with an alpine draw if the crack twists. It cuts drag and keeps the nut seated. Clip the draw, not the cable direct.
Flares, pin scars, and shallow pods, where Curve Nuts shine
Metolius Curve Nuts grab spots where straight nuts fail. Outward flares push regular stoppers out. The curve fights back. One face bulges to fill the space. Rails dig into edges. You get three points that lock tight. Pin scars work the same way. Blown piton holes have weird shapes. Asymmetric taper hugs one side deeper. It stays put under pull.
Irregular textures love them too. Funky granite bumps or limestone pods fit perfect. Standard nuts wobble there. These nest like a key in a lock. Shallow pods take small sizes best. #1 to #4 shine in tight nooks. On traverses, direction changes matter. The curve resists side loads better. Still, extend every one. Draws prevent walking from rope twist. Test on your routes. These spots turn sketchy cracks safe
Common placement mistakes that make them feel sketchy
Bad habits turn solid gear shaky. Avoid these errors. Each kills confidence fast. Here’s what goes wrong, plus fixes.
First, pick a size too small. It pinches without gripping rails. Do this instead: Size up for room to curve in. Feel the taper match first.
Second, force into smooth parallel cracks. Curves hate even walls. They spin out. Do this instead: Save them for flares. Use stoppers there.
Third, load them sideways. Traverses tempt this. Pull shears them loose. Do this instead: Rotate for direct back-pull. Extend long.
Fourth, over-set so they weld. Hammering sticks them forever. Do this instead: Rock gently. Tug once. Let rock hold it.
Fifth, ignore the fall line. Off-angle clips walk them. Do this instead: Visualize your whip. Align cable straight.
Fix these, and placements bomb. Practice spots your eye quick.
When you should place a cam instead (and when a stopper is faster)
Choose gear for the moment. No piece rules all cracks. Metolius Curve Nuts excel in irregular flares. But cams win parallels. Smooth granite splitters take cams fast. They expand even. Place them in seconds. Skip nuts there.
Standard stoppers beat curves in straight constrictions. Clean dihedrals suit them. They pop in quick. No twisting needed. Use Curve Nuts for bumpy scars or pods. Safest holds matter most.
Speed counts too. Rush a cam in wide spots. Grab a stopper for obvious tapers. Curve Nuts slow you in perfect cracks. But they save whips in flares. Read the rock. Pick what grips best now. Your rack covers all. Stay calm. Protect smart.
Real-world pros and cons, including the honest truth about cleaning them
Climbers take Metolius Curve Nuts on real routes because they grab weird cracks where others fail. However, they stick sometimes. You gain confidence in flares, yet cleaning demands patience. Users praise their grip after hundreds of pitches. Still, no gear works everywhere. Let’s look at what works and what doesn’t.
Why people love them, security in weird rock and confidence on small gear
You feel the difference on lead. Metolius Curve Nuts seat in spots where regular nuts shift. Their curves hug bumps. Rails bite edges. This creates three solid contacts. Other stoppers wobble in flares or pin scars. These stay put.
Place one right, and it inspires trust. Climbers call them confidence boosters on small sizes. #1 to #5 hold thin granite tips. They resist walks from odd pulls. Users report solid catches after 100 routes. Light weight helps too. You rack them without bulk.
However, remember this. Any nut can fail in poor rock or bad placement. Fragile crystals snap. Flares pull wrong. Test every piece. Skill matters most. So, they shine in irregularities. You climb bolder because of that grip.
Why they can be hard to clean, and how to avoid leaving one behind
Rails and curves grab rock tight. They bite protrusions deep. New ones stick worst. Your second yanks hard sometimes. That’s the honest downside. Climbers leave them behind on textured granite. Yet, you can fix that with smart habits.
First, place gently. No hard bounces. They seat without welding. To clean, reverse your placement path. Pull straight up or wiggle side to side. Tap upward lightly, not outward. This loosens rails.
Grab a nut tool next. Lift the back edge. Rotate as you pull. It breaks the bite. Communicate with your belayer. “Take in slack” helps. Or let them body weight it slow.
Edges wear smooth over time. After a season, they clean easier. Rappel single pitches to practice. Long routes need quick sets. Patience pays off. You keep your rack full.
Durability and inspection, what to look for before and after a season
Metolius Curve Nuts last years with care. Cables stay stiff. Heads take dings. Anodizing scratches fast, but that’s cosmetic. Check them often. Retire issues before they fail.
Inspect cables first. Look for frays or kinks. Straight press-fit wires resist damage. Yet, bashes happen. Next, scan heads. Deformed shapes or sharp edges mean retirement. They won’t seat right.
Anodizing fades from falls. Colors help sizing at first. Ignore wear there. Test pulls on good ones. Follow Metolius guidelines.
Store smart too. Clip in size order. Avoid crushing cables in packs. Bins work at home. After a season, sort them out. Good ones go back on the sling. Bad ones rest. You stay safe that way.
Curve Nuts vs Black Diamond Stoppers and cams, which should you buy first
You already rack some passive and active pro. But Metolius Curve Nuts tempt you for those tricky flares. Do they beat Black Diamond Stoppers right away? Or should cams stay your focus? Each piece shines in spots. Stoppers offer simple reliability. Cams place fast. Curve Nuts grab irregularities others miss. Pick based on your cracks. Many climbers mix them all. Let’s break it down.
Curve Nuts vs classic stoppers, stability in flares vs all-around simplicity
Metolius Curve Nuts feel different at first. You twist them into place. That curve hugs bumps for three contacts. They lock tight in flares. Regular Black Diamond Stoppers slide in straight. No fuss. You learn them quick.
Curve Nuts take practice, however. Place wrong, and they wobble. But in irregular rock, they outperform. Stoppers shift there. Plus, Stoppers clean easy. You yank them out fast. Curve Nuts stick on rails. Climbers tug harder sometimes.
Most rack both. Stoppers handle parallels. Curves fill gaps. Check this quick comparison:
| Feature | Metolius Curve Nuts | Black Diamond Stoppers |
|---|---|---|
| Placement | Trickier in flares; secure hold | Straightforward in most cracks |
| Removal | Often sticks on bumps | Quick and simple |
| Best for | Irregular, flaring cracks | Parallel constrictions |
In short, grab Curve Nuts if flares frustrate you. Keep Stoppers for speed. Together, they cover more ground.
Curve Nuts vs cams, passive reliability vs fast protection
Passive pro like Metolius Curve Nuts wedges in tight. No springs or lobes move. You rely on shape and rock friction. Active cams expand on command. Lobes press out. They grip smooth walls.
Nuts win on cost and weight. A full Curve set runs light at 331 grams. Cams add bulk. Nuts also stay put extended. Less walking in twists. Use them in shallow pods or scars. Cams beat them for speed, though. Parallel cracks take cams in seconds. Black Diamond Camalots range wide per size.
Pick nuts when weight matters. Or for brittle rock. Cams shine in clean splitters. You place faster there.
Rack nuts first if budget limits you. Add cams for versatility. No single choice rules.
A quick buyer guide based on the routes you climb most
Your routes decide the rack. No setup fits every crag. Lean toward pieces that match your rock. Here are four common profiles.
Granite cracks demand mixed pro. Metolius Curve Nuts grab flares. Add Black Diamond Stoppers for parallels. Skip full cams unless splitters dominate.
Sandstone splitters favor cams. Black Diamond Camalots place quick in clean lines. Use Stoppers for tips. Curve Nuts help rare bumps.
Alpine chossy ridges need light gear. Pack small Curve Nuts and offsets. They hug loose irregularities. Cams weigh too much up high.
Pin scar areas scream offsets and Curves. Metolius Curve Nuts hug blown holes best. Stoppers fill straight bits.
Conclusion
Metolius Curve Nuts turn frustrating flares, pin scars, and irregular cracks into solid protection. They suit light racks perfectly because they weigh little yet cover wide ranges. However, their strong grip means cleaning demands patience, and good placements take practice.
You already know the drill from this guide. So, grab a few key sizes like #4 to #7 first. Practice placements close to the ground. Then hit routes with a partner who handles stuck nuts without fuss.
Back to Climbing Nut Reviews
Recommended Trad Protection and Rack Essentials
These products can support safer climbing, belaying, rappelling, and emergency readiness.
Affiliate disclosure: As an Amazon Associate, TradClimbers may earn from qualifying purchases at no additional cost to you.
Keep exploring helpful trad climbing, gear, safety, and technique resources.
- A Climber’s Guide to Rock Climbing in Thailand
- A Trad Climber’s Guide to the Isle of Skye Ridge
- Hueco Tanks Rock Climbing: hueco tanks rock climbing Essentials
- A Climber’s Guide to The Nose of El Capitan
- The Top 8 Unforgettable Climbing Routes El Capitan Has to Offer in 2026
- Yoga for Climbers: Boost Strength, Flexibility, and Recovery | yoga for climbers