

So, you’re in a bind and need a way to secure yourself for a climb or a rappel, but your fancy harness is nowhere to be found? It happens. Maybe it got left behind, or perhaps it’s not suitable for the situation. Learning how to make a climbing harness out of webbing can be a real lifesaver in a pinch.
I am going to look at a few different ways to tie one up, from a quick emergency seat to something a bit more involved. Just remember, these are usually for emergencies or specific situations, not for your everyday climbing adventures. Safety first, always.
How to Make a Climbing Harness Out of Webbing Post Key Takeaways
- Improvised harnesses from webbing are best for emergency use or specific situations like short rappels, not regular climbing.
- The Swiss Seat is a more involved but generally safer DIY webbing harness option.
- The Diaper Sling and Hasty Harness are quicker to tie but may be less comfortable and secure.
- Using the correct knots, like the Water Knot, and securing them properly is vital for safety.
- Always double-check the fit and carabiner attachment; a snug fit is important, especially around the waist.
Understanding Webbing Harness Basics
Purpose of an Improvised Harness
Sometimes you find yourself in a situation where a standard climbing harness just isn’t available, or maybe you need a temporary solution. This could be for a quick rappel in a canyon, a situation where a friend forgot their gear, or even for outfitting a group of kids for a short activity. An improvised webbing harness can be a lifesaver in these scenarios. It’s about having a backup plan, a way to get by when the usual equipment isn’t an option. Think of it as a tool for specific, often non-standard, situations.
Webbing Types and Considerations
When you’re thinking about making a harness from webbing, the type of webbing matters. Tubular webbing is generally preferred because it’s strong and has a bit of give. Nylon is common, but polyester is also used. The width is usually around 1 inch, and the thickness can vary. You’ll want webbing that feels sturdy but isn’t so stiff that it’s impossible to knot. The length you need will depend on the type of harness you’re making and your own body size, but having a good amount, like 20 feet, gives you flexibility.
Here’s a quick look at common webbing:
| Type | Material | Width | Notes |
|---|---|---|---|
| Tubular | Nylon | 1″ | Strong, slightly stretchy, common |
| Tubular | Polyester | 1″ | Strong, less stretchy than nylon, durable |
Safety Disclaimer for DIY Harnesses
Okay, let’s be super clear here. Making your own harness from webbing is not a substitute for a professionally manufactured and certified climbing harness. These DIY methods are generally intended for emergency use, short rappels, or static situations where a fall is highly unlikely. They often lack padding and can be uncomfortable, potentially causing injury if used improperly or for extended periods. Always double-check your knots, ensure a snug fit, and use a locking carabiner. If you’re unsure about any step, it’s better to err on the side of caution and seek professional guidance or use proper gear.
Always remember that the strength and security of any improvised harness depend entirely on the quality of the webbing, the correct tying of the knots, and the proper fit. Mistakes here can have serious consequences.
Constructing the Swiss Seat Harness
Alright, let’s get down to building the Swiss Seat harness. This is a pretty solid option when you need something reliable from just webbing. It’s not fancy, mind you, no padding or gear loops here, but it gets the job done.
Preparing the Webbing Length
You’ll need about 20 feet of 1-inch tubular webbing for this. Make sure it’s good quality stuff. You want to find the center of your webbing first. This is important for getting the loops even.
Forming the Waist and Leg Loops
Start by folding the webbing to create the leg loops. You’ll bring the two ends back up between your legs. Then, wrap the webbing around your waist. The key here is to get the waist wraps snug. You’ll want to wrap it around your waist a few times, making sure it’s tight but not cutting off circulation. Think “snug,” not “painful.” The number of wraps can depend on your body shape and the webbing thickness.
Securing the Harness with a Water Knot
Once you’ve got the waist and leg loops formed and everything is snug, it’s time to tie it all together. The water knot is your best friend here. It’s specifically designed for webbing and holds really well when tied correctly. Make sure you leave a good amount of tail on the knot, at least six inches, and then back it up with a couple of half hitches for extra security. Double-check that knot; it’s what’s holding you up!
Attaching the Carabiner for Use
Finally, you’ll need a locking carabiner. This is your connection point. You want to clip this carabiner through all the strands of the waist wrap and also through the strand that forms the leg loop. It might take a bit of maneuvering to get the leg loop strand in there, especially if you’ve cinched the waist down tight. This carabiner acts like your belay loop.
Remember, the snugness of the waist wraps is super important. After your first rappel, or if the webbing gets wet, or even just after a bit of walking around, stop and retighten those waist wraps. Webbing can stretch and loosen up.
Here’s a quick rundown of the steps:
- Find the center of your 20-foot webbing.
- Form the leg loops by bringing the ends up between your legs.
- Wrap the webbing around your waist multiple times, getting it snug.
- Tie the two ends together with a water knot, leaving a long tail and backing it up.
- Clip a locking carabiner through all waist strands and the leg loop strand.
Creating a Diaper Sling Harness
Sometimes you need a quick way to make a harness, and the diaper sling is one of those methods. It’s pretty simple, really. You just need a length of webbing, usually about 12 feet of 1-inch tubular webbing should do the trick for most folks. The idea is to create a loop that you can then arrange to support you.
Tying the Initial Webbing Loop
First things first, you need to make a big loop out of your webbing. The best way to do this is with a water knot. It’s a knot specifically designed for joining two ends of webbing together. Make sure you tie it correctly and leave a good tail on both sides – at least a few inches. This knot is what will hold the whole thing together, so don’t skimp on the tails or the tightening.
Positioning the Sling for Comfort
Once you have your loop, you’ll want to get it ready to wear. Lay the loop flat on the ground. Now, imagine the small of your back and your butt. You’re going to take the top part of the loop and run it across your lower back, and the bottom part of the loop will sit just under your butt. Try to keep the water knot you tied towards the front, so it’s not digging into you when you’re wearing it. It should feel somewhat like a saddle.
Securing the Diaper Sling
This is where it gets a little bit like putting on a diaper, hence the name. With the loop positioned as described, reach between your legs with one hand and grab the lower part of the loop. Pull that section up and between your thighs. Keep holding onto the original loop you had around your waist. Now, you’ll likely need a carabiner to connect everything.
Clip the carabiner through the loop that’s around your waist and also through the section you just pulled up between your legs. This carabiner is what turns the sling into a functional harness. Make sure it’s a locking carabiner and that it’s properly secured. It might feel a bit strange at first, but it’s designed to hold your weight in a pinch.
Tying a Hasty Webbing Harness
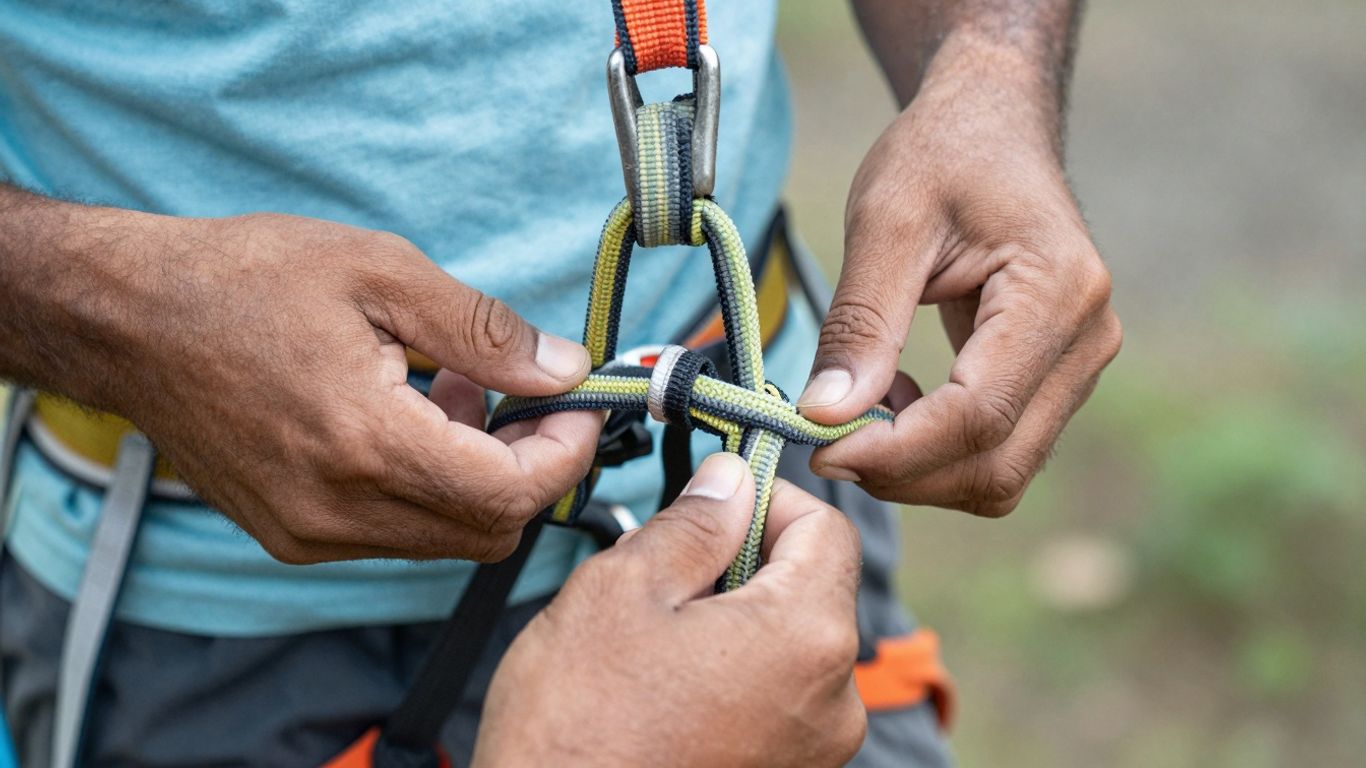
Sometimes you need a quick way to get a harness on, maybe for an emergency situation or just a short rappel where a full setup feels like overkill. That’s where the hasty webbing harness comes in. It’s designed to be tied relatively quickly, using just a length of webbing. Think of it as your go-to backup.
Method One: The Traditional Hasty Seat
This is a pretty straightforward method that uses a good chunk of webbing, usually around 18 to 20 feet. You’re essentially creating a seat that loops around your legs and waist. It’s not the most comfortable thing in the world, but in a pinch, it’ll do the job.
Here’s a basic rundown:
- Start by making a loop about six inches from the middle of your webbing. Tuck this loop into your waistband.
- Take both ends of the webbing and pass them back between your legs, then around your thighs.
- Bring those ends back up and pass them through the initial loop you made.
- Now, wrap the ends around your waist, using up the slack until the webbing is snug. The final knot goes above one hip.
- Secure the waist section. A Square (Reef) knot is often used here, but it’s really important to back it up with a couple of half hitches on either side of the Square knot. Some folks prefer a Water Knot for webbing, but it’s much harder to tie quickly and cinch down tight.
- Finally, attach your carabiner through the loop at the waist and the webbing turns around your waist. Make sure it’s a locking carabiner and that you screw the gate down tight.
Method Two: The Quick-Don Runner
This method is a bit different and uses less webbing, typically around 12 feet. It’s more like a pre-tied runner that you can slip on fast. It’s not as robust as the first method, but it’s definitely quicker to deploy.
- You’ll need to pre-tie a loop using a strong knot like a Water Knot, backed up. This forms the main loop.
- The idea is to have this pre-tied runner ready to go. You can even use rubber bands to keep it coiled neatly for fast access.
- To use it, you essentially step into the loop and pull it up around your waist, similar to how you’d put on a very basic sling.
- Again, always use a locking carabiner and secure the gate properly.
While these hasty harnesses are useful in emergencies, they aren’t a replacement for a proper, certified climbing harness. Their strength ratings can vary, and they are generally intended for short rappels or as a backup, not for prolonged hanging or dynamic loads. Always practice tying them when you’re not in a stressful situation.
Reinforcing the Hasty Harness
No matter which method you choose, you can always add a little extra security. Some people like to use tape knots to reinforce the main tie-off points. Others might integrate it with a sturdy belt, like a rigger’s belt, by clipping the harness into the belt’s gear loops. This adds stability and can make it feel more secure, especially if you’re going to be hanging for any length of time. Remember, the goal is to get down safely, so any extra bit of security is usually a good idea.
Essential Knots for Webbing Harnesses
When you’re making a harness out of webbing, the knots you use are super important. They’re what hold everything together, and if they fail, well, that’s not good. So, let’s talk about the main ones you’ll need to know.
The Water Knot for Webbing
This is pretty much the go-to knot for joining two ends of flat webbing. It’s also called the ring bend or tape knot. It’s designed specifically for webbing because it lies flat and is pretty strong when tied correctly. You’ll see it used a lot for making endless slings or joining webbing for harnesses. It’s not the easiest knot to untie after it’s been loaded, but that’s actually a good thing for a harness – you don’t want it coming undone by accident.
Here’s a basic idea of how it works:
- Lay the two ends of webbing flat, side-by-side, with a few inches of overlap.
- Tie a simple overhand knot with one end around the other.
- Now, take the other end and tie the exact same overhand knot in the opposite direction, following the path of the first knot.
- Pull both standing ends and both working ends to snug the knot down tight.
Make sure you leave a good amount of tail on both sides – at least a few inches, maybe more. This gives you something to grab if you ever need to untie it, and it adds a bit of security.
Backup Knots for Security
Even with a good knot like the water knot, it’s always smart to add a backup. Think of it as a safety net. For webbing harnesses, especially improvised ones, adding a couple of half hitches on either side of your main knot can make a big difference. This is especially true if you’re using a knot that might slip a bit, or if you just want that extra peace of mind.
- Half Hitch: A simple knot that wraps around a standing part and then through its own loop. It’s easy to tie and adds friction.
- Double Overhand Stopper Knot: This is a beefier version of a simple stopper knot, good for adding bulk and preventing slippage.
When you’re tying off the waist or leg loops of your harness, adding these backups can prevent the main knot from loosening up under stress.
Alternative Knotting Techniques
While the water knot is standard, sometimes you might find yourself in a situation where you need to improvise with what you have. Some people use variations of the square knot (also known as the reef knot) for quick harnesses, but it’s generally advised against for critical safety applications because it can capsize or slip under certain loads, especially with slick webbing.
The idea behind any knot used in a harness is to create a secure, non-slipping connection that can hold body weight. When improvising, you’re balancing ease of tying with reliability. Always test any improvised knot system thoroughly before relying on it for any serious use.
For a truly hasty harness, some methods involve tying the webbing directly around the body using a series of loops and tucks, often secured with a square knot backed up by half hitches. While faster to tie, these are generally considered less secure and less comfortable than a properly tied water knot system. It’s a trade-off between speed and absolute security.
Finalizing and Using Your Webbing Harness
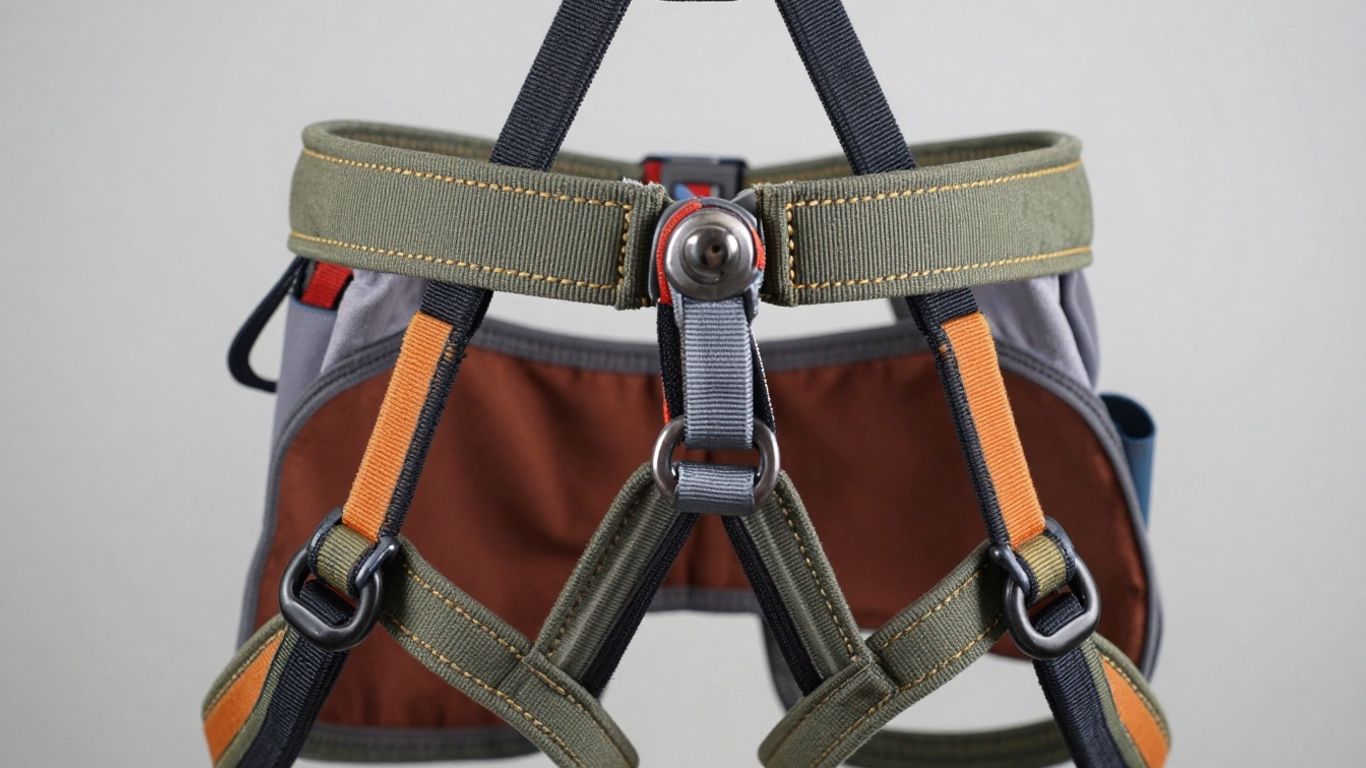
Alright, you’ve gone through the steps and tied your webbing harness. Now comes the part where you make sure it’s actually going to work and keep you safe. This isn’t the time to be shy; you need to check everything thoroughly.
Ensuring a Snug and Secure Fit
First things first, put the harness on. You want it to be snug, but not so tight that it cuts off circulation or makes it hard to breathe. Think about how it feels when you’re moving around. Does it shift? Does it feel like it’s going to slip down?
- The waist loop is the most important part for security. It needs to be tight enough that it won’t slide up over your hips. If it’s too loose, it’s basically useless.
- Check the leg loops. They should be comfortable and not chafe, but also not so loose that they don’t provide any support.
- Walk around a bit. Do a few squats. Mimic some movements you might do while climbing or rappelling. Pay attention to any pressure points or areas that feel unstable.
Remember, a webbing harness, especially an improvised one, relies heavily on friction and a good fit. Any slack can become a big problem when you’re under load.
Augmenting with Additional Straps
Sometimes, the basic harness might feel a little flimsy, or you might want a bit more security, especially if you’re using a simpler design like a diaper sling or a hasty harness. You can add extra webbing straps to help.
- Chest Strap: A simple loop of webbing that goes around your chest and clips into the main harness can prevent the waist loop from slipping down. This is especially helpful if you have a less defined waist.
- Shoulder Straps: For more complex situations or if you’re carrying weight, adding straps that go over your shoulders can distribute the load better and keep the harness in place.
- Reinforcement: If you notice any areas that seem weak or are stretching too much, you can add extra wraps of webbing or even a second knot for added strength.
Proper Carabiner Attachment and Use
This is where things get serious. Your carabiner is your connection point, and it needs to be attached correctly and used with care.
- Use a locking carabiner. This is non-negotiable. An auto-locking or screw-gate carabiner is best. Make sure the gate is locked securely.
- Screw-gate carabiners: Always screw the gate down. The common advice is to screw it down so that gravity would tend to close it, not open it. This is a simple habit that can prevent a major accident.
- Attachment Point: Make sure the carabiner is clipped through all the necessary strands of webbing as per the specific knot you used. For a Swiss Seat, this means through the waist loops and the leg loop strand. For other designs, consult the instructions for that specific knot.
- Orientation: Consider the orientation of the carabiner. It should be loaded along its major axis, not sideways. This is usually achieved naturally with a properly tied harness, but it’s worth a quick check.
Always double-check your knot, your fit, and your carabiner attachment before putting any weight on the system. It might seem like a lot, but taking these extra moments can make all the difference.
Wrapping It Up
So, there you have it. Making a webbing harness isn’t exactly rocket science, but it does take some attention to detail. Remember, this is mostly for emergencies or situations where a proper harness just isn’t an option. It’s not going to be as comfy as your store-bought one, and it definitely won’t have all those fancy pockets. Always double-check your knots and make sure everything is snug before you put any real weight on it. Safety first, always!
Frequently Asked Questions
Can I use a webbing harness for regular climbing?
No, these DIY webbing harnesses are meant for emergencies only. They don’t have the padding or the same safety features as a store-bought climbing harness. For actual climbing, always use a professionally made harness.
What kind of webbing should I use?
You’ll want to use strong webbing, like 1-inch tubular webbing. It’s often made of nylon and is used in climbing gear. Make sure it’s in good condition, with no rips or frays.
How long does the webbing need to be?
The length depends on the type of harness you’re making and your body size. For some methods, like the Swiss Seat, you might need around 20 feet. Shorter methods, like the Hasty Harness, might only need 12-18 feet.
What is a ‘Water Knot’ and why is it important?
The Water Knot is a special knot used to join two ends of webbing securely. It’s important because it’s strong and doesn’t slip easily, which is crucial for something as vital as a harness. Always leave a good amount of tail on the knot and make sure it’s tied correctly.
Are these homemade harnesses comfortable?
Honestly, not really. They’re designed for safety in a pinch, not for comfort. They can be stiff and might dig into you, especially if you have to wear one for a while or after a fall. Padding is usually missing.
How do I make sure the harness is safe to use?
First, use the right knots and tie them correctly. Second, make sure the webbing is wrapped tightly around your waist and legs. Finally, always use a strong locking carabiner and check that it’s attached properly to all the necessary strands of webbing.
Recommended Climbing Products
These products can support safer climbing, belaying, rappelling, and emergency readiness.
Affiliate disclosure: As an Amazon Associate, TradClimbers may earn from qualifying purchases at no additional cost to you.
Keep exploring helpful trad climbing, gear, safety, and technique resources.