

A heel hook is one of those techniques that, once it clicks, completely changes how you see and move on the rock. Think of it as turning your leg into a third arm. You’re not just placing your foot; you’re actively hooking your heel onto a hold to pull your body into the wall and upwards. It's the key to unlocking steep, overhanging routes that might otherwise feel totally out of reach.
Why Heel Hooks Are a Climber's Secret Weapon
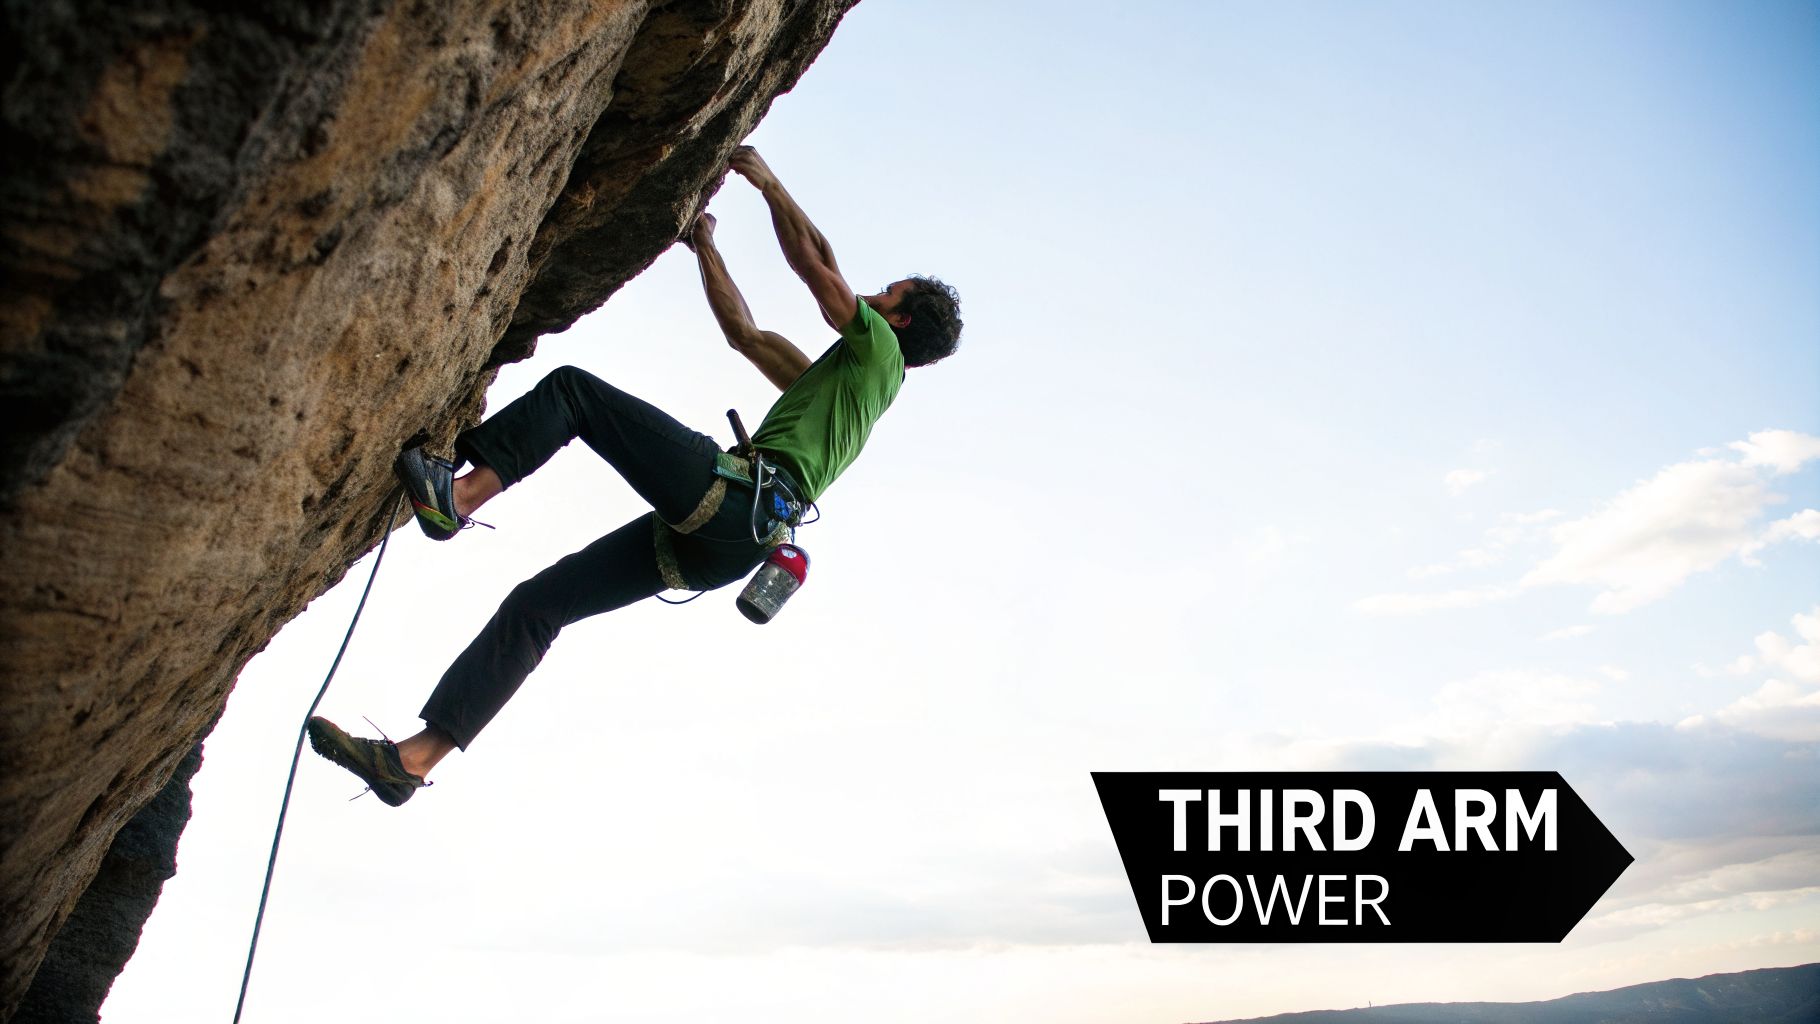
If you've ever felt your arms burning out while your hips sag away from an overhang, you already know the problem a heel hook solves. It's the move that lets you bring your body's biggest muscles—your glutes and hamstrings—into the fight, taking a huge amount of strain off your upper body.
This isn't just about finding a sneaky rest. A heel hook is an active, powerful pull. By hooking your heel and firing up your posterior chain, you create a new, incredibly strong point of leverage. This allows you to:
- Reel Your Body In: On steep terrain, gravity is your enemy. A solid heel hook works like a winch, letting you pull your center of gravity back over your feet and making distant handholds feel solid and secure.
- Save Your Arms for the Crux: Instead of muscling through a big move with a desperate lock-off, you can use your leg to generate upward momentum. This saves precious arm strength for where you'll really need it.
- Prevent a "Barn Door" Swing: Nothing is more frustrating than swinging uncontrollably off the wall. A heel hook acts as a third point of contact, creating a stable triangle with your other limbs that locks you in place.
From Shut Down to Sending
I'll never forget a V5 boulder problem that had me completely stumped for weeks. The crux was a long, desperate reach from a greasy sloper on a 45-degree wall. I’d fall off it every single time, my arms screaming.
Then a friend pointed out a chalked-up nubbin near my hip I’d completely ignored. I tried the heel hook climb sequence, and it was a revelation. By sinking my heel onto the hold and pulling hard, my body felt weightless. That reach, which had felt impossible, was suddenly static and controlled. It was a lightbulb moment: climbing isn't just about pulling down; it's about pulling in with your entire body.
Heel hooks have really come into their own as bouldering and modern gym climbing have pushed routes onto steeper and more complex terrain. Climbers figured out their legs could do more than just stand on holds—they could pull, too. If you're curious about the history, Flashed.com has a great article on the evolution of the heel hook.
Key Takeaway: A heel hook is not a passive foot placement. It's an active pull that engages your hamstrings, glutes, and core to generate force, pull you into the wall, and drive you upward.
Mastering this technique will fundamentally change how you read routes. You'll start spotting opportunities everywhere, unlocking sequences that seemed impossible before. It’s easily one of the most critical skills for anyone looking to push their grades on steep ground.
To get you started, think about where these opportunities hide in plain sight.
When a Heel Hook Makes All the Difference
Here are some common climbing scenarios where throwing a heel up is probably your best move.
| Climbing Scenario | Why It Works |
|---|---|
| Aretes and Corners | Hooking the corner of an arete or the inside of a dihedral provides immense stability and stops you from swinging out. |
| Traversing on Overhangs | It allows you to keep your hips close to the wall and move sideways without gassing your arms. |
| High Steps & Rock-Overs | A heel hook can help you pull your center of gravity up and over your foot to gain a high ledge or finish a mantle. |
| Setting Up for a Dyno | Locking in a solid heel provides a stable, powerful platform to generate momentum for a dynamic move. |
| Roof Climbs | In a roof, a heel hook (or toe hook) is often the only way to keep your body from cutting loose and to make progress. |
Once you start looking, you'll see these opportunities everywhere—from the gym to your outdoor project. It's all about training your eyes to see holds as more than just something for your hands or toes.
Executing the Perfect Heel Hook
Alright, let's get into the nitty-gritty of actually sticking a solid heel hook. It's so much more than just throwing your leg onto a hold; it's a full-body effort that starts with your eyes and ends with a powerful hip drive. When done right, you'll feel your heel become an extra hand, pulling your body into the wall.
First things first, you have to find the right spot. Before you even think about lifting your leg, scan the rock for potential placements. Don't just look for obvious ledges. Some of the best heel hooks are on features you might normally grab with your hands, like sidepulls or underclings. The sharp corner of an arête or the lip of a gym volume can also be prime real estate. A good rule of thumb? Any hold at or above your hip level is a potential candidate for a great heel hook.
Heel Placement and Body Position
Once you've picked your target, placement is everything. This is where so many climbers get it wrong. They slap the soft, sensitive part of their Achilles on the hold, which is not only painful but also incredibly weak. You want to place the solid, bony part of your heel squarely on the hold. Think about "cupping" the feature with the back and side of your heel.
Depending on the hold and where you're trying to go, you'll use one of two main placements:
- Inside Heel Hook: This is your workhorse. You use the inner edge of your heel, usually on a hold on the same side of your body. It’s fantastic for pulling yourself directly upward.
- Outside Heel Hook: This involves reaching across your body to place the outer edge of your heel. It's an amazing tool for creating counter-pressure and stopping your body from swinging out, especially on overhanging terrain. We call that swing a "barn door," and an outside heel is the best way to shut it.
After your heel is placed, the real work begins. Don't just let it rest there passively. A good heel hook is an active pull.
A truly effective heel hook feels like you're doing a leg curl right on the wall. You should feel a serious contraction in your hamstring and glutes as you pull your hips in and drive your body up.
Your hands are holding you on the wall; your heel is what pulls you into it. As you pull with your heel and engage your hamstring, consciously squeeze your glutes. This double-whammy of engagement generates incredible pulling power and makes you feel way lighter on your hands.
Engaging Your Hips for Maximum Power
The final piece of this puzzle is your hips. A sagging hip will kill a heel hook's power instantly. As you pull hard with your leg, you have to simultaneously drive your hips toward the wall. This is the crucial step that transfers all that power from your leg into your core and upper body.
A great mental cue I use is to imagine driving the knee of my hooked leg up toward the sky. This simple thought naturally forces my hips to rotate up and in, locking me against the rock and maximizing the leverage I get from the hook.
Imagine you're on a steep boulder problem. You're pumped, and the next hold is a distant crimp. Your hips are sagging, threatening to swing you right off the wall. But you spot a chalked-up little edge out to your left, right about waist-high.
Instead of desperately trying to campus the move, you bring your left foot up and place your heel precisely on that edge. You flex your foot, feel your hamstring tighten, and pull. As you do, you drive your left hip into the wall, rotating your whole body. All of a sudden, you feel stable and light. That crimp that seemed miles away is now an easy, controlled reach. That's the magic of a well-executed heel hook.
It takes practice to get this sequence of spotting, placing, pulling, and driving to feel like second nature. But once you master it, you’ll unlock a whole new dimension of movement, especially on steeper climbs.
Working Out the Kinks: How to Fix Common Heel Hooking Mistakes
We’ve all been there. You throw a heel up, it feels sketchy, and just as you commit, your foot pops off and sends you swinging. Heel hooks have a funny way of feeling totally useless right up until the moment they click and feel like magic.
If you're stuck in that frustrating first phase, don't worry. I'm going to walk you through the most common mistakes I see at the crag and in the gym—many of which I had to unlearn myself. Fixing these will help you build a safer, stronger heel hook right from the get-go.
Your Achilles is Not a Muscle
The biggest and most frequent error is placing the hook too high up on your leg. If the hold is digging into the soft, squishy part of your Achilles tendon, you're doing it wrong. Not only does this give you zero power, but it’s a surefire way to strain something. All your pulling power comes from your hamstring and glutes, not your ankle.
The trick is to find the solid, bony part of your heel and make that the point of contact. Think of the process as a deliberate, three-part sequence: Spot, Place, and Pull.

This isn’t just about passively resting your foot; it's an active sequence that starts with your eyes and ends with a powerful contraction.
Stop the Saggy Hip Syndrome
Another classic mistake is letting your hips hang low and away from the wall. You could have the most bomber heel placement in the world, but if your body is dangling like a wet noodle, you've already lost the battle. This happens when you forget to engage your core and drive your hips into the move.
A heel hook is a full-body movement. Its entire purpose is to lift your center of gravity up and pull it closer to the wall. Your hips are the engine for this.
Here’s a great mental cue: As you start pulling with your heel, imagine a rope is tied to your hip on that same side. Now, picture someone pulling that rope directly towards the hold you're hooking. This little trick forces you to engage your hip and stops that energy-wasting sag.
If your hips are still lagging, try this: actively drive the knee of your hooking leg up toward the sky. This motion naturally rotates your hip upward and inward, locking in the tension you need to make the move feel static and controlled.
Taming the Dreaded Barn Door
The "barn door" is that wild, uncontrolled swing where your body pivots off the wall like a saloon door in a western. It’s a momentum killer that happens when your center of gravity drifts away from your points of contact. Usually, it's a dead giveaway that you aren't creating enough counter-pressure.
To stay glued to the wall, you need to think about creating a stable triangle with your limbs.
- Squeeze Your Core: A tight core is your number one defense. It links your upper and lower body into a single, rigid unit.
- Flag Your Other Foot: Use your free foot to press against the wall. This creates an opposing force that shuts down the swing before it can even start.
- Try an Outside Heel: If the hold is big enough, hooking with your outside heel (reaching your leg across your body) is an almost foolproof way to lock off your hips and prevent any rotation.
Other Little Things That Make a Big Difference
Beyond those big three, a few other subtle habits can sabotage your heel hook. Keep an eye out for these.
| The Mistake | The Fix & Mental Cue |
|---|---|
| Using a Passive Leg | A heel hook is a PULL, not a place to hang out. Actively squeeze your hamstring and glute. Imagine you're doing a single-leg curl on the wall. |
| Having a Floppy Foot | Keep your toes pulled back toward your shin (this is called dorsiflexion). This fires up the smaller muscles around your ankle, turning your foot into a much more rigid and effective lever. |
| Ignoring the Hold's Shape | Don't just slap your heel on there. Take a second to feel for the most positive edge or divot. Really cup the hold with your heel to maximize your grip. |
Learning to spot these issues in your own climbing is a game-changer. Pay attention to how the move feels. If it’s weak, insecure, or even a little painful, you’re likely making one of these common errors. Take a breath, reset your position, and try again with one of these fixes in mind.
Building a Bomber Heel Hook with Targeted Training
A powerful heel hook can feel like a secret weapon, turning impossible moves into casual sends. But that kind of security doesn't come from technique alone—it’s built on a solid foundation of specific strength and mobility. Just repeating the move on your project won't cut it. You have to train the muscles that do the work.
Here, we'll break down a practical plan to develop the posterior chain strength you need for a truly reliable heel hook. This isn't just about generic gym exercises; it’s a focused approach to building the right muscles for powerful, injury-free climbing.
Prepping Your Body for Action
Never, ever just jump on the wall and start wrenching on a high heel hook. Throwing your leg up with cold, tight muscles is asking for a hamstring strain. A proper warm-up is non-negotiable.
Your goal is to get blood flowing and gently prepare your joints for the positions they're about to be in.
- Leg Swings: Do 10-15 controlled swings forward-and-back and side-to-side on each leg. This is great for waking up the hip flexors and adductors without overstretching them.
- Hip Circles: Standing on one leg, draw big, slow circles with your other knee. Go both clockwise and counter-clockwise to really work the hip joint through its full range of motion.
- Cat-Cow: Get on all fours and move slowly between an arched and rounded back. This mobilizes your spine and pelvis, which are absolutely crucial for getting your hips into the wall.
After you're warm, a little bit of targeted mobility goes a long way. The "90/90" stretch is fantastic for this. Sit on the floor with one leg bent at a 90-degree angle in front of you and the other bent at 90 degrees behind you. Gently lean over your front shin until you feel a good stretch in your glute and hip. This perfectly mimics the hip rotation needed for a solid heel.
On-the-Wall Drills for Skill and Strength
The best place to practice heel hooking is, of course, on the wall—but with intention. Make these drills a regular part of your bouldering sessions.
Try a heel hook traverse. Find a stretch of wall with decent handholds and plenty of feet. As you traverse, force yourself to use at least one heel hook for every two or three hand moves. Concentrate on pulling with your hamstring and glute, really feeling that engagement as you keep your hips glued to the wall. It’s a low-intensity way to build both strength and muscle memory.
Next, pick an overhanging boulder problem that's well within your flash grade. Climb it a few times, and on each go, challenge yourself to find new and creative ways to place a heel hook. This trains your brain to spot opportunities you might otherwise miss.
My Personal Tip: Don't just hunt for obvious heel-hook jugs. Experiment with hooking small crimps, sidepulls, and even slopers. Learning to generate tension on less-than-ideal holds is a game-changer, especially when you take your skills outside onto real rock.
Off-the-Wall Conditioning
To build the raw power for a truly locked-in heel, you need to supplement your climbing with strength work. The exercises below directly target your hamstrings, glutes, and core—the engine behind every good heel hook.
Hamstring strains are painfully common for a reason: the demand on these muscles during a hard heel hook is enormous. That's why this conditioning is so vital for injury prevention. Research has shown that strengthening the entire posterior chain with exercises like hamstring ball curls and single-limb bridges is incredibly effective. For those who also do other sport-specific work like campus board training, this is an easy addition to your routine. Studies also suggest that strong adductors (inner thigh muscles) are important, as they work alongside the hamstrings. If you want to dive deep into the science, you can read the full research on heel hook biomechanics and injury prevention.
Here's a sample conditioning plan to get you started. Focus on quality movement and controlled progression.
Off-the-Wall Heel Hook Conditioning Plan
This progressive plan will help you build the strength and resilience needed for powerful, injury-resistant heel hooks. Start at a level that feels challenging but manageable, and only progress when you can complete all sets and reps with perfect form.
| Exercise | What It Strengthens | How to Progress |
|---|---|---|
| Glute Bridges | Glutes and basic hamstring activation. | Start with two feet on the floor. Progress to single-leg bridges. |
| Hamstring Curls on a Ball | Hamstring endurance and eccentric control. | Start with two legs. Once easy, perform them with a single leg. |
| Nordic Curls | Eccentric hamstring strength (injury prevention gold). | Start with a limited range of motion. Gradually increase how far you lower yourself. |
Remember, consistency is key. Integrating these exercises into your training just a couple of times a week will make a noticeable difference in your heel-hooking power and confidence on the wall.
Heel Hooks Beyond the Gym on Trad and Multi-Pitch Routes
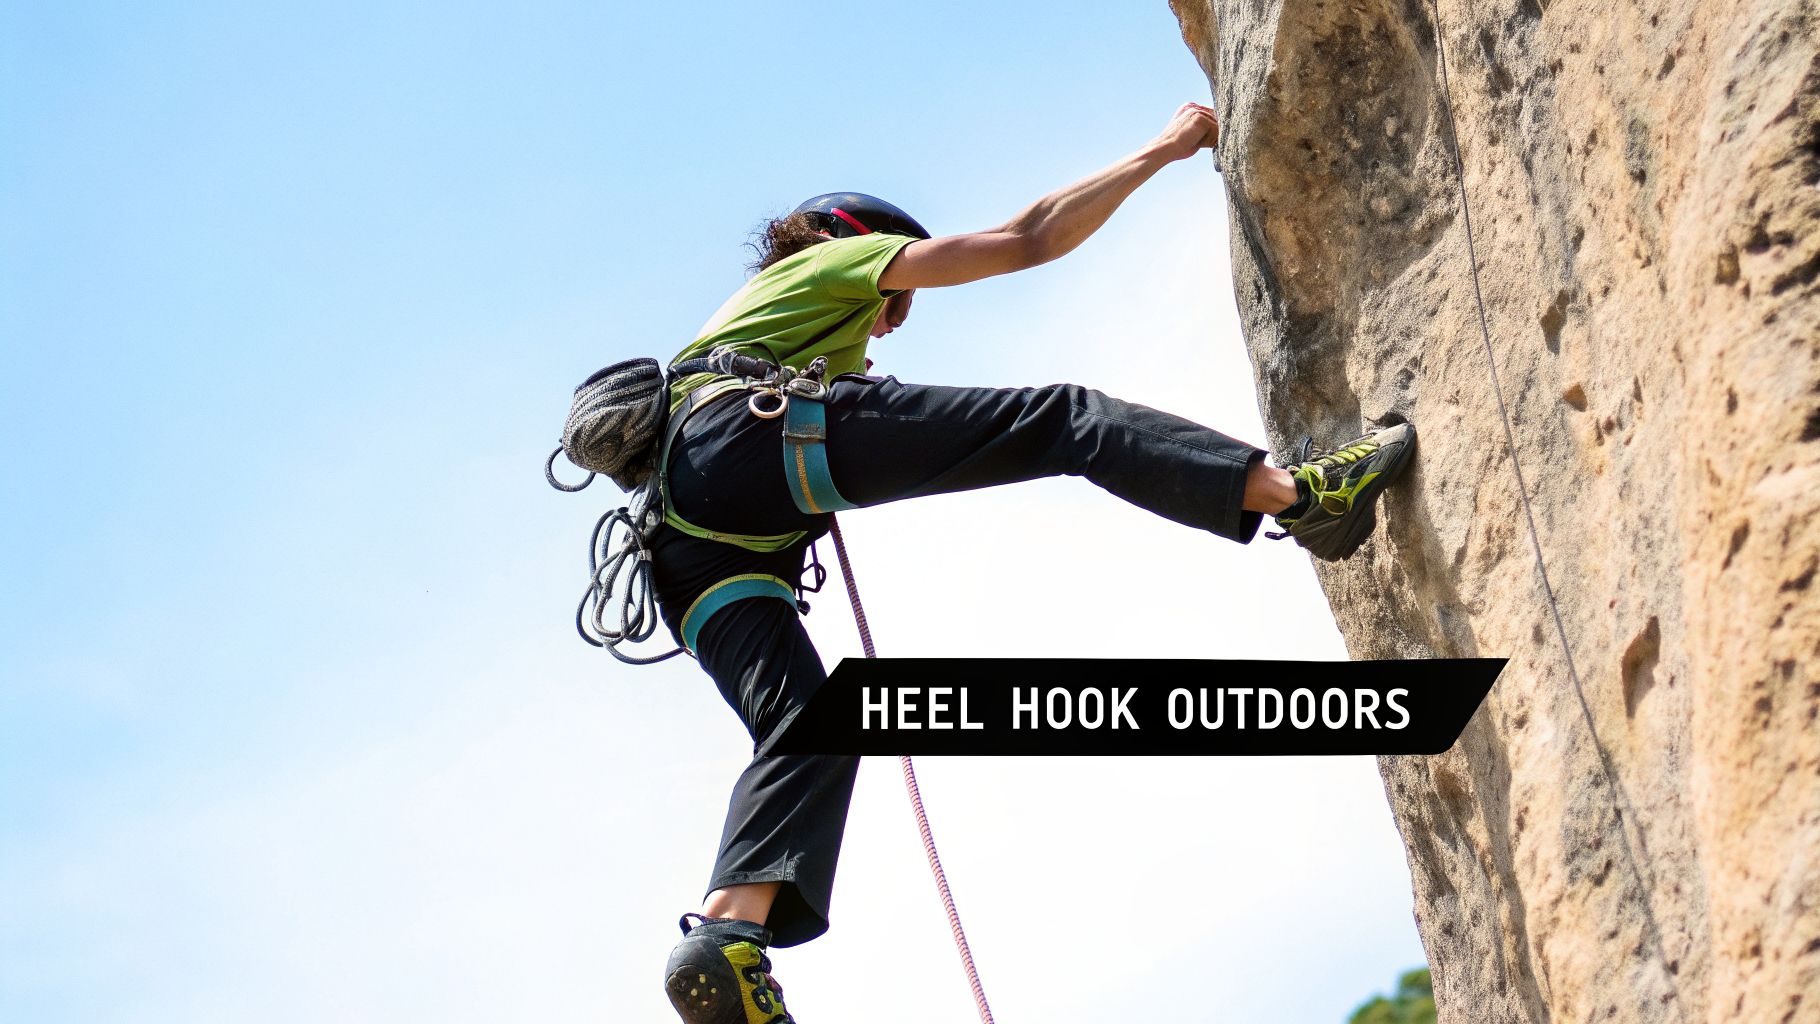
The skills you build pulling on plastic are invaluable, but taking a heel hook climbing technique outside is a whole different ballgame, especially on big trad routes. The brightly colored jugs are gone. Out on real rock, you have to train your eyes to spot the subtle, natural features that can give you that same powerful leverage.
Mastering this is a game-changer. It can turn a desperate, pumpy crux into something controlled and even restful. Look for the sharp edge of a small roof, a solid horn of rock, or a jutting flake. Even the lip of a horizontal crack can become an incredible heel hook that saves precious arm strength for placing gear or navigating the moves ahead.
Finding Rest and Placing Gear
One of the best uses for a heel hook on a multi-pitch climb is for a no-hands rest. Picture this: you’re on a steep face, your forearms are screaming, and you still need to build an anchor. Sinking a solid heel hook can let you sit back, totally unweight your arms, and get a true recovery.
It’s just as critical for placing protection. When you’re on the sharp end, getting a stable position to place a cam or nut is everything. A good heel hook locks you into the wall, freeing up both hands to fiddle with gear. This is especially true on traverses where your body wants to barn-door away from the rock.
For instance, if you're traversing under a small rooflet, hooking your heel on the lip will stabilize your entire body. This lets you calmly place a piece that would have otherwise demanded a strenuous, shaky lock-off. Our guide on trad climbing heel hook technique digs into more of these real-world scenarios where the move is essential for both safety and efficiency.
I once used a tiny, insecure-looking flake for a heel hook on a long granite route. It was just enough to take the weight off my arms, allowing me to shake out and place a crucial micro-cam before tackling the thin crux above. It saved my send.
Rope Management and Safety
While heel hooks provide amazing stability, they also bring a new hazard into the mix on trad climbs: your rope. A poorly managed rope can easily get caught behind your hooking leg, creating a dangerous situation in a fall. It can flip you upside down or put a massive, injury-inducing force through that leg.
You have to stay mindful of where your rope is.
- Keep the Rope in Front: Whenever you can, make sure the rope runs in front of your hooking leg. This prevents it from getting snagged behind your knee or ankle.
- Communicate with Your Belayer: Give your partner a heads-up when you're about to throw a big heel hook, especially on a traverse. This helps them manage the slack and anticipate the movement.
Your body position matters, too. On trad, think about how your heel hook might interact with your gear. The last thing you want is to kick out your last piece of protection. Always test your placements and maintain full-body awareness as you move. Weaving these habits into your climbing will make big routes feel far more secure.
Smart Heel Hooking: Understanding and Preventing Injuries
The heel hook is an absolute game-changer, but all that power comes with a catch. Feeling your whole body pivot off your leg to cruise through a steep roof is an incredible feeling, no doubt. But the forces at play are serious, and knowing the risks is the first step to using this move for a long and healthy climbing career.
This isn't about scaring you off the technique. It's about empowering you to heel hook with confidence, knowing you're doing it right and protecting your body.
Most heel hook injuries pop up when we get our bodies into an awkward, high-torque position. The two spots that really take a beating are the hamstrings and the knee, especially the outside of the joint. When you throw up a really high heel and then have to twist your body to reach the next hold, you're putting a ton of nasty torque on the ligaments that keep your knee stable.
The Anatomy of a Heel Hook Injury
Think of your leg as a powerful lever. When you hook that heel, your hamstring contracts to pull your body in. The problem starts when your hips aren't aligned with the hold. Your knee suddenly becomes the unwilling pivot point for all that rotational force.
This is exactly how climbers injure their Lateral Collateral Ligament (LCL) on the outside of the knee or damage their meniscus, which is the cartilage that's supposed to cushion the joint.
Hamstring strains and full-on tears are also a huge risk. These usually happen during a sudden, powerful pull or when a foot unexpectedly blows off a hold while your hamstring is firing on all cylinders. The biceps femoris muscle, a key part of the hamstring, is often the main victim.
This isn't just anecdotal, either. A clinical analysis of 17 climbers injured while heel hooking revealed a scary pattern. Every single one felt a sudden onset of pain in their knee, thigh, or hip. A shocking 41% of them actually heard a "snapping" sound—the classic, gut-wrenching sign of a ligament tear.
Digging deeper, the study showed that of 9 complete tears, a staggering 67% were located up near the pelvis, with most of them being tears of that same biceps femoris muscle.
Listening to Your Body and Recognizing Red Flags
Your body is constantly giving you feedback, but you have to be willing to listen. Never, ever push through a sharp, shooting, or pinching pain, especially in or around your knee. A dull ache after a hard session is one thing, but a sharp pain during a move is a bright red stop sign.
Key Insight: If you feel like you have to aggressively twist your knee to keep your heel on a hold, the move is too risky. It's far better to back off and find a different sequence than to sacrifice your knee for a single move.
Be extra cautious in these high-risk scenarios:
- The High Heel Hook: The higher your foot is in relation to your hip, the more your knee is forced into a compromised, stressful angle.
- The Twisted Position: If your torso is facing one direction and your knee is cranked in another, you're in the danger zone. The alignment is all wrong.
- Dynamic Moves: Latching a heel hook with a lunge or a swing dramatically multiplies the peak force running through your muscles and ligaments.
Your overall fitness and mobility play a massive role here. For a much deeper dive into how to stay healthy on the rock, check out our complete https://tradclimbers.com/trad-climbing-safety/trad-climbing-injury-prevention-guide/.
It's also smart to understand how to manage common lower leg issues that can be aggravated by climbing. For example, having a good resource for Achilles Tendonitis Treatment is valuable for any serious climber. By pairing smart technique with targeted strength and mobility work, you can turn the heel hook into one of the most reliable tools you have.
Answering Your Top Heel Hooking Questions
Once you start playing with heel hooks, a few common questions always pop up. I've heard these in the gym and out at the crag time and time again, so let's clear them up.
What’s the Best Type of Climbing Shoe for Heel Hooks?
Your shoe can make or break a heel hook. You absolutely need a shoe with a solid, rubber-covered heel cup that fits snugly. If your heel is swimming around inside, you'll lose all the power you're trying to generate.
Aggressive, downturned shoes are fantastic for this, as they often have specialized 3D molded heels designed for grabbing and pulling. That extra rubber and precise shape can make a world of difference on steep terrain.
That said, you don't need the most expensive shoes to start. A good all-arounder with a well-built heel will do the job just fine. Just steer clear of anything with a soft, flimsy heel—it just won’t give you the tension you need.
Are Heel Hooks Safe for Beginners to Practice?
Yes, as long as you approach them intelligently. Don't go throwing your heel up on a tiny crimp on the steepest part of the cave just yet.
Start on big, positive holds. Stick to vertical or slightly overhanging walls where you can focus on the movement itself—the feeling of engaging your hamstring and creating balance—rather than pulling with all your might. And always, always warm up your hips and hamstrings first.
The golden rule is simple: if you feel any sharp pain, especially in your knee, stop immediately. Hamstring strains are a real risk with powerful heel hooks, so knowing about treating acute hamstring strains is good knowledge to have just in case. As you get stronger and your technique improves, you can gradually move on to smaller holds and steeper angles.
What's the Difference Between an Inside and Outside Heel Hook?
This just comes down to where the hold is in relation to your body.
An inside heel hook is the more intuitive one. You place your heel on a hold that's on the same side of your body—your left heel on a hold to your left.
An outside heel hook is when you reach across your body's centerline to place your heel. Think of using your left heel on a hold over to your right. I've found these are amazing for controlling a "barn door" swing or maintaining tension on a traverse. They can feel a bit awkward at first, but once you nail the body position, they often feel incredibly secure.
Recommended Products for Trad Climbing
These products can support safer climbing, belaying, rappelling, and emergency readiness.
Affiliate disclosure: As an Amazon Associate, TradClimbers may earn from qualifying purchases at no additional cost to you.
Keep exploring helpful trad climbing, gear, safety, and technique resources.
- A Climber’s Guide to Rock Climbing in Thailand
- A Trad Climber’s Guide to the Isle of Skye Ridge
- Hueco Tanks Rock Climbing: hueco tanks rock climbing Essentials
- A Climber’s Guide to The Nose of El Capitan
- The Top 8 Unforgettable Climbing Routes El Capitan Has to Offer in 2026
- Yoga for Climbers: Boost Strength, Flexibility, and Recovery | yoga for climbers