

A DMM protection pack is a bundled set of passive protection (nuts) used in traditional climbing to help protect falls. Passive pro means there are no moving parts, so the pieces work by wedging into cracks instead of expanding like cams. Because they’re simple, tough, and usually cheaper than buying singles or a full cam rack, packs are a popular way to start building a solid setup.
Most DMM packs center on Wallnuts, DMM’s classic wired stoppers that cover a wide range of crack sizes and come color-coded for fast grabs on your harness. Depending on the pack, you might also see Torque Nuts (larger passive pieces that can bite in like a cam in certain placements) or Halfnuts, a lighter, slimmer option that shines in shallow cracks where a regular nut feels too tall.
This post breaks down what’s inside the common DMM options (Wallnuts, Torque Nuts, Halfnuts, and when offsets make sense), then helps you choose sizes that match your local rock and the routes you actually climb.
After that, you’ll get beginner-friendly basics for placing nuts so they don’t walk, and for cleaning them without getting gear stuck. You’ll also learn what else you need to use them well, like a few key carabiners, quickdraws or alpine draws, and a nut tool.
Inside a DMM protection pack, the nut types you will actually use
A rack means your full collection of protection gear clipped to your harness for a climb. You build it based on routes ahead, rock type, and crack sizes. A DMM protection pack kickstarts that rack with a smart bundle of nuts. It saves money and cuts guesswork for beginners. Most packs center on Wallnuts sizes 1 through 11, the workhorses for everyday cracks.
You pick one with Torque Nuts 1-4 for wide spots or offsets 7-11 for irregular flares. Halfnuts often come separate, but they slot in for tight, shallow areas. Because packs focus on passives, they stay light and simple compared to cams. Beginners love them since nuts last forever and teach solid placement skills first. Let’s break down the nuts you’ll reach for most.
Wallnuts, the everyday nuts for most cracks
Wallnuts shine in general trad climbing because their four-lobed, disc-like shape hugs tapered cracks and constrictions perfectly. You slide them in, tug to set, and they bite with confidence. Climbers trust them since the stiff wire keeps them stable, even upside down. As passive pro, they have no springs; a nut tool pries them out later.
In addition, smaller sizes use hard brass for bite in tiny cracks, while bigger ones soften up for granite grips. Most routes call for mid-sizes like 4 through 9, so grab extras there. They handle quartzite or sandstone flares better than offsets sometimes. Picture leading a 5.8 hand crack; Wallnuts rack up placements fast without fuss.
Torque Nuts, when the crack is wide but you do not want to carry big cams
Torque Nuts look like fat, curved arrows with a twistable lobe. They tackle wide, flared, or irregular cracks where Wallnuts slip. You rotate them to cam in place, mimicking a passive cam for bomber holds. However, they add bulk and weight to your rack, yet cost less than big cams and simplify setups.
For example, a beginner on a budget builds a wide-crack kit with the Torque set 1-4 from a DMM pack. They protect offwidths or chimneys without hauling heavy gear. Still, pair them with slings to avoid wire bend. In contrast to cams, Torques stay put in mud or runouts.
Halfnuts, small and light for shallow placements
Shallow cracks barely take a full nut deep, often just a few inches. Standard small nuts flop or wobble there. Halfnuts fix that; they’re half-height versions, lighter by grams with thin wires. They nest in pods or micro-cracks where depth lacks.
You place them precise, though. Rock quality matters most; flaky edges blow out fast. Pull stays straight-on, or they skate. Beginners add a set after Wallnuts since small gear demands practice. Meanwhile, they save rack space on alpine routes.
What does a “pack” usually include, and what it does not
Packs bundle a solid run of sizes to start your rack strong. Typical ones hold Wallnut set 1-11 plus Torque 1-4 or offset 7-11. Colors match sizes for quick clips. They cover most cracks on sporty trad lines.
But packs skip key extras for safe climbing. You still need:
- Quickdraws or alpine draws to extend placements.
- Slings and locking carabiners for anchors.
- A nut tool for clean removals.
- Cordelette or extra slings for stations.
- Helmet and hands-on training.
Buy those separate. Packs suit starters on moderate granite routes, but scout your crag first.
How to choose the right DMM protection pack for your climbing and local rock
You need a DMM protection pack that fits your routes. Start simple. Look at crack sizes, rock types, and climb styles first. Single-pitch moderates demand less than multi-pitch pushes. Granite tapers call for one setup; sandstone flares need another. Ask local climbers or mentors what works at your spots. They know the tricks.
DMM offers three main packs: NUTSET1 pairs Wallnuts 1-11 with offsets 7-11 for flares. NUTSET2 adds Torque 1-4 to Wallnuts for parallels. NUTSET3 combines everything at 998g for all cracks. Pick based on what you climb most. Wallnuts cover tapers everywhere. Offsets handle granite or Utah deserts. Torques bite sandstone offwidths. For moderate single-pitch, NUTSET1 saves weight. Multi-pitch pushers grab NUTSET3.
Rules of thumb help. Tiny finger cracks take sizes 1-4. Medium offwidths need 5-8. Big chicken-wings fit 9-11. Granite like Yosemite loves tapers, so lean NUTSET1. Sandstone flares in the Peaks suit NUTSET2. Limestone mixes want NUTSET3. Always double-check with partners.
Match the pack to the cracks you see most
Scout your crags ahead. Flip through guidebook photos. Spot finger tips, hands, or fists? Walk to the base. Inspect cracks up close. Thin gear means sizes 1-6 for fingertips or pinkies. Hand-size cracks pull from 7-11.
For example, Yosemite granite runs thin to medium. Grab extras in 4-9. Utah sandstone yawns wide; stock Torques. Borrow a partner’s rack next trip. Place what fits most. You will see patterns fast. Because you climb the same spots, match your DMM protection pack to those cracks. Do not guess.
Think about rock shape and surface, not just crack width
Crack width matters less than shape. Flares kill straight nuts; they pop out. Pin scars in limestone need offsets. Smooth granite grips better than crumbly slate. Holding power comes from nut shape, rock quality, and pull direction.
Place conservative always. Marginal spots get skipped. Torque nuts twist into parallels where Wallnuts slide. Offsets bridge flares without wobble. Pull straight-on for best hold; sideways yanks walk nuts. Test every tug. Local mentors spot bad rock first.
In short, pair packs to features. NUTSET1 shines on tapered granite. NUTSET2 suits flared sandstone. Because rock varies, inspect close.
Budget and progression, build a rack in stages without buying twice
Start cheap with passives. Nuts beat cams for cash, weight, and life span. Buy a DMM protection pack first. NUTSET1 runs light at 624g. Add sizes later. Skip doubles until you climb often.
Stage it smart. Grab Wallnuts 1-11 next. Fill gaps from borrow tests. Torques or offsets come third for specials. Cams wait; nuts build skills. Used gear tempts, but inspect cables and heads close. Skip rusty history. New packs last years.
Because progression matters, nuts teach placement before cams. Single-pitch budgets love NUTSET2. Multi-pitch adds NUTSET3 later. You save without waste.
New climbers, what to buy first if you are starting from zero
Keep it basic. One DMM protection pack like NUTSET1 covers most. Add three alpine draws, two locking carabiners, and a nut tool. That is your core.
Gear alone fails. Skills save falls. Find a mentor or take a course first. Practice on toprope. Place, tug, clean. Do not lead blind
Quick checklist before you buy:
- List your top three crags and crack types.
- Borrow racks; note sizes used most.
- Ask locals for rock tips.
- Pick pack: NUTSET1 taper, NUTSET2 parallel, NUTSET3 all.
- Budget passives first; add active later.
- Train skills over stuff.
Placing nuts well, a beginner-friendly guide to safer protection
Your DMM protection pack comes alive when you place nuts right. Good habits keep falls safe and gear reusable. Start with solid rock. Skip loose flakes or crumbly edges. Follow simple steps like the DCSC method: direction of pull, constriction, surface contact, and clean cracks. These basics build confidence fast. You will place bomber pro that holds. Let’s break it down.
Find a constriction, then place for the direction of pull
A constriction is a narrow pinch in the crack. Nuts love them because they wedge tight like a key in a lock. Wide or flared spots let pieces slip, so hunt for that taper first.
Next, think about pull direction. Falls rarely yank straight down. The rope runs over edges or lips, so it angles outward or sideways. Align the nut to match. Imagine the rope snapping tight in a whip; position so the nut stays seated, not lifting out.
For example, tilt the nut sideways as you slide it in. Face the wide part down and out. That way, load presses it deeper. Good cue: even contact on all lobes. Sketchy sign: it wobbles or only touches one side. Because direction matters most, test every piece. You avoid blowouts that way.
Seat it, test it, and avoid common beginner mistakes
Push the nut in smooth. Give a sharp tug down on the wire next. It should sink snug without bouncing back. Check for stability; bounce test lightly. Stable means no wiggle.
Make sure it grabs with full surface contact, not just a tiny edge. All four lobes need rock touch. However, beginners often mess up here.
Common mistakes include:
- Flaring cracks without bite: Straight nuts pop in widening spots. Use offsets from your DMM protection pack instead.
- Over-twisting Torques: They cam tight, but force makes them hard to clean later. Twist just enough for hold.
- Loose flakes: Gear behind them peels off rock. Tap flakes first; skip if hollow.
- Tiny nuts in poor rock: Small sizes shine in solid granite, but crumbly stuff blows them out.
In short, seat firm but not forced. Good placements feel solid. Sketchy ones feel iffy, so back them up or bail.
Extend placements to reduce rope drag and keep nuts from walking
Rope drag happens when your line zigzags between pieces. It tugs gear upward or sideways over time. Nuts walk out from that force, especially small ones.
Use longer slings or alpine draws to fix it. Clip the rope straight from the nut. That keeps pull clean and direct. In addition, extensions prevent snags on sharp edges.
Traversing or zig-zag cracks need this most. Picture a diagonal roof crack; short draws curve the rope bad. Long ones let it run true. As a result, your DMM protection pack stays put.
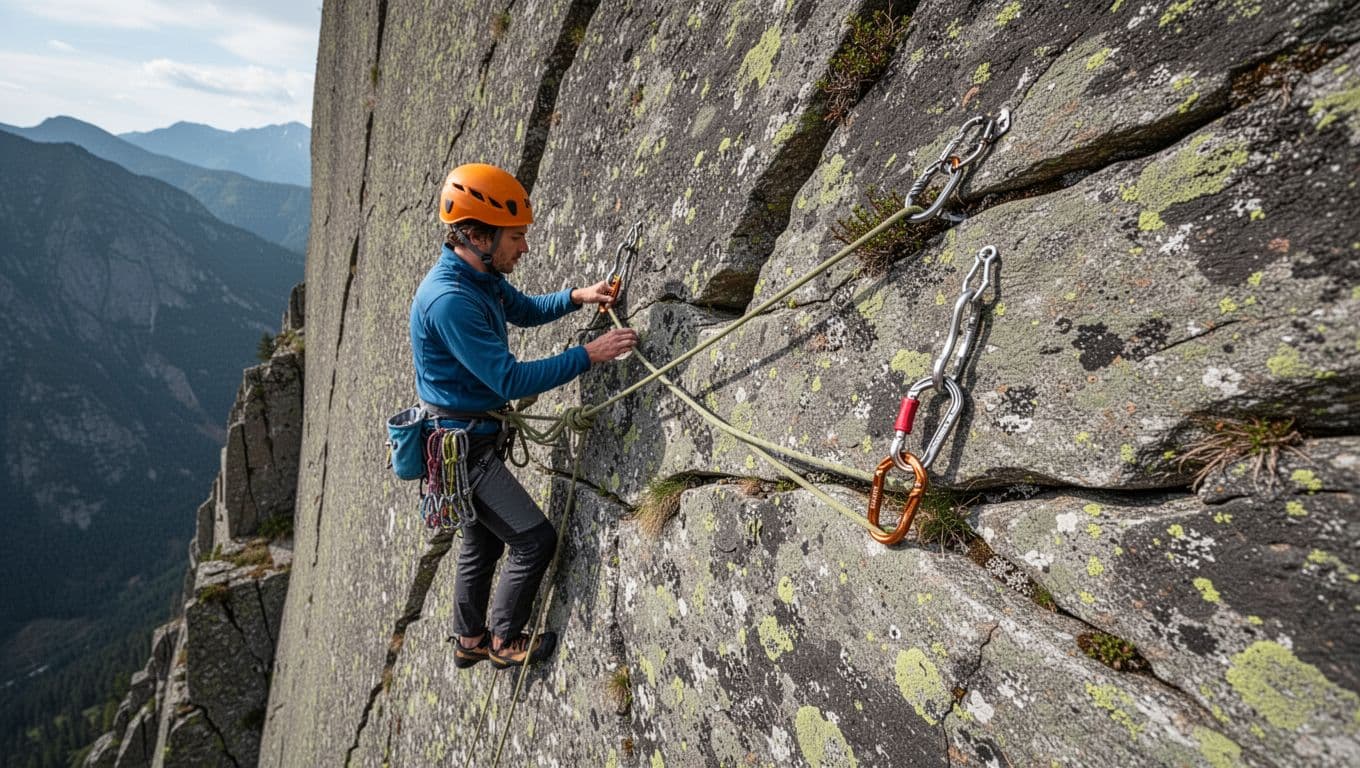
Pack three to five alpine draws with your nuts. Clip them now. You cut drag and risk.
How to clean nuts without getting stuck or damaging the rock
Cleaning follows the same logic as placing: reverse the load. Stay on belay or clipped always. Position off to the side; don’t stand under a yanking leader.
Grab your nut tool. Hook the thin end under the nut first. Tug the wire downward, then twist side to side. Tap the tool from different angles if stuck. Patience wins; force chips rock.
Communicate before you drop anything. Yell “rock” if gear flies. Over-seated nuts happen from hard falls or poor spots. Sometimes, leave the piece. Safety beats a stuck nut.
Practice on toprope first. Good cleaning keeps your DMM protection pack ready. You save time and rock too.
What else you need with a DMM protection pack to climb trad responsibly
Your DMM protection pack gives you solid nuts for cracks. However, nuts alone won’t keep you safe on trad routes. You need a smart racking system and extra gear to clip them right. In addition, learn anchor basics to build stations that hold. These pieces turn a basic pack into a full setup. Because trad demands quick access and clean pulls, pick gear that matches. Start with simple additions. They make all the difference.
Racking nuts so you can find the right size fast
Nut racking carabiners keep your DMM protection pack organized on your harness. Clip one carabiner per size group. Sort smallest nuts on your left hip, largest on the right. Colors line up that way for fast grabs mid-route.
Keep the system the same every climb. Muscle memory kicks in when stress hits. As a result, you grab size 6 without looking. Beginners, try this tip: keep small nuts (sizes 1-3) on a separate mini-carabiner. They hide easy in the mix otherwise.
Pack four to six lightweight wire-gate carabiners just for nuts. They weigh little but save seconds. Meanwhile, test the setup on practice laps. You will rack faster each time.
Carabiners, slings, and quickdraws, the unsung heroes
You clip nuts to your rope with quickdraws or slings. Short quickdraws work for straight cracks. However, wandering routes need longer alpine draws, 24 inches or more. They cut rope drag that walks nuts out.
Slings extend placements too. Double them for length or girth hitch for security. Locking carabiners shine at belays and anchors. They gate shut under load, so no cross-load slips.
Grab six to eight total: four alpine draws, two slings, two lockers. They keep pulls clean. Because drag tugs gear loose, extend every piece. Your DMM protection pack stays bomber that way.
Anchors and belays, where nuts can help and where they should not be forced
Nuts build anchors when placements bite solid. Use two or more in good rock for redundancy. Equalize them so force shares even. However, never force marginal nuts; skip weak spots.
Direction of pull matters most. Align pieces for the rope’s angle. Solid granite constrictions hold best. Flaky edges fail fast, so test each tug.
Learn from a qualified instructor or partner first. They spot bad rock you miss. Practice on toprope anchors before leading.
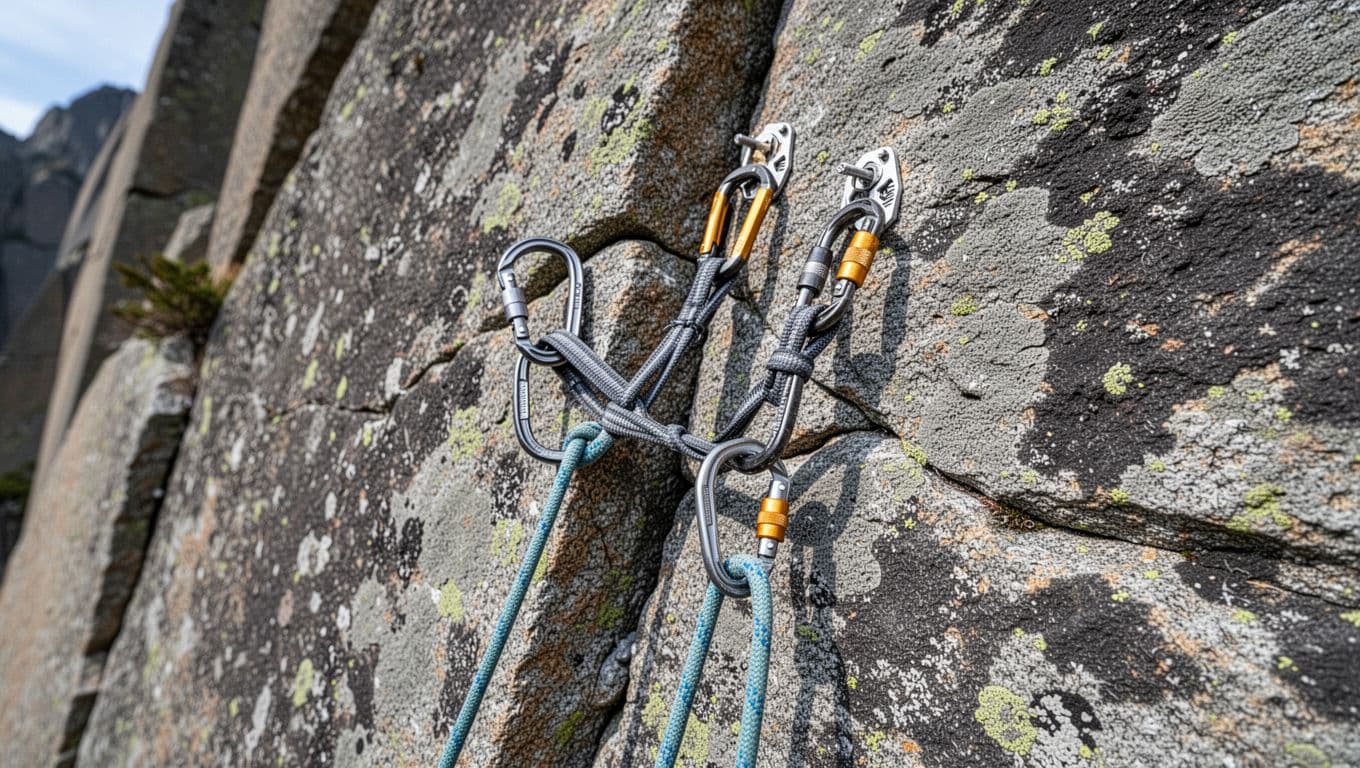
In short, nuts help anchors with good judgement. Redundancy saves falls. Build skills slow; gear follows.
Care, inspection, and smart upgrades so your nut set lasts for years
Your DMM protection pack deserves regular attention. Proper care keeps nuts bomber for seasons. DMM stresses checks before every climb. Dirt hides wear, so clean first. Then inspect close. Simple habits extend life and build safe habits. In addition, smart storage spots issues early. After a season, tweak based on real use. You stay light and skilled.
Inspect the heads and cables, and know when to retire a nut
Check every piece before you rack up. Look at heads for cracks or bad deformation. Deep grooves mean retire it. Bent lobes or flat spots weaken holds too.
Cables take abuse, especially on Halfnuts. Spot frayed or kinked wires right away. Corrosion pits metal fast, so scrub salt from sea cliffs. Rockfall dents show as gouges or sharp edges.
If history stays unknown, play safe. Major falls or impacts demand caution; retire those nuts. DMM says replace on doubt. In short, sharp eyes save falls.
Cleaning and storage basics that prevent hidden damage
Rinse grit after dirty routes. Use warm water and mild soap. Dry fully before packing. Wet gear breeds rust.
Skip chemicals or damp bags. Salt speeds wear, so coastal climbers clean extra. Organized storage helps too. Spot problems fast that way.
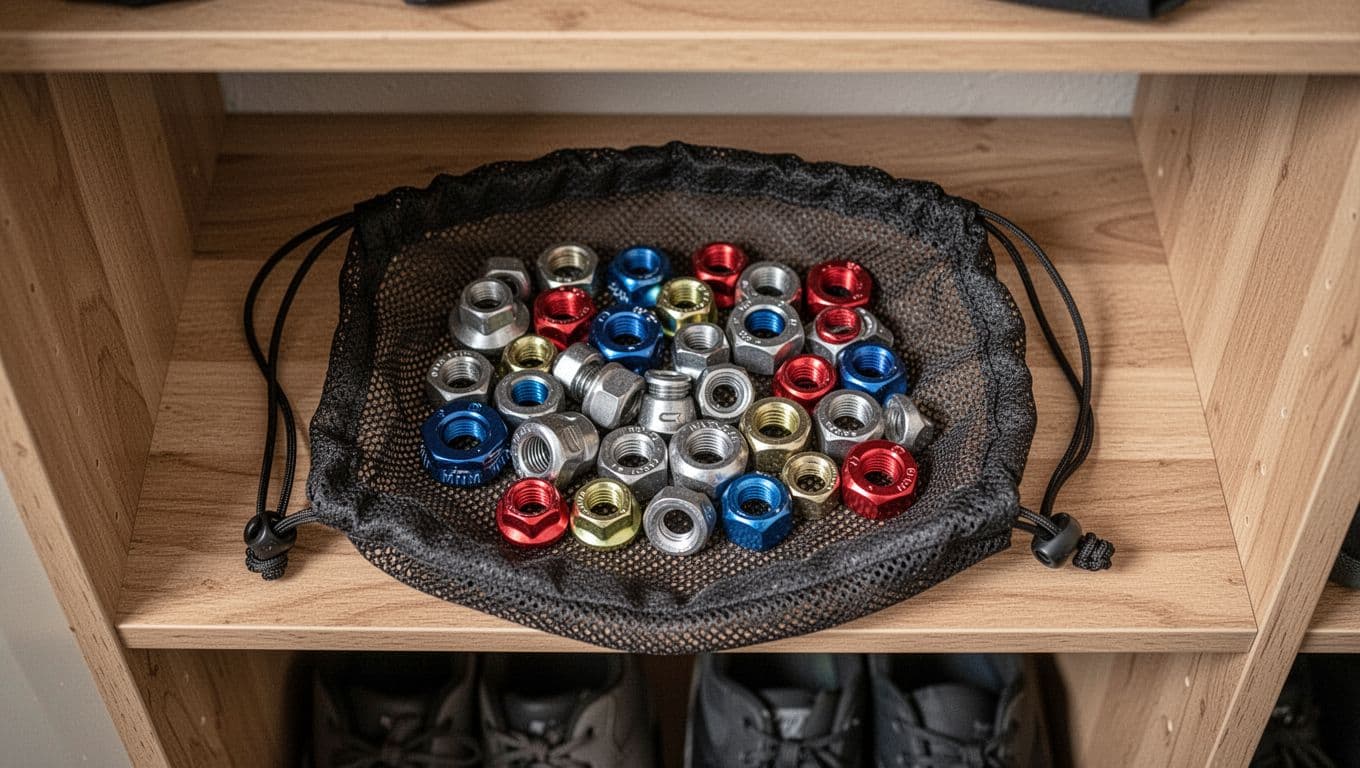
Store loose, away from sun or pests. Crammed racks deform heads over time. Because care pays off, your DMM protection pack lasts longer.
Upgrade path after your first season, fill the gaps you actually feel
Track sizes you burn through first. Note empty spots on your harness. Wide cracks or tiny seams show weak links too.
Add singles where needed. Duplicate mids like 5-8 for busy routes. Then eye cams for must-haves, or specialties like more offsets.
Keep it simple. Skills trump gear. Test borrows at your crags. As a result, upgrades match your climbs. Next, hit local spots. Log placements. Build from there.
Conclusion
A DMM protection pack gives you a smart start with passive nuts like Wallnuts for tapered cracks, Torque Nuts for wide flares, and Halfnuts for shallow spots. You pick the right one, like NUTSET1 for granite tapers or NUTSET3 for mixed rock, by scouting your local crags first. Solid placements follow simple rules: find constrictions, match pull direction, seat with a tug, and extend with alpine draws to stop walking. Add carabiners, slings, and a nut tool for clean runs. Regular checks keep your gear bomber for years.
Because safety comes first, build skills before big leads. Nuts teach placement basics that last.
Here is your next step list:
- Practice placements on boulders or toprope, close to the ground.
- Get feedback from experienced climbers or take a course.
- Borrow racks at your spots, then buy singles to fill real gaps.
Back to Climbing Nut Reviews
Recommended Products for Trad Climbing
These products can support safer climbing, belaying, rappelling, and emergency readiness.
Affiliate disclosure: As an Amazon Associate, TradClimbers may earn from qualifying purchases at no additional cost to you.
Keep exploring helpful trad climbing, gear, safety, and technique resources.
- A Climber’s Guide to Rock Climbing in Thailand
- A Trad Climber’s Guide to the Isle of Skye Ridge
- Hueco Tanks Rock Climbing: hueco tanks rock climbing Essentials
- A Climber’s Guide to The Nose of El Capitan
- The Top 8 Unforgettable Climbing Routes El Capitan Has to Offer in 2026
- Yoga for Climbers: Boost Strength, Flexibility, and Recovery | yoga for climbers