

If you’ve seen the name dmm peenuts and done a double take, you’re not alone. They’re climbing protection, not a snack, and they’re built for the kind of placements that make regular nuts feel useless. Think tiny, offset micro nuts you slot into thin seams, flared cracks, and old pin scars where nothing seems to sit right.
That’s the problem they solve: real rock cracks aren’t always clean and parallel. In quarry lines, compact granite, slate, or any feature that’s shallow and uneven, standard symmetrical nuts can skate, rotate, or bottom out before they bite. Peenuts use an asymmetric taper, so one side can key into the flare while the other side bears against a better edge, which often turns a “no gear” section into something you can actually protect.
In the rest of this post, you’ll learn what makes DMM peenuts different from other micro nuts, how to pick the right size fast, and how to place and seat them so they hold. It’s written for new trad climbers who want clear fundamentals, and for experienced leaders who want sharper tips for thin, weird cracks, plus the common mistakes that make tiny gear fail.
What DMM Peenuts are and when you would reach for them
DMM Peenuts are offset micro nuts, small aluminum alloy wedges on thin wires that climbers use for trad protection in the thinnest, trickiest cracks. You reach for them when standard nuts won’t hold because the rock doesn’t offer parallel sides. They excel in shallow seams, flared cracks, pin scars, and uneven spots where you need gear but nothing fits right. Plus, the full set weighs just 61 grams, so they rack light without adding bulk.
Offset shape, in simple terms, why it fits where regular nuts slip
Regular nuts have equal tapers on both sides, so they work best in clean, parallel cracks. Offset nuts like DMM Peenuts break that mold; one side stays narrow while the other flares wider. Picture a doorstop that’s thinner on one edge; it slips under the door easily, then wedges tight because the thick side presses against the frame.
This asymmetric design lets the narrow side enter shallow or flared spots first. Then, the wider side catches the constriction. As a result, Peenuts bite where symmetrical nuts rotate, slip out, or fail to seat. You gain protection in places that look impossible at first glance.
The kinds of rock features they shine in: flares, peg scars, and thin seams
DMM Peenuts turn problem placements into solid pro. Here are the spots where they deliver most:
- Flared cracks: These widen outward or downward, so regular nuts walk or pop. Peenuts key the narrow entry with one side, then lock the flare with the other, giving you confidence on runout slabs.
- Peg scars: Old pin holes leave pitted, irregular edges that swallow gear unevenly. The offset taper matches those funky shapes, so you protect scars that once forced bold leads.
- Thin seams: Super-narrow, shallow grooves under 14mm offer no bite for bigger nuts. Peenuts squeeze in and hold firm, especially in compact granite or slate where falls feel sketchy.
In short, they find gear where you thought none existed. Rack them for tricky sections, and suddenly those “no pro” pitches become doable.
Sizes, colors, and strength ratings, what the numbers actually mean
DMM Peenuts come in five sizes, #1 to #5, each with a distinct color for quick grabs off your rack. Smaller ones tackle the tiniest cracks; larger sizes fit up to about 14mm. Colors match the cable labels too, so you spot them fast mid-pitch.
Strength ratings use kN, a lab-tested measure of how much force the nut holds before failing. For example, 4kN equals about 900 pounds; it shows peak lab strength, not every real-world fall. Always prioritize good placements over raw numbers, since rock quality and seating matter more. Smaller Peenuts have lower ratings because they’re tiny, but solid technique keeps them reliable.
Here’s the breakdown:
| Size | Color | Strength | Weight | Range |
|---|---|---|---|---|
| 1 | Red | 4kN | 8g | 6.5-11.5mm |
| 2 | Dark Grey | 5kN | 9g | 6.8-12.1mm |
| 3 | Purple | 5kN | 10g | 7.8-12.7mm |
| 4 | Green | 8kN | 16g | 8.9-13.2mm |
| 5 | Silver | 8kN | 18g | 9.2-13.9mm |
This table helps you match size to crack. Carry the set for full coverage; it weighs little but punches above its size.
Why climbers like Peenuts, and what they do not do well
Climbers grab DMM Peenuts because they fit odd cracks that laugh at regular nuts. The offset shape slips into flares and scars, then locks tight. They rack light at 61 grams for the set, place fast with color codes, and pair well with other micros for full crack coverage. You protect runouts that once forced soloing. However, they aren’t perfect. Tiny size means tricky placements demand skill, and they hold less force than bigger gear. Overtrust them, and trouble follows. In short, treat Peenuts as smart backups, not solo saviors.
Where they can feel more secure than a standard micro stopper
Offset shapes create solid seats in uneven rock. The narrow side keys into a flare first. Then the wide side presses the constriction. Standard nuts often rotate or slip there because both sides match. Peenuts stay put instead.
Many climbers rack them alongside regular micros. This combo covers more shapes. You slot a symmetric nut in parallel spots, then add a Peenut nearby for the funky bits. As a result, your rack handles granite slabs or slate seams better.
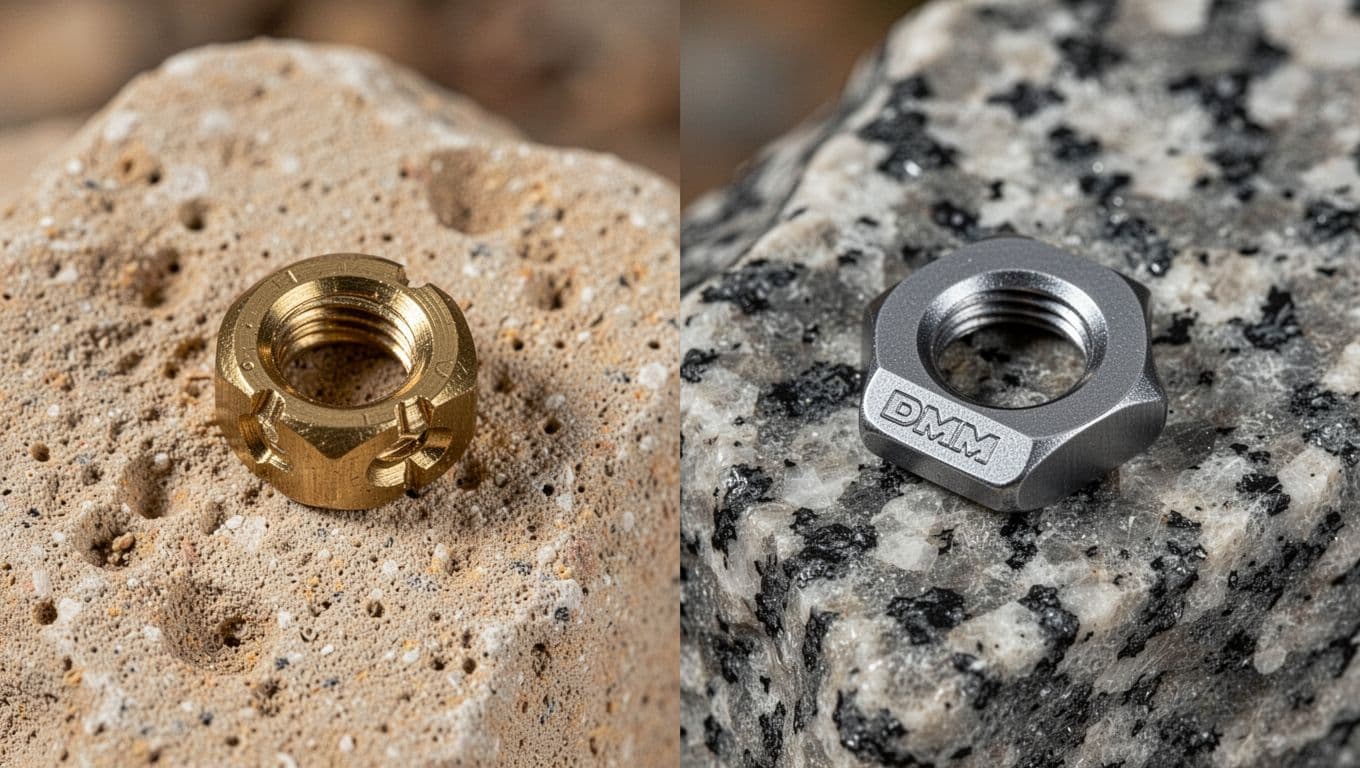
Alloy vs brass, what that changes in real life
DMM Peenuts use aluminum alloy, which stays durable over many uses. Brass nuts deform more because they soften under pressure. Climbers notice alloy seats clean and precise, especially in hard granite. Brass might grab softer sandstone with visible bite marks.
Cleaning differs too. Alloy pulls free without sticking, even after damp routes. Brass can scar rock lightly but wedges tighter in crumbly spots. Crack texture shifts the feel. Smooth seams favor alloy’s edges. Rough walls let brass conform better sometimes.
Pick based on your rock. Alloy handles most granite and mixed pitches well. Still, test both; no material wins every time.
Common mistakes with micro nuts that can make any piece feel sketchy
Bad placements turn solid micros into bombs. Avoid these pitfalls to keep Peenuts reliable.
Here are the top errors climbers make:
- Drop into flares without constrictions. Widening cracks let nuts walk out. Always find a pinch or edge first.
- Skip the seat tug. Just clipping skips the bounce that locks it. Give a sharp downward yank every time.
- Yank sideways during removal. Pull straight back, or it binds. Side force damages rock and gear.
- Ignore rope drag. Sharp bends walk pieces down. Clip direct and extend if needed.
- Bury too shallow. Nuts need full contact. Half-in means half-protection.
Micro gear demands practice. Use it as backup for skilled eyes only. Big falls test limits fast, so build extended pro below.
How to place DMM Peenuts step by step (and how to test the placement)
You can place DMM Peenuts right every time with a few clear steps. These tiny offset nuts need care because they protect thin cracks. Practice them first on boulders or low crags, close to the ground. Get tips from a mentor too. That way, you build skills safely before trusting them high up. Now, let’s break it down.
Finding the right constriction, what you are looking for with your eyes and fingers
Scan the crack first. Look for a narrowing spot, a small notch, or any change in width. These spots let the Peenut grip tight.
Run your fingers along the seam. Clear out dirt or grit with a quick brush. Check that the rock feels solid, not crumbly. The wire needs a clean path too. Avoid sharp edges that could cut it.
A good spot shows even sides or a slight flare. Your fingers spot what eyes miss. Probe gently until you feel the pinch.
Setting the nut so it does not lift out when you move above it
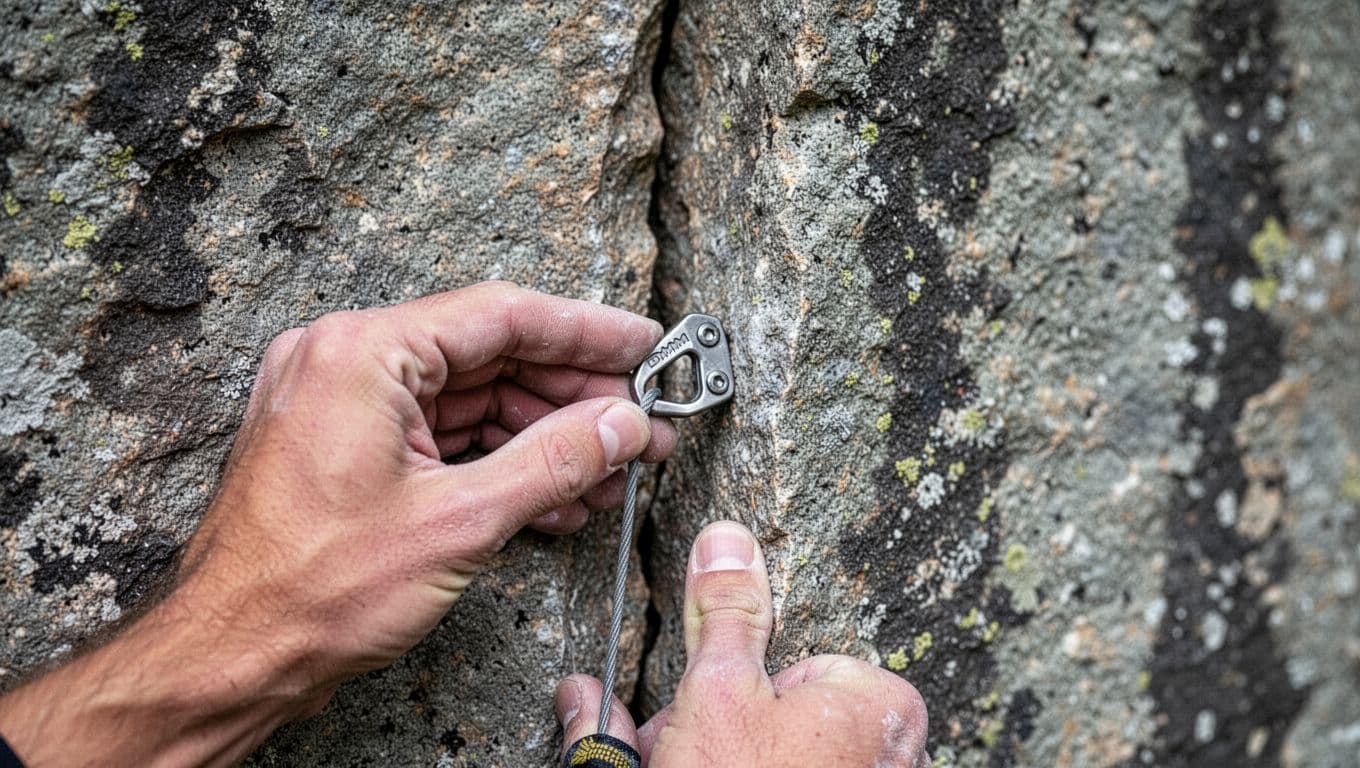
Pick the right size first. Slide the narrow side into the crack. Twist it so the offset matches the rock’s shape.
Push it in halfway deep. Then, give a firm tug downward on the wire. Pull in the direction of a fall, usually straight out or down the crack. This seats it solid.
Align the wide side against the constriction. It locks in place now. Add an alpine draw or long sling next. This cuts rope drag and stops the nut from walking out later.
Quick placement checks: depth, direction of pull, and how it would fail
Test every placement before you climb past. Use this simple checklist to spot issues fast.
- Depth: Does the middle of the nut touch rock on three sides? Too shallow means it pops easy.
- Direction of pull: Tug hard downward again. Does it hold without moving? Imagine your fall line.
- Failure mode: Picture a whip. Would it rotate, slide, or cam out? Skip smooth flares or weak rock.
Micro nuts like Peenuts can look perfect but fail shallow. Back them up with another piece nearby. Rate it 3 out of 5 at least: solid tug, no wobble. Clip the wire, then move on.
How to rack, carry, and choose a Peenuts set for your style of climbing
You just learned how to place DMM Peenuts solid. Now think about getting them on your rack first. A smart setup lets you grab the right size fast during thin-crack cruxes. Most climbers start simple, then tweak based on their routes. Let’s break it down so your gear matches your leads.
Full set vs doubles, a simple buying guide
Most new trad leaders buy the full DMM Peenuts set of sizes 1-5. It costs around $92 and weighs just 61 grams total. This covers every thin crack from 6.5mm to 14mm, so you protect flares, scars, and seams without gaps. Start here because routes vary; one pitch might eat size 1 reds, the next skips them.
Track your placements over ten routes. Note which sizes you use most in your logbook or phone. Crack specialists on granite slabs often double #2 and #3 greys and purples next. They hit flared tips often, so extras prevent digging mid-pitch. Peg-scar hunters double #4 greens for those pitted edges.
Newbies stick to one full set. It keeps weight low and builds skills across sizes. Experienced runners double only after data shows repeats, like two #1-2 for alpine micro-routes. In short, full set first; add doubles later for your rock.
Racking tips so you can grab the right size fast
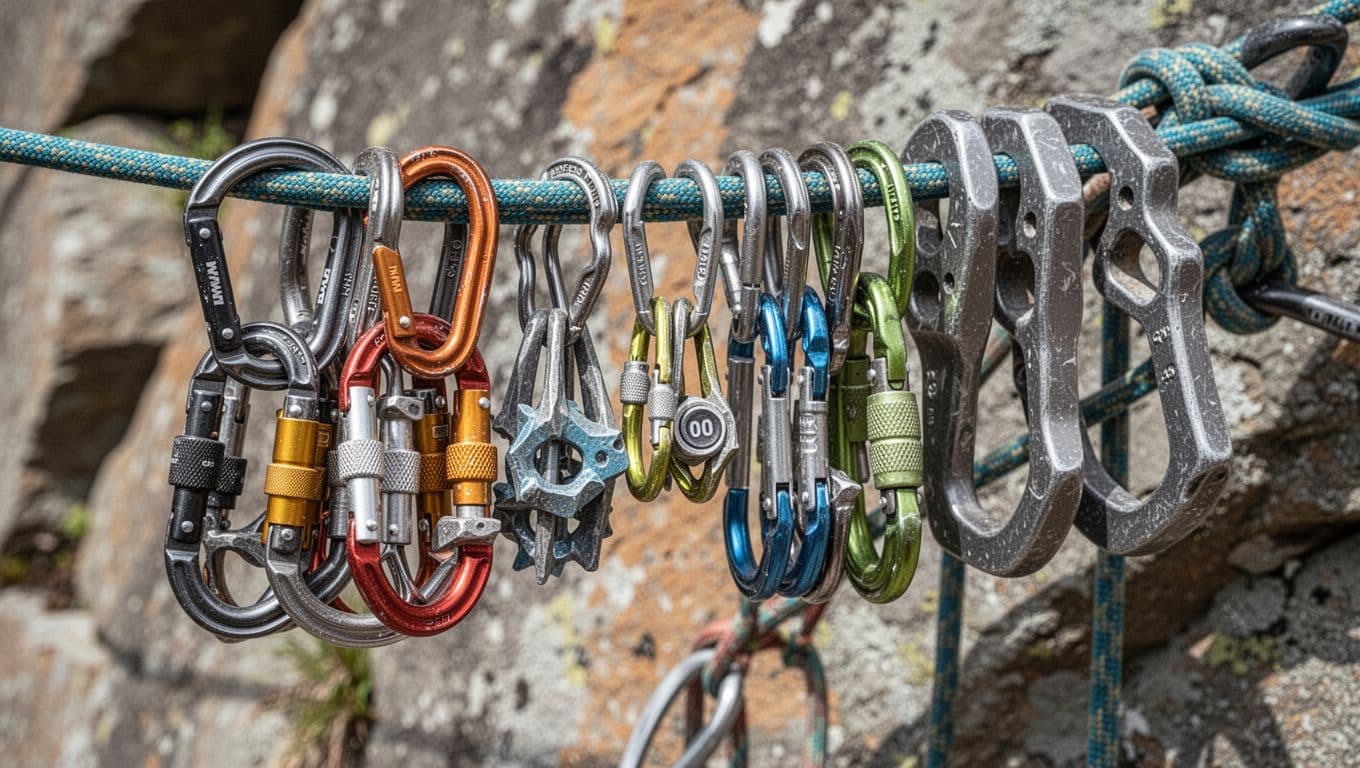
Clip your DMM Peenuts to one small wiregate carabiner. Keep it dedicated, away from big nuts or cams. This speeds crux grabs because you skip the tangle hunt. Organize smallest to largest, red #1 left to silver #5 right. Colors match cable labels, so you spot purple #3 blindfolded almost.
Hang that carabiner low on your harness rear gear loop. Micro wires stay stiff for overhead spots, and they avoid snags on slings. For doubles, split them: smalls front hip, mediums back. New trad folks rack one set gear-loop low. Crack pros add a second carabiner nearby for repeats.
Separate Peenuts from larger stoppers. Big wires knot micros easy, so crux sections slow down. Use that nut-tool carabiner on your shoulder strap too. As a result, you place fast and clip quicker. Practice racking at home; it pays off up high
What else to pair with them: small cams, regular offsets, and micro nuts
DMM Peenuts shine as part of your small-gear system. They don’t replace cams or stoppers; they fill thin gaps. Pair #1-3 Peenuts with small cams like Dragon 00 or #1 for parallel tips those miss. Cams expand wide; Peenuts key flares beside them.
Add regular offsets like HB Alloys 7-11 for scars over 12mm. Peenuts handle under-14mm; bigger offsets bridge to cams. Stack Wallnuts 1-6 next to Peenuts for clean granite constrictions. New leaders rack Peenuts plus Wallnuts 1-4 and one small cam set. Crack climbers add doubles and medium offsets for full coverage.
Peg-scar routes need Peenuts with brass micros for soft edges sometimes. Always extend runners on mixes to cut drag. This combo protects thin pitches light. Your rack stays bomber without bulk.
Care, inspection, and retirement, keeping micro nuts safe over time
DMM Peenuts handle tough cracks well, but they wear out over time. You keep them reliable with quick checks before and after each climb. Spot issues early, and you avoid failures on lead. Follow manufacturer guidelines always; if unsure, email DMM or ask a shop expert. Heavy use or falls shorten life, so retire pieces fast when needed.
What to inspect every time: wire strands, swage, and sharp edges
Check your DMM Peenuts before every outing. Run your fingers over the wire and nut head. Look close under good light. This routine catches problems before they bite.
Use this simple checklist each time:
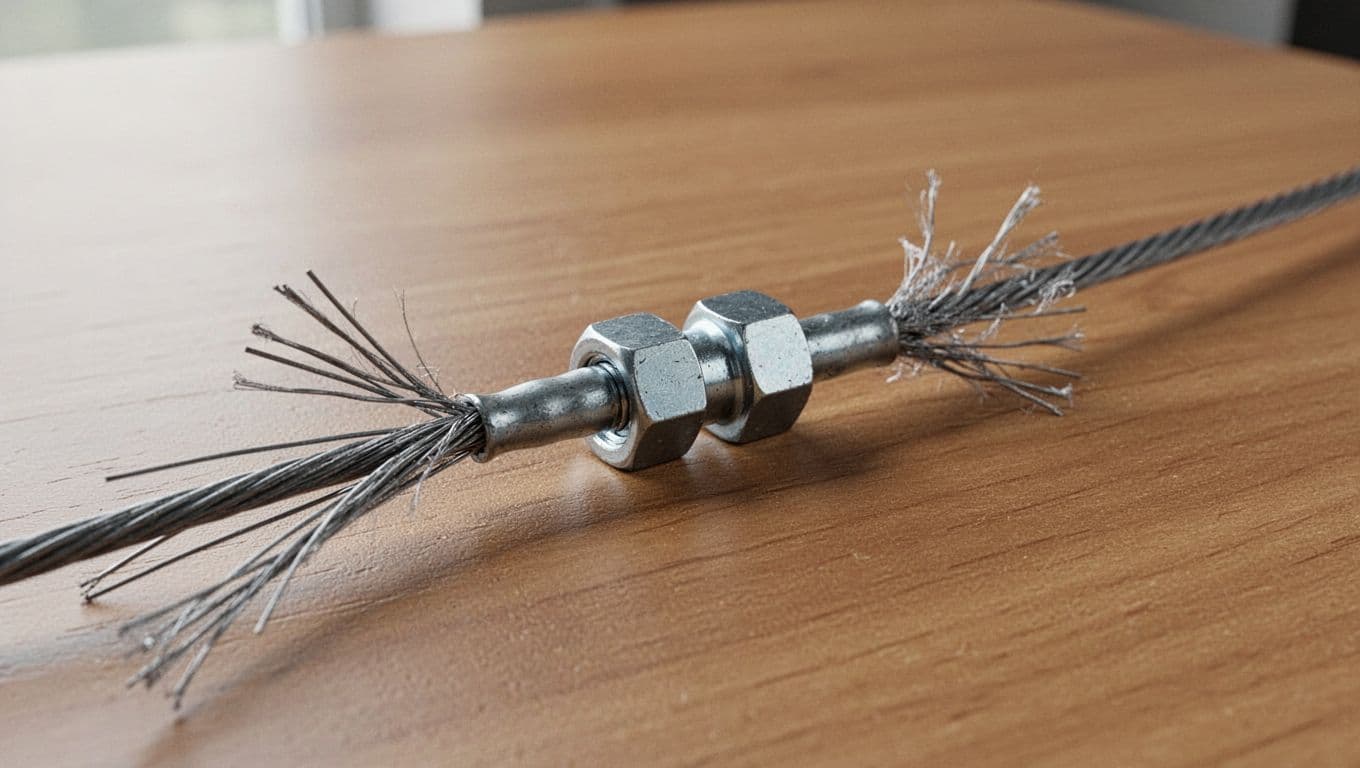
- Wire strands: Fraying shows as loose, splayed fibers that look fuzzy or bird’s-nested. It matters because weak strands snap under load and drop your pro.
- Swage crimp: Feel for pulls or bends where wire meets the sleeve. A loose swage lets the wire slide and fail.
- Sharp edges or burrs: Rub your thumb over the nut head and wire. Burrs feel rough; they cut slings, skin, or rope sheaths fast.
- Nut body: Scan for deep grooves, dents, cracks, gouges, or rust. These weaken the hold.
Frayed wires kill strength quick. Bent swages bend more under stress. Always retire if you spot any doubt.
After a fall or heavy load, what to do next
A big fall or shock load tests your gear hard. Pull that DMM Peenut right away. Inspect it close, then decide.
Look for bent or kinked wires first. Check if the swage pulled loose. Scan the nut head for new dents, gouges, or deep grooves. Rust speeds up after wet falls too. Even small changes signal weakness.
When in doubt, retire it. No piece bounces back fully from a factor-two whipper. Most nuts last up to 10 years unused, but one heavy load cuts that short. Label retired gear “BAD” with tape, then recycle or bin it. Better safe than sorry on your next lead.
Cleaning and storage habits that make gear last longer
Dirt and damp ruin micros fast. Clean your DMM Peenuts after every trip, especially sea cliffs or salty routes. Simple steps keep them ready.
Rinse grit and salt with warm water, max 30°C, and mild soap. Use a soft brush on the nut and wire. Rinse well, then air dry fully; hang them up if needed. Skip harsh chemicals or machine washes.
Store in a cool, dry spot with good air flow. Use a breathable mesh bag on a closet shelf. Avoid hot cars, damp basements, backpacks, or chemical smells. Heat warps wires; moisture brings rust.
Good habits extend life years. Check stored gear before use too. As a result, your set stays bomber pitch after pitch.
Conclusion
DMM Peenuts fill those thin, irregular cracks that trip up standard nuts. Their offset shape grips flares, peg scars, and seams from 6.5mm to 14mm, so you protect runouts that once felt sketchy. You now know how to pick sizes, seat them solid with a sharp tug, rack them fast, and inspect for wear. As a result, your thin-crack game levels up without extra weight.
Trad climbers on granite slabs, slate routes, or peg-scar classics benefit most. New leaders gain confidence in “no pro” spots; veterans sharpen placements for bomber backups. However, beginners might wait until they master bigger nuts first. Micro gear demands sharp eyes and steady hands, so don’t rush it.
Practice placements low on boulders or top-ropes next. Learn from experienced partners or take a class on trad fundamentals. Build those skills before you clip DMM Peenuts high. In short, they add real security to tricky leads.
Back to Climbing Nut Reviews
Recommended Products for Trad Climbing
These products match the equipment and gear topics covered in this article.
Affiliate disclosure: As an Amazon Associate, TradClimbers may earn from qualifying purchases at no additional cost to you.
Keep exploring helpful trad climbing, gear, safety, and technique resources.
- A Climber’s Guide to Rock Climbing in Thailand
- A Trad Climber’s Guide to the Isle of Skye Ridge
- Hueco Tanks Rock Climbing: hueco tanks rock climbing Essentials
- A Climber’s Guide to The Nose of El Capitan
- The Top 8 Unforgettable Climbing Routes El Capitan Has to Offer in 2026
- Yoga for Climbers: Boost Strength, Flexibility, and Recovery | yoga for climbers