
Trad Climbing Belay Stance Tips: Stay Safe and Solid
Picture this: You’re belaying your partner on a classic trad route when a loose rock tumbles down. Thanks to your solid belay stance, you shift just enough to dodge it, keeping the rope tight and your climber safe. That quick thinking saved the day.
In trad climbing, a belay stance is your base camp at the rock. You stand or sit braced against the terrain to handle leader falls without bolts or fixed anchors. It keeps you balanced, absorbs force, and prevents you from getting yanked off your feet.
Mastering trad climbing belay stance tips boosts your safety on runout pitches or multipitch adventures. Poor stance leads to falls or lost control; a good one lets you manage rope and rockfall with ease.
You’ll learn practical steps here, from beginners to experts. We cover choosing your spot below the first gear, body position for max stability, tethering to anchors, smart rope management, and top device setups like GriGris from fixed points.
These tips draw from real-world advice to build your confidence. Get ready to belay safer and climb bolder on any trad line.
Master Your Body Position for a Rock-Solid Belay Stance
Your body position forms the foundation of any strong belay stance in trad climbing. Picture yourself on a gritty crack like those at Joshua Tree: a sudden fall yanks the rope, but you stay planted because you nailed the athletic setup. Step your non-dominant foot forward about shoulder-width, center your weight, bend your knees softly, push hips back slightly, and keep shoulders relaxed yet ready. This fighter’s pose braces you against upward or sideways pulls, keeps you out of the direct fall line, and cuts fatigue on long pitches.
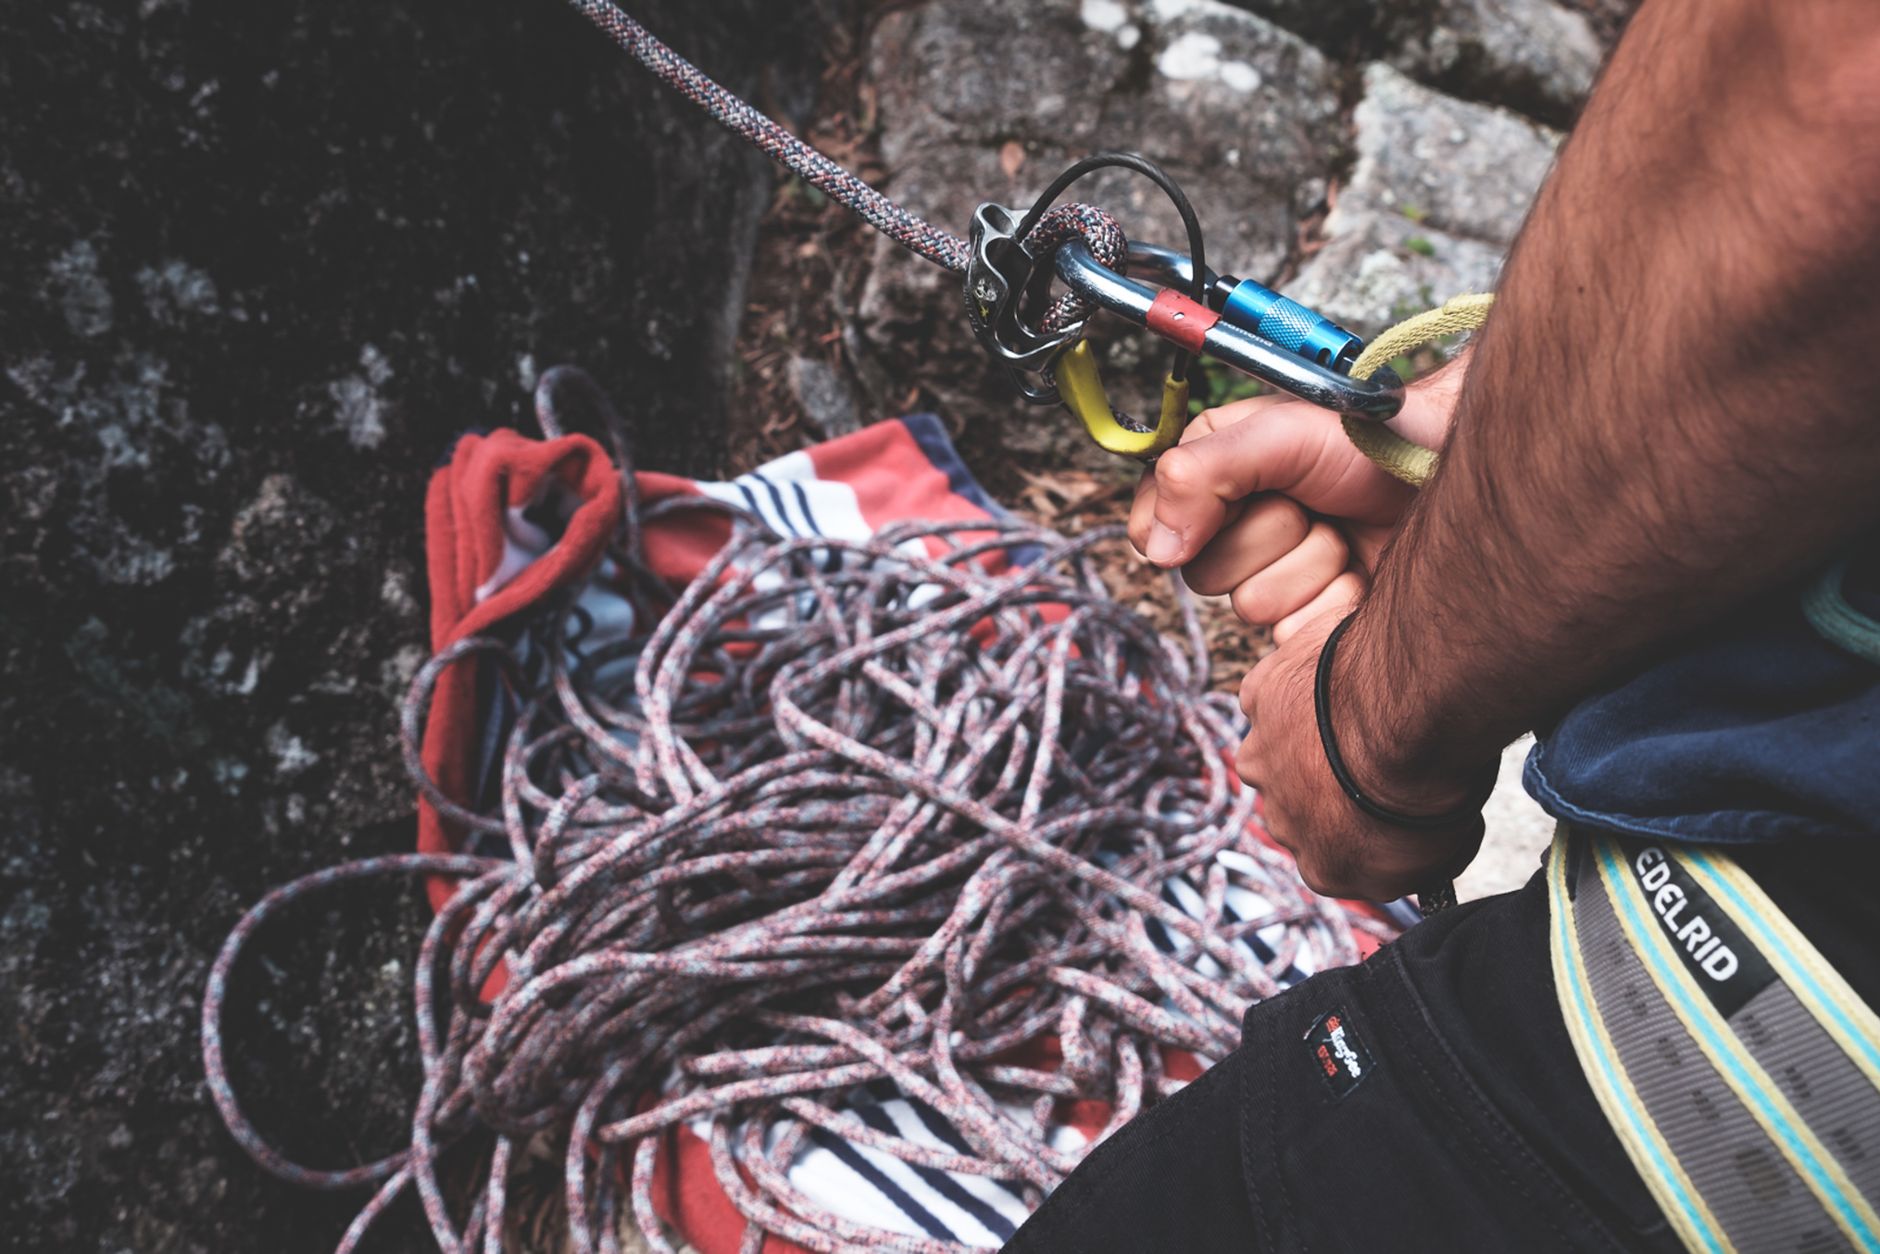
Photo by Lachlan Ross
To set it up right, follow these steps:
- Face the climb directly; plant your non-dominant foot forward on flat or stepped ground.
- Bend knees 20-30 degrees; avoid locking them to absorb shock.
- Shift weight to the balls of your feet for quick adjustments.
- On uneven terrain, like a ledge at the base of East Face on Manure Pile Buttress, wedge your back foot against a bump or rock for extra grip.
- Stay alert: scan the rockfall zone and tweak as your climber moves.
This stance gives better rope control and holds you steady without draining energy. Check REI’s belay basics for visuals that match.
Foot Placement and Knee Bend Basics
Start with your feet. Step the non-dominant one forward, like a boxer’s lead foot, heel down for stability. Space them shoulder-width; center weight over the midpoint. Bend knees softly, never lock them straight. This lowers your center of gravity and lets you flex against force.
It mimics a fighter’s ready pose perfectly. You can pivot, shuffle back, or drop low if needed. On trad routes with poor footing, like sandy ledges in the Tetons, this keeps you balanced. Soft knees soak up the jolt from a 20-foot whipper, preventing slips. Practice it ground-side until it feels natural; you’ll thank yourself mid-pitch.
Upper Body Alignment for Stability
Now align above the waist. Engage your core like you’re bracing for a punch; it locks your torso solid. Position hands in brake hand grip, rope flowing free but controlled. Lock eyes on your climber, not your feet.
For hour-long belays on multipitch epics, shift weight often to dodge slouch. Roll shoulders back, chin up. Hips back reinforces the base. This setup counters twists from off-angle falls and fights fatigue. You’ll manage micro-adjusts smoothly, staying fresh. As this guide on belay stances notes, it shares load with anchors for top safety.
Choose the Right Spot: Stay Off the Fall Line
Your trad climbing belay stance tips start with spot selection. Stand about 10 degrees off the climber’s direct path to dodge falls, rocks, or gear whips. This simple shift keeps you safe from swings while you hold the rope tight. Pick ledges, ridges, or solid ground below the first gear piece. Face the climber’s approach, test for stability, and adjust your tether for a snug connection. In gear belays, equalize three solid pieces at chest height first. You’ll catch falls better and stay planted.
Testing Ground for Secure Footing
Hunt for flat spots or natural shelves before you commit. Kick dirt away and stomp hard to check hold. Loose gravel or sandy patches spell trouble; they shift under force and send you sliding.
Follow these steps to lock in:
- Scuff the surface with your boot heel to clear pebbles.
- Jump up and down lightly; solid ground bounces back firm.
- Seek cracks, bumps, or edges to wedge your heels.
- Skip vegetated dirt; roots hide weakness.
At Joshua Tree’s slabs, test sandy cracks thoroughly. Tetons ledges demand wide bracing against wind. Solid footing absorbs the load so your body position shines.
Aligning with the Climbing Line
Spot the fall line straight down from your leader’s path. Step one pace sideways, about 10 degrees off, so pulls angle you into position, not onto your head. Tighten your tether to the master point; it counters sideways yanks.
On crack climbs like Joshua Tree runs, offset lets rope run clean. Face routes need more side shuffle to avoid slab slides. Once past three clips, center under anchors. Check Climbing’s fall line guide for visuals. This setup boosts safety on runouts.
Tether Safely with the Clove Hitch
In trad climbing belay stance tips, tethering keeps you glued to the anchor during falls or shifts. The clove hitch shines here. It uses your rope for a short, adjustable link to the master point. This setup lets you move freely in your stance yet locks tight under load. Keep the tether under 3 feet so angles stay below 90 degrees; it protects gear from sharp pulls. Unlike slings, the clove hitch adjusts fast as your partner progresses or you tweak position. Tests show it holds strong, even weighted. Perfect for runouts at Joshua Tree or Tetons ledges where stance changes quick.
Clip to the central anchor ring or equalized master point. Short tethers cut swing risk and share force with the setup. You’ll stay secure without bulky PAS systems. Check Climbing’s clove hitch guide for pro insights.
Step-by-Step Clove Hitch Tying
Tie it right every time with this sequence. Start with 4-6 feet of rope tail from your belay loop.
- Form a loop in the rope; hold it like an “S” shape with the tail over the standing part.
- Twist the loop once away from you; pass the twist behind the standing rope.
- Pull the twisted loop through the first loop; it forms a T-shape.
- Clip the new loop to your anchor ring; dress it flat and snug.
- Yank both strands hard to cinch; it locks under tension.
Adjust length by adding or removing twists before clipping. Shorten for tight stances; lengthen as you back off the fall line. Practice on the ground: tie 20 reps blindfolded. Common errors? Loose twists slip; always dress flat. Over-twist jams it. Benefits hit home in falls: it grabs instantly, unlike figure-8s. See Fox Mountain Guides on multipitch tethers for real scenarios. Master this, and your belay stance stays bombproof.
Manage Your Rope Like a Pro
Rope tangles kill your focus in a trad climbing belay stance. One snag mid-fall, and you fumble when seconds count. Keep it neat on your brake-hand side by your feet. This setup feeds slack smooth, cuts drag, and speeds reactions. Stack coils flat to dodge knots. Tie a stopper knot at the rope end; it blocks snags. Minimal slack stays ready without excess pull. In wind or doubles, pile coils in one spot. Neat rope means you spot issues fast and pay out clean. Practice builds habits that save belays.
Stacking Coils Without Tangles
Use the hand-over-hand method for tangle-free stacks. Pull slack with your brake hand low, always down for control. Remember PBUS: pull to your chest, brake down, under the device, slide to feed.
Here’s how:
- Grab rope ends; flake into flat pancakes at your feet, brake side.
- Work hand-over-hand; flip each coil outward to avoid twists.
- Stack 6-8 inches high max; keep live rope free.
This keeps coils from rolling into cracks or wind. For doubles, alternate colors in separate piles. Windy Tetons? Tuck under your knee. Peak Mountaineering’s belay tips show it clean.
Drill it: At home, flake 60 meters on carpet 10 times. Clip a GriGri; feed imaginary slack. Time yourself untangling zero. Outdoors, repeat on short topropes. You’ll stack pro fast, belay solid. Neat coils equal quick pulls in runouts. Your partner climbs free; you stay sharp.
Pick the Best Belay Device Setup for Trad
Your belay device setup anchors your trad climbing belay stance tips. In gear-only belays, pick one that catches falls fast, adds friction without rope rub, and lets you lower smooth. Always keep your brake hand down, thumb up for control. Practice every setup on the ground first; real falls test it. Wrong choice spikes force on anchors or slips rope.
Re-Directed vs Direct Belay Methods
Redirected belays route rope through an anchor carabiner above you, then to your device on the harness. Use this in cramped trad stances or when anchors sit high; it pulls rope straight, cuts rub on rock edges. Direct ties straight from harness. Save it for spacious ledges where pulls stay low angle.
Here’s a quick comparison:
| Method | Pros | Cons | Best Trad Use |
|---|---|---|---|
| Redirected | More friction, easier lowering, less rub | Extra gear wear, slight drag | Tight spots, high anchors |
| Direct | Simpler, faster setup, less weight | Higher force on body, rub risk | Open ledges, low pulls |
For lowering with redirects, clip a fat carabiner at the master point; feed slack slow. See Petzl’s GRIGRI belay guide for details. Redirect shines on Joshua Tree runouts.
Using Guide Mode Devices Safely
Guide mode on devices like the Petzl GriGri or ATC flips to auto-lock for hauling the second. Benefits? It grabs falls instantly, frees your hands for anchors. Works with single or twin ropes; just thread both strands through.
Warning: Never lead belay in guide mode; stick to standard for leaders. Practice simulated falls at home: clip to a beam, weight a pack, let it drop. Builds muscle memory. For twins, match rope diameters. Check VDiff’s guide mode tutorial for visuals. In multipitch trad, it speeds seconds up safely. Master it, and your stance stays rock-solid.
Common Belay Stance Mistakes and How to Fix Them
You’ve got the basics down from our trad climbing belay stance tips, but small slips can turn a good setup bad. In trad routes, these errors pack extra punch. Runouts mean longer falls, and gear anchors flex under load. Spot them early, fix them fast, and you’ll belay like a pro. Here are the top five pitfalls climbers face, with quick fixes.
- Standing in the fall line: You plant right under your leader’s path, inviting rocks or swings. Shift 10 degrees sideways now. Test the new spot with jumps; it dodges debris and angles pulls safely.
- Loose tethers: A long or sloppy clove hitch lets you swing into walls. Shorten to under 3 feet and dress it flat. Yank both strands to cinch; it shares load with anchors instantly.
- Messy ropes: Coils roll into cracks or tangle mid-pull, stealing your focus. Stack flat pancakes brake-hand side with hand-over-hand flakes. Tuck ends under your knee in wind; feeds clean every time.
- Poor brake position: Hand floats up or thumb pushes down, risking slips. Lock brake hand low, thumb opposed. Practice PBUS drills daily; muscle memory saves seconds in falls.
- Ignoring hazards: You skip testing loose dirt or overlook rockfall zones. Stomp ground firm and scan above before settling in. Wedge feet against bumps; spots hidden weak spots quick.
Trad amps these risks because no bolts mean you absorb more force alone. Build habits like pre-belay checks and partner shout-outs. Check Climbing’s common belay errors for real stories. Nail these fixes, and your stance stays unbreakable. Your climbs get safer, bolder.
Conclusion
You’ve got the core trad climbing belay stance tips locked in now. Nail your body position with knees bent and feet planted firm. Pick spots off the fall line on solid ground. Tether tight with a clove hitch under three feet. Stack ropes neat for smooth control. Set up devices right, redirected when needed.
Put it all to work on easy routes first. Practice these steps ground-side, then top-rope setups. Build that muscle memory before big runouts hit. You’ll catch falls clean and stay planted every time.
Back to Trad Climbing Skills and Techniques
Recommended Products for Trad Climbing
These products can support safer climbing, belaying, rappelling, and emergency readiness.
Affiliate disclosure: As an Amazon Associate, TradClimbers may earn from qualifying purchases at no additional cost to you.