
Core Trad Climbing Skills, Techniques for Solid Gear, Anchors, and Descents
Trad climbing is different from sport for one simple reason, you place your own protection as you go. That means the route doesn’t come pre-built, your judgment does the work. Strength helps, but skill, pacing, and calm decision-making matter more.
This guide breaks down core trad climbing skills in a safe learning order. You’ll start with movement that protects your feet and saves energy, then move into gear selection and placement (camming, nuts, extensions, and clean racking). From there, you’ll build reliable anchors with clear principles, run a clean belay and rope system, and finish with the part that ends most days, getting down with smart walk-offs, rappels, and simple retreat plans.
Trad has real consequences, so treat this as a roadmap, not permission to wing it. Learn with a trusted mentor or a reputable course, and start on easy terrain where you can focus on systems, not survival. Practice placements on the ground or on top-rope before you lead, and keep early leads well within your comfort zone.
Build a Trad Foundation: Movement, Crack Basics, and Calm Headspace
Before you worry about whether a cam is perfect, get your movement steady. The cleanest gear in the world won’t help if you’re pumped, rushed, and placing from a bad position. These core trad climbing skills start with moving in control, using jams and stances to stay relaxed, then making small, smart decisions when the lead feels serious.
Crack climbing fundamentals: hand jams, finger locks, and footwork that sticks
Crack climbing is less about pulling and more about wedging and standing. A good jam should feel like a doorstop: it locks when you weight it, not when you squeeze it.
Hand jams (cupped hand)
- Set it, then soften: place your hand, then relax your grip once it bites. Over-gripping wastes energy and increases pain.
- Thumb position matters: for many straight-in hand jams, thumb-down helps your hand cam in as you twist.
- Stand on it: treat the jam like a rung on a ladder, get your hips over your feet and stand instead of hauling.
Finger jams and finger locks (thin cracks)
- Choose a “stack”: one to three fingers can work, but pick a consistent size and commit so it locks.
- Twist to lock: insert fingers, then rotate slightly until it bites, don’t just pull.
- Keep your wrist straight: a bent wrist bleeds strength and makes the lock feel insecure.
Fist jams (wide hands)
- Make a solid fist: thumb outside or tucked depending on comfort, then place the fist deep enough to engage the crack.
- Use opposition: press your knuckles one way and your forearm the other to create a stable wedge.
- Move feet first: with fists, it’s easy to over-pull. Re-center, step up, then bump the next fist.
Basic foot jams (the secret to not getting pumped)
- Toe in, then twist: insert the toe, then rotate your knee outward so the shoe edges and locks.
- Weight it fully: a foot jam works when you stand on it, half-weighting feels slick and insecure.
- Keep hips close: if your hips drift out, your foot jam feels weaker and your calves burn.
Pain is normal early on, but you can keep it manageable. Tape gloves reduce skin loss and let you practice longer, and long sleeves can save your forearms in rough cracks. Focus on technique first, pain drops fast as your placements get cleaner. For more detail on jam mechanics, REI’s crack climbing technique tips are a solid reference.
Route reading for trad: spotting gear stances and planning where to rest
On trad, route reading is partly about climbing and partly about where you can stop being a climber and become a gear tech for ten seconds. The goal is to spot stances and crack features that give you time.
Look for three things as you scan upward:
- Good stances: ledges, pods, constrictions, stemming corners, or any spot where you can stand hands-free or one-hand.
- Solid rock: clean crack edges, less fractured bands, and places where the crack walls look uniform.
- Size changes: flares, pinches, and pods often take protection and also create rests.
A simple plan that keeps you moving:
- Identify the next safe stance (where you can pause without barn-dooring).
- Identify the next likely gear spot (a pod or constriction near that stance).
- Identify the next good hand or jam above it (so you leave the stance with a clear first move).
Most rushed gear placements happen when you ignore stances and try to place mid-move. If you want a quick refresher on previewing and decision points, BMC’s route reading basics explain the habit well.
Managing fear and decision-making on lead without freezing
Fear spikes when your brain tries to solve everything at once. The fix is to shrink the problem. Small, steady progress beats big hero moves because it keeps you breathing, keeps you in balance, and keeps gear opportunities from sliding past.
When things feel serious, run this quick checklist:
- Breathe (long exhale first, then normal breaths).
- Find feet (reset one foot to something you trust).
- Get to a stance (even a brief one where you can pause).
- Place something solid (one good piece changes your headspace fast).
- Continue (one controlled move at a time, no rushing).
Use one honest prompt to guide choices: “If I fell here, would that piece hold and would I hit anything?” If the answer is fuzzy, prioritize getting to the next stance and improving your options, not forcing a hard sequence while your thoughts spiral.
Gear Placement That Holds: Nuts, Cams, Extending, and Cleaning
Placing gear is one of the most important core trad climbing skills because it decides how forgiving the climb will be if you slip. The fastest way to improve is to practice on the ground first. Build mock anchors at the base, place pieces in cracks you can see, then weight them by hand and try to remove them. You’ll learn what “bomber” feels like, and you’ll also learn what looks good but is actually junk.
A simple goal helps: place gear that loads in the right direction, in solid rock, with no surprises when the rope moves.
Nuts and hexes: how to find constrictions and set them with a real tug
A good nut placement works like a doorstop. It sits in a tapered constriction so it wedges tighter when pulled. Look for clean, solid rock with a narrowing crack, not grainy edges or a shifting block.
Here’s what “good” looks like in plain terms:
- Correct size: the nut fills the constriction without bottoming out. Too small can pull through, too big sits shallow and tips out.
- Matches the taper: the nut’s taper should mirror the crack’s taper, so it locks when weighted.
- Stable orientation: the nut shouldn’t wiggle when you tap or tug down.
Common mistakes to spot fast:
- Flared placements (wider toward the direction of pull). These can look snug but can pop with a real fall.
- Soft rock edges that crumble when you test. If the rock flakes under finger pressure, don’t trust it.
- Offset cracks where a symmetrical nut sits on two points instead of nesting.
Place it, then set it. After you seat the nut with your fingers, give the wire a firm downward tug in the expected direction of pull. You’re trying to mimic a fall load, not gently “check” it. Once it’s set, clip it. Fiddling after it’s clipped often twists it into a worse position, especially if the rope starts to pull it sideways.
When it’s time to clean, use a nut tool and think “reverse the path it took in.” If you yank sideways, you can weld gear in by camming it into the constriction even harder, or by kinking the wire so it binds. A couple of small, controlled taps up (or up and in) usually beats brute force. For a more visual breakdown, Climbing’s guide on how to use nuts for protection is a solid refresher.
Cams: choosing the right size, getting the lobe range right, and avoiding walking
Cams shine in more parallel cracks where nuts won’t bite. The key is cam range, meaning how open or closed the lobes are when the cam is placed.
A simple rule:
- Not too open: lobes near fully open can skid or “tip” under load.
- Not too closed: lobes near fully closed can be hard to seat well and can get stuck.
You want the lobes in the middle usable range so they have room to contract under load and still bite. If you want a clear picture of usable ranges by size, Metolius’ cam range guide lays it out cleanly.
Placement basics that keep cams honest:
- Depth: place the cam deep enough that the lobes sit on solid rock, not on the lip of a flake or at the mouth of a pin scar. Too deep can also be a problem if it lands in a flare you can’t see.
- Stem alignment: aim the stem along the expected pull (usually down and slightly out). If the stem points off to the side, the cam can twist and lose contact.
- Full lobe contact: each lobe should touch rock evenly. If one lobe is hanging in space or perched on a bump, treat it as suspect.
To prevent walking (the cam creeping deeper as the rope moves), reduce rope drag and keep the pull direction stable. Often the fix is simple: use a longer sling on the cam so the rope isn’t tugging it with every move.
Small cams in tiny cracks deserve extra care. They fit where rock features can be irregular, and they don’t like being yanked around. Place them gently, avoid over-camming, and extend them more often. If a small cam feels “pingy” or wants to rotate when you clip, reset it.
Quickdraws and runners: extending gear to cut rope drag and keep placements strong
Extension is not about comfort, it’s about keeping gear loaded the way you intended. If the rope pulls a piece upward, sideways, or into a flare, a good placement can turn mediocre fast.
A quick way to choose:
- Short draw: straight cracks, direct lines, and pieces that won’t get tugged sideways.
- Shoulder-length sling: wandering cracks, corners, roofs, horizontals, and anything behind a flake where the rope will zigzag.
Real examples where extension helps:
- Wandering crack: your rope snakes, the pull changes, and unextended pieces can shift.
- Roof: the rope runs over an edge and can lift your last piece as you move out.
- Horizontal crack: many cams sit best with the stem aligned, but the rope can tug them sideways without a sling.
- Flakes: rope movement can “saw” the piece and nudge it into a worse spot.
There’s also a downside. Over-extending adds slack and can mean more rope out, which increases fall distance and can make ledges more relevant. The balance is extending the pieces that need it most (often the ones near direction changes), not automatically putting everything on the longest sling you own.
The first piece, the last piece, and spacing: building a real “line” of protection
Think of your protection like a chain, not a single link. You want a steady line of good decisions, not one heroic placement followed by a runout.
The first piece matters because it controls ground fall risk. If you’re still low, prioritize getting something in that would catch a slip before you hit the deck or a ledge. That might mean placing from a lower stance, even if the gear is slightly less comfy to place.
The last piece matters too. Keep protecting near the anchor and before cruxes because falls happen when you’re tired, rushing, or trying hard. A common mistake is relaxing too early and running it out into the belay.
A simple rule of thumb that works on real rock: protect when the fall would be dangerous, and protect when you’re leaving a stance. “Dangerous” usually means a ledge, a corner that could swing you, a ground fall zone, or a place where the rope will run poorly.
Instead of counting feet, ask one question each time you consider skipping gear: If I fall here, do I hit anything, and does my last piece stay in the right direction of pull? That mindset builds spacing that fits the climb, not a number.
Belay and Rope Skills for Trad: Soft Catches, Clean Rope, and Multi-pitch Basics
If gear placements are the “hardware” of trad, belaying and rope handling are the “wiring.” Most new leaders don’t get in trouble because they can’t place a cam, they get in trouble because of slack control, sharp edges, missed calls, and a rope pile that turns into a knot farm. Add multi-pitch time pressure, and small mistakes stack up fast. These rope skills are a core part of core trad climbing skills because they keep falls reasonable and systems predictable.
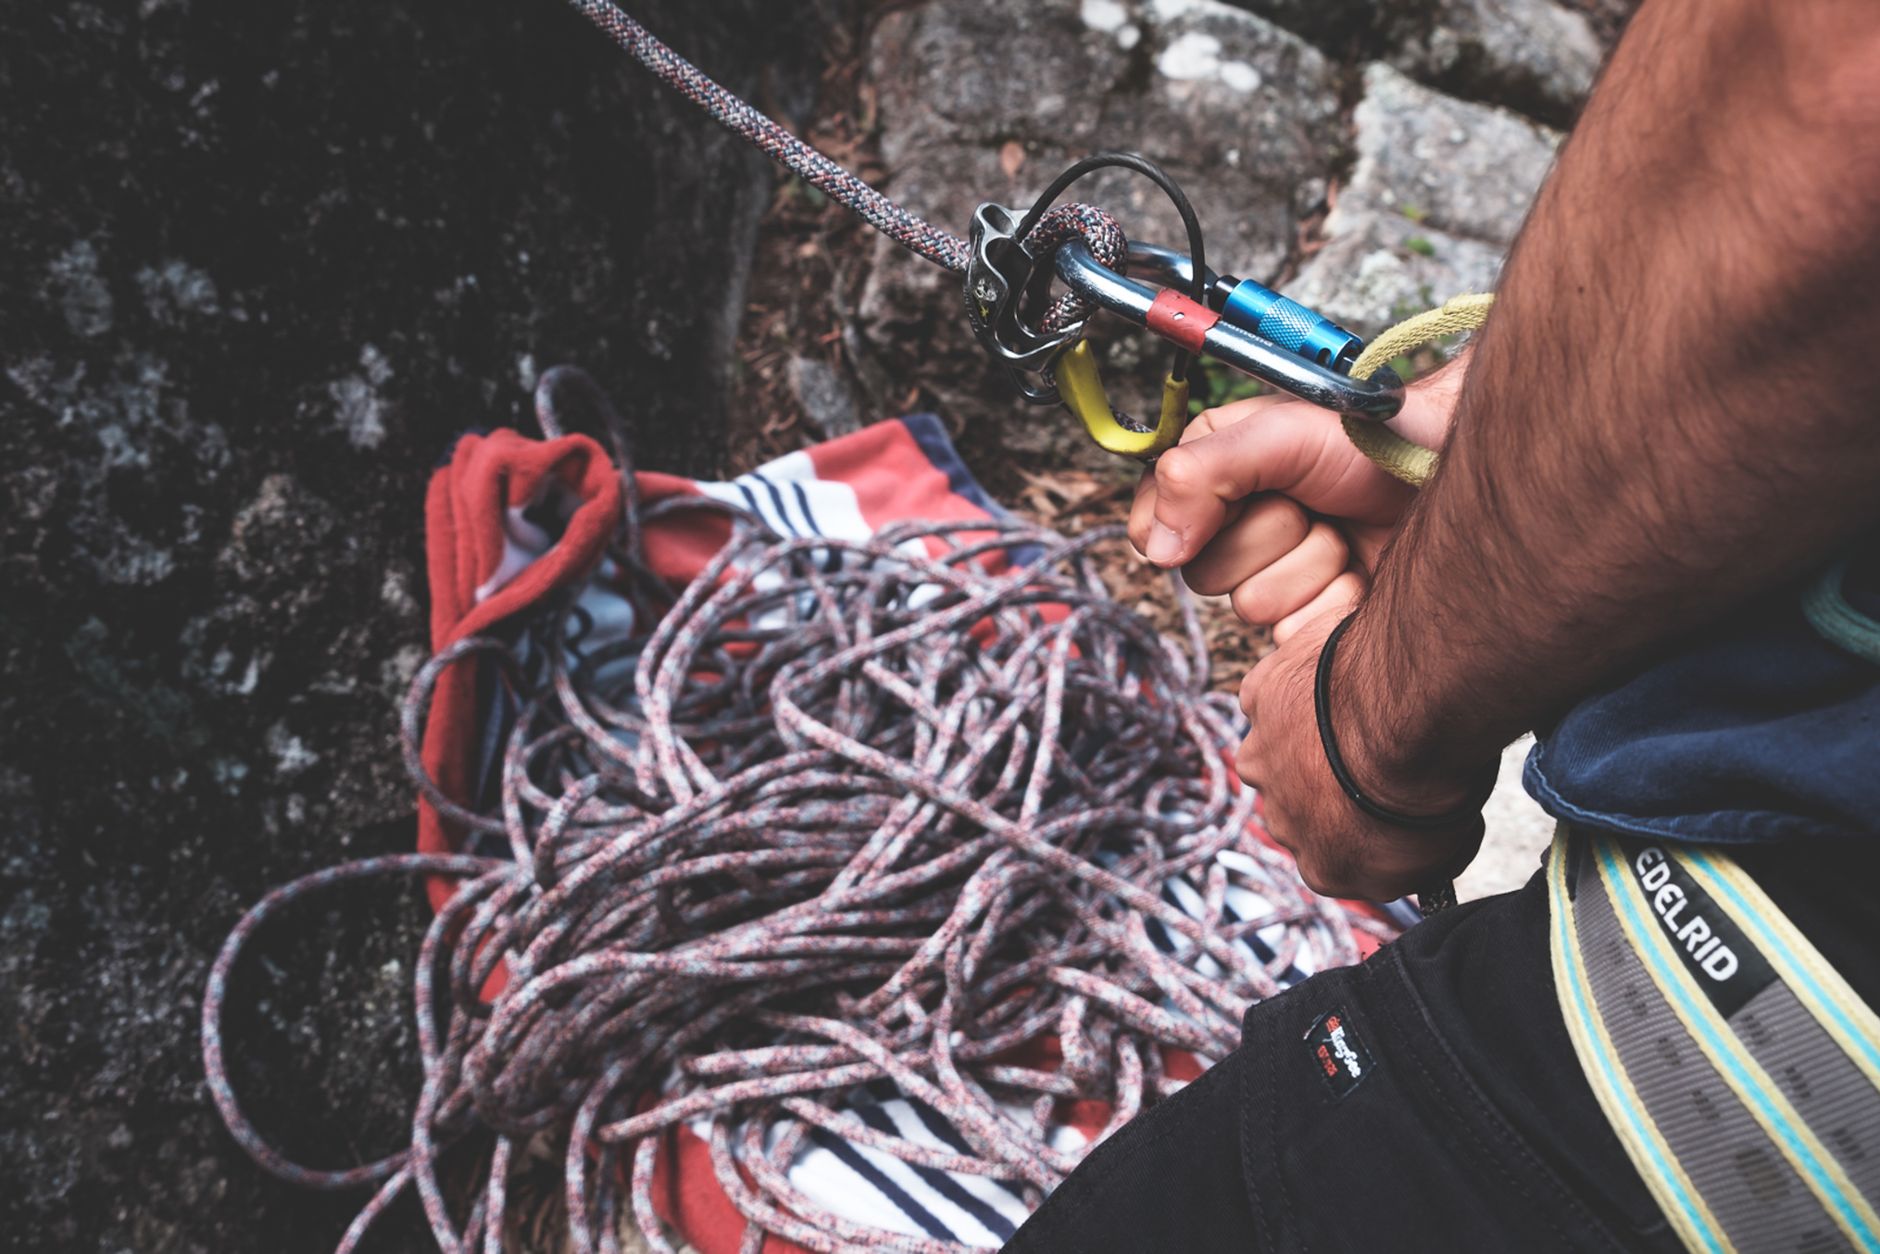
Photo by Lachlan Ross
Lead belaying outside: stance, brake hand habits, and giving a soft catch
Outdoor belaying feels different than a gym right away. The ground is uneven, the stance might be sloped, and the best belay spot is often next to an edge or below a corner. Wind can hide commands, and the rope can run over sharp rock or dirty ledges. Falls can also be longer, with more slack in the system and more rope drag.
A soft catch is a catch with a little controlled give. Instead of locking the climber off like a brick wall, you let the system absorb some force by allowing a small amount of rope to slip through the stance, usually by stepping forward or letting your body rise slightly while still keeping the brake hand down and in control. The goal is a lower peak force on the climber and gear, not extra airtime.
When not to give a soft catch:
- If there’s ledge or ground-fall risk.
- If the climber is low on the pitch and a fall could hit a slab, a corner, or the belay.
- If the route traverses and a longer fall increases swing potential.
If you want a clear visual, Touchstone’s overview of dynamic belaying and soft catches is a useful primer.
Before the leader leaves the ground, run a quick stance check:
- Belay position: stand where you can see the leader and won’t get pulled into the wall or off a ledge.
- Brake hand: keep it on the brake strand, always, no exceptions.
- Rope path: keep the rope away from sharp edges, and adjust if the leader moves behind a rib.
- Attachment: if you could be pulled off balance, clip yourself to the anchor with a secure tether, not the rope alone.
- Communication: agree on simple calls and what you’ll do if wind kills your voices.
Rope management at belays: stacking, preventing tangles, and avoiding stuck ropes
A clean belay is a fast belay. Rope piles matter because the next lead depends on them. If the rope feeds with snags, the leader gets tugged, gear gets walked, and you lose time when you can’t afford it.
One simple stacking method that works on many stances is stacking over the tie-in:
- As you bring the second up, flake the rope into neat loops over your tie-in area (or between your feet if it’s safe and clean).
- Keep loops consistent in size so they don’t cinch into each other.
- When it’s time to lead again, the rope feeds from the top of the stack without flipping into knots.
When to use other options:
- In a sling: great on hanging belays or tiny ledges. Clip a shoulder-length sling to the anchor, then stack loops through it like a rope bucket.
- Neat pile on a ledge: works on big, flat stances, but keep it away from cracks, bushes, and loose rock.
Habits that prevent stuck ropes and ugly pulls:
- Watch where the rope runs as the leader moves, don’t let it drop into deep cracks or behind blocks.
- Keep the rope out of loose terrain where it can snag when you pull.
- When pulling rope to re-stack or rappel, keep knots away from the belay device so they don’t jam at the worst time.
For more detail on multi-pitch rope handling, Pisgah Climbing School’s rope management guide is practical and easy to follow.
Single-pitch trad workflow: lead, build the top anchor, bring up the second, clean gear
A simple workflow keeps you from missing steps when you’re tired.
- Leader climbs and protects with steady spacing and clean extensions.
- Leader builds the top anchor, clips in, and goes “on belay” for the second.
- Second climbs, stays focused on keeping the rope running clean.
- Second cleans gear, then meets the leader and re-racks.
The second’s cleaning job, in plain terms:
- Stay clipped to the rope the whole time.
- Remove gear with control, don’t yard on it and don’t drop it.
- Use a nut tool to tap and lift nuts back the way they went in.
- Put cleaned gear on the correct racking spots so the next pitch doesn’t start with a spaghetti rack.
Keep communication simple and consistent. Outdoors, you won’t always hear. Confirm the big moments, like “off belay” and “on belay,” and don’t assume.
Double ropes and tag lines: when they help, and when they add risk
Double ropes (or a lead rope plus tag line) can be great on wandering routes. They help you keep rope drag down by clipping pieces to the left or right strand, and they can make rappels easier when you need more length or a straighter rappel line.
They also add complexity:
- More rope to stack, flake, and avoid tangles.
- More chances to mis-clip or feed the wrong strand.
- More time lost at belays, which is where multi-pitch pressure causes mistakes.
If you’re curious, learn these systems with a skilled partner first, on easy terrain where you can practice without rushing.
Anchors, Rappels, and Self-Rescue Basics: Getting Up and Getting Down Safely
Most trad days go fine on the way up. The problems tend to show up at the top, when you’re tired, the light is fading, and you have to switch from climbing to systems. Treat this as the safety capstone of your core trad climbing skills: build a simple anchor in solid rock, check it with your partner, then choose the safest way down with backups in place.

Photo by DiEGO MüLLER
Building trad anchors in cracks: strong pieces, equalization, and clean direction of pull
A trad anchor is only as good as the rock and the placements. Start by choosing solid rock (no hollow flakes, no shifting blocks), then build with independent pieces so one failure doesn’t take the whole system with it. Keep the master point simple and easy to inspect at a glance.
Common anchor builds that work on most crack belays:
- Three-piece gear anchor (default choice)
Place three solid pieces in the crack (often a mix of cams and nuts), each in its own feature. Clip each piece, then connect them to a single master point using your rope or a sling system. The point is not perfection, it’s redundancy and a clean load path. - Two-piece anchor (only when both pieces are truly bomber)
Sometimes the crack gives you two perfect placements. If both pieces are in excellent rock and would each hold a fall on their own, you can build off two. This is common at stances with a great nut constriction and a perfect cam pod. - Two-piece plus a third “confidence piece” (when you’re unsure)
If you’re asking yourself, “Is this good enough?”, add one more. That third piece can be smaller, but it should be real protection, not a token. This is a smart habit when you’re new, when the rock is suspect, or when the stance is awkward.
Two priorities keep anchors strong and predictable:
- Direction of pull: Build for how the anchor will be loaded. Most of the time that’s downward (a second hanging, a leader fall onto the anchor, or a rappel). If you expect an upward tug (like the second stepping above the belay or a traversing start), plan for that too with piece choice and orientation.
- Avoid weird angles: If one leg of your anchor runs off to the side, it can pull a piece sideways or lift it. Try to place pieces so the lines to the master point look clean and straight.
If you want a clear visual explanation of equalizing gear anchors, REI’s guide on how to build climbing anchors is a good reference.
Anchor checks and partner checks: how to catch the mistakes that hurt people
Most serious mistakes are simple, like an unlocked carabiner, a mis-threaded device, or a knot that never got finished. A repeatable check catches these before the rope gets weighted.
Use this quick talk-through every time you swap modes (belay to rappel, second to leader, or after a messy stance):
- Pieces and rock: “These are solid, placed in good rock, no moving blocks.”
- Carabiners: “Gates closed, lockers locked, no cross-loading.”
- Knots: “Knots are dressed, tails are long enough, nothing half-tied.”
- Attachment: “You and I are clipped in correctly, not just hanging on a single quick clip.”
- Belay device: “Threaded right, brake strand correct, carabiner locked.”
How you say it matters. Keep the tone neutral and routine, like a pre-flight check:
- “Quick check before I go on belay.”
- “Mind taking ten seconds to look at my device and lockers?”
Re-check after transitions and when tired. Fatigue is when people skip steps, and trad systems punish skipped steps.
For a solid baseline, Petzl’s partner check checklist lays out the habit clearly.
Rappelling on trad routes: backups, knots in rope ends, and avoiding anchor wear
Choose to rappel when it’s safer than a walk-off, or when the route is built for rappel, or when weather and time demand a quick retreat. Walk-offs are often safer when they’re obvious and dry, but they can be worse in the dark, in storms, or on loose gullies.
A safe rappel starts with three habits:
- Tie knots in the rope ends every time. It’s a simple guard against sliding off the end when you’re distracted, the ropes are uneven, or the station is farther than expected.
- Use a friction backup like an autoblock (a short prusik hitch clipped to your leg loop). “Autoblock” just means a hitch that grabs the rope if you let go. It’s not magic, but it buys you control if you get hit by rockfall, lose balance, or need both hands.
- Inspect existing rappel anchors. Sun-bleached webbing, fuzzy slings, or rusty links should set off alarms. If you can’t verify it, rebuild or add your own material so you know what you’re trusting.
To reduce stuck-rope problems, set yourself up before you pull:
- Pull in the correct direction so the rope runs clean over the edge.
- Keep rope ends out of cracks and behind flakes where they can jam.
- Watch for wind that can blow strands into horns and corners.
Also think about anchor wear. Don’t run rope directly through soft slings if there’s a ring or quick link available, and avoid repeated pulls over sharp edges when you can reposition.
Self-rescue essentials every new trad leader should practice
Self-rescue doesn’t mean complex hauling systems. It means you can stop the situation from getting worse, keep someone safe on the rope, and make steady progress.
Start with three basics:
- Escaping the belay: Transfer the load from your belay device to the anchor so your hands are free. This is the first move in almost every rescue.
- Simple assist for a stuck second: If your second can’t get past a move, you should know how to give a small, controlled upward assist (a basic haul) while keeping them protected.
- If the rope gets stuck on rappel: Don’t yank harder right away. First, make sure you are safe at the station. Then try small changes like re-stacking, flicking the strands, or changing the pull angle. If it’s still jammed, the safest option is often to re-rappel on the strand that still moves to reach the snag and free it, if you can do so without committing to worse terrain.
Practice on the ground with a mentor, then rehearse on an easy single-pitch. The time to learn is not when your partner is hanging and it’s getting dark.
A simple “minimum kit” idea that isn’t gear-obsessed:
- A few feet of cord for a friction hitch.
- A couple of locking carabiners beyond your normal belay setup.
- A knife and a way to keep it secure.
- A small headlamp, because rescues love bad timing.
Skills to drill until they feel boring:
- Tie and dress your key knots without thinking.
- Escape the belay cleanly.
- Add friction and lower under control.
- Build a simple assisted haul.
- Diagnose a stuck rope without panic.
More Helpful Articles on Trad Climbing Techniques
Building cordelette anchor trad
Trad climbing rope drag solutions
How to reduce swing on trad leads
Footwork tips for trad crack climbing
Trad climbing heel hook technique
Trad top rope conversion basics
How to lead follow trad safely
Offwidth climbing tips for trad
Layback technique for crack climbs
Trad multi pitch transition tips
Trad climbing clipping efficiency
How to build bomber trad anchors
Managing gear drag trad climbs
Trad climbing belay stance tips
Conclusion
Core trad climbing skills stack in a clear order, movement first so you can stay calm on your feet, then gear so every placement has the right direction of pull, then belay and rope habits that keep slack, drag, and communication clean, then anchors and descent systems that finish the day without drama. The goal is repeatable choices, not perfect ones, made from stable stances and backed by simple partner checks.
Progress comes from reps on easy routes, ground practice where you can see what you’re doing, and honest checks when you swap modes. If you rush the basics, you’ll feel it later, usually at the belay or on rappel.
Plan the next 2 to 4 weeks like this: one movement session on cracks (jams, footwork, resting), one gear-placement practice at the base (nuts, cams, extensions, then clean what you place), one easy lead day well below your limit (focus on spacing and rope path), and one anchor and rappel drill (build, inspect, back up, then repeat). Be sure to check out our trad climbing gear guide for more information and tips.
Recommended Products for Trad Climbing
These products can support safer climbing, belaying, rappelling, and emergency readiness.
Affiliate disclosure: As an Amazon Associate, TradClimbers may earn from qualifying purchases at no additional cost to you.