

Getting your harness sized correctly is one of those things you absolutely cannot compromise on, especially when you’re hours up a multi-pitch trad route. The perfect fit is simple in theory: the waistbelt sits high and snug above your hip bones, you can slide two fingers (and only two) underneath it, and the leg loops are tight enough to keep you from flipping upside down but loose enough for a high-step.
Anything less than that isn't just uncomfortable. It’s a genuine safety hazard when you're hanging at a belay or fighting through a crux hundreds of feet off the deck.
Why Your Harness Fit Is Crucial for Safety and Comfort
A harness that mostly fits is a ticking clock. It might feel fine while you're racking up at the base, but an ill-fitting harness always shows its true colors at the worst possible time. It quickly becomes more than an annoyance—it's a real drain on your energy and your headspace.
Imagine this: a waistbelt that’s too loose can creep up into your ribs on a hanging belay, making every breath a chore. Even worse, it could slip down over your hips in a head-first fall. On the other hand, leg loops that are too tight will cut off circulation and make that crucial high-step feel like you're fighting a boa constrictor. This isn't just about being comfortable; it's about staying functional when it matters most.
The Real-World Impact of a Bad Fit
For trad climbers, the consequences of a sloppy fit are amplified. A poorly sized harness can shift awkwardly under the weight of a full rack, creating painful hot spots during long hangs on questionable gear. The numbers don't lie, either. Ergonomic studies have found that a bad fit can increase your fatigue by as much as 30% on sustained, overhanging terrain. More sobering, ill-fitting harnesses are cited in about 15% of gear-related incident reports on multi-pitch climbs.
A correctly sized harness distributes your weight so evenly across your hips and legs that a long hanging belay becomes, at worst, a bit boring. An incorrectly sized one digs in, creates sharp pressure points, and forces you to constantly squirm, wasting precious energy you need for the sharp end.
For a clearer picture of what to check, here’s a quick-reference table.
Harness Sizing At a Glance: Key Fit Checks
This table breaks down the most critical fit checks you should perform every single time you try on a harness. Think of it as your pre-flight checklist before committing to a purchase or a climb.
| Fit Check Area | What to Look For | Why It Matters for Trad Climbing |
|---|---|---|
| Waistbelt | Sits comfortably above the iliac crest (hip bones). You should be able to fit two stacked fingers between the belt and your waist. | Prevents the harness from slipping over your hips in an inverted fall. Ensures the load is carried by your skeletal structure, not soft tissue. |
| Leg Loops | Snug, but you can fit a flat hand between the loop and your thigh. They shouldn't restrict movement or circulation. | Allows for full range of motion for high-stepping and stemming. Prevents painful pinching and ensures comfort during long hangs. |
| Rise | The distance between the waistbelt and leg loops feels balanced. The belay loop should not pull the waistbelt down or feel too high. | A proper rise keeps the harness from hindering your movement and ensures you remain upright and balanced when weighted. |
| Gear Loops | Positioned on the sides for easy access, not too far back. They should be able to support a full rack without sagging excessively. | A sagging or poorly placed gear loop makes it a nightmare to find the right piece of pro quickly, especially in a crux sequence. |
Getting these four points right is the foundation of a safe and comfortable fit.
Beyond the Basics for Trad Climbers
While those rules apply to every climber, trad climbers have a few extra things to worry about. Your harness is essentially your mobile command center, and it needs to perform flawlessly under the weight of a full double rack.
A proper fit specifically ensures:
- Gear loops stay where you need them: When a harness sags under weight, your gear loops can bunch up or slide out of reach. That's the last thing you want when you're pumped and desperately fumbling for a #0.3 cam.
- Your mobility is never compromised: From high-steps and mantels to wide stems in a chimney, you need to move freely. A harness with the wrong rise (that distance between the waistbelt and leg loops) will fight you on every move.
- You can trust your gear and focus: A secure, comfortable harness lets you put all your mental energy into the climbing—the movement, the gear placements, the rope management. This confidence is a huge and often overlooked part of overall trad climbing safety.
In the end, taking a few extra minutes to dial in your harness fit is a direct investment in your performance and well-being on the rock. It’s a foundational step that pays you back on every single pitch.
How to Accurately Measure Yourself for a Harness
First things first: forget about your pant size. It's a notoriously unreliable number for sizing a climbing harness, and frankly, it measures the wrong part of your body. To get a harness that actually fits, you need to grab a soft measuring tape and get two precise numbers: your true waist and your thighs.
Getting this right from the start saves you a world of frustration. There's nothing worse than ordering a harness online only to find it doesn't fit, or worse, discovering painful pressure points halfway up a route during your first hanging belay. If you need a refresher on the basics, here’s a good guide to take accurate body measurements for any kind of gear.
Finding Your True Waist
The most common mistake climbers make is measuring where their pants sit. Your harness waistbelt doesn't go there. It’s designed to sit high and secure, squarely above your iliac crest—the bony top of your hip bones. This is critical. In a fall, you want your skeletal structure to catch the force, not your guts.
Here’s how to find that spot:
- Put your hands on your hips like you’re disappointed in your belayer, with thumbs pointing back and fingers forward.
- Slide your hands up until you feel that prominent bony ridge of your pelvis. That’s your iliac crest.
- The sweet spot for the waistbelt is just above this ridge, which for most people lines up with or is slightly higher than their belly button.
Once you’ve found it, wrap a flexible measuring tape snugly around that "natural waist." Keep the tape level with the floor, but don’t crank it down so tight that it digs in. Jot down the number in both inches and centimeters—different brands use different sizing systems, so you'll want both.
Measuring Your Leg Loops
Now, let's talk about the leg loops. Their fit is just as important for comfort, especially on long trad pitches that involve high-stepping, stemming, and general leg trickery. You need them snug enough that you can't pull them down over your thighs, but not so tight they cut off circulation.
Measure the circumference of your upper thigh at its widest point, which is usually just a few inches below the groin. Use that same soft tape, making it snug but not constricting.
A piece of advice I give every new climber: always measure yourself while wearing the clothes you'll actually climb in.
Think about it. The difference between a thin pair of summer shorts and insulated softshell pants for a winter alpine objective can easily bump you into a completely different size range. This one small step can prevent you from buying a harness that’s perfect for the gym but dangerously tight when you’re layered up in the mountains.
This infographic breaks down the three most important fit checks you'll do: locking in the waistbelt, dialing in the leg loops, and making sure the rise (the distance between them) feels right.
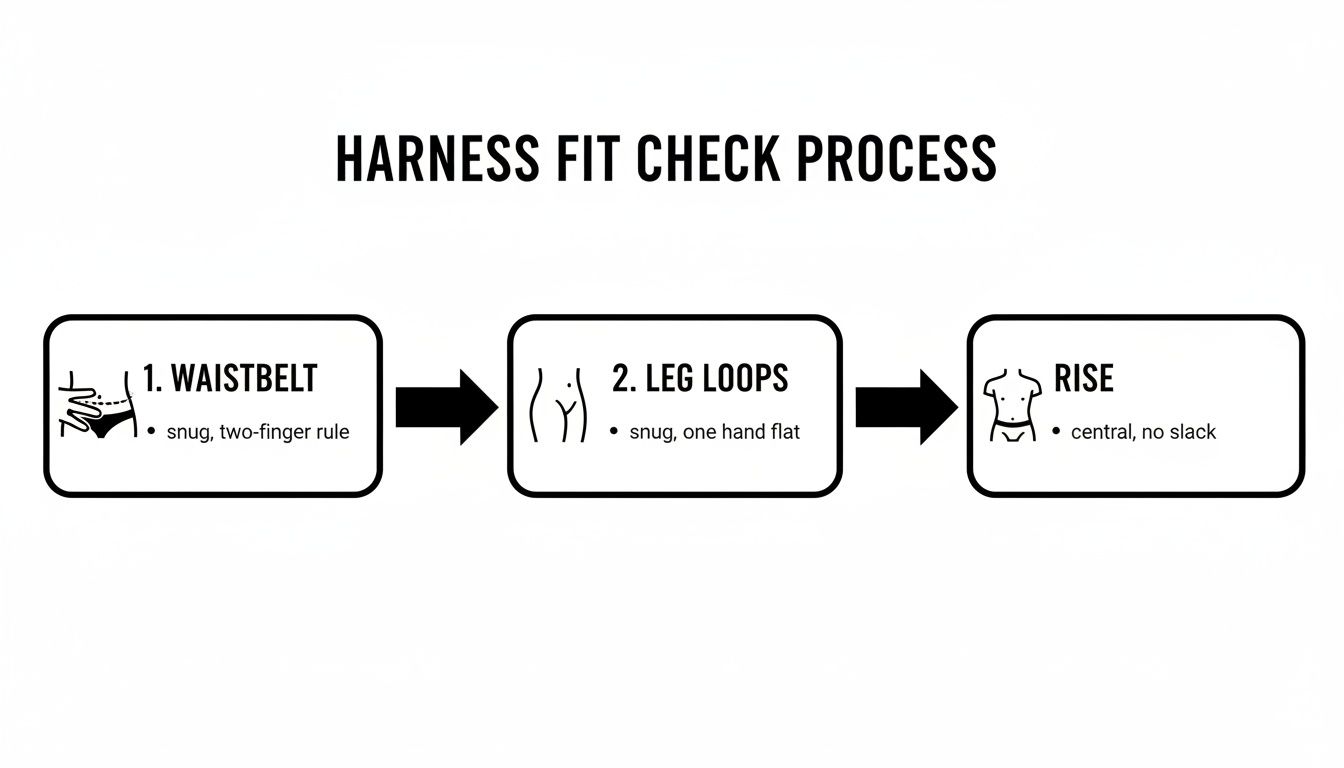
With these two key measurements—your natural waist and upper thighs—you have the hard data you need to stop guessing and start comparing brand sizing charts with confidence. You’re no longer just picking a harness; you're choosing one based on your specific anatomy and the kind of climbing you do. That's the foundation of a perfect fit.
Decoding Brand Sizing Charts and Harness Types
Alright, you've got your measurements. Now comes the tricky part: translating those numbers into a harness that actually fits. Think of a brand’s sizing chart as a starting point, not the final word. Each manufacturer has its own fit philosophy, and knowing those quirks is the difference between a harness that just works and one that feels like it was made for you.
This is especially true when you find yourself stuck between two sizes—a situation every climber runs into eventually.
The Classic Dilemma: When You're Between Sizes
So you’re on the fence between a small and a medium. Which way do you go? For trad climbing, my experience is that leaning towards the smaller size is almost always the right call, as long as you can still comfortably pass the two-finger waistbelt test.
A harness that’s on the larger end of its range leaves a long, floppy tail of webbing. That’s more than just an annoyance; it’s a serious snag hazard when you’re squirming up a chimney or bashing through brush on a walk-off. Sizing up is the bigger gamble. You might find you can't get it tight enough over just a t-shirt, and as the foam padding compresses and "packs out" over months of use, the fit will only get looser.
Pro Tip: When you're trying on that smaller size, cinch the waistbelt all the way down. If it's already maxed out with just a summer shirt on, you’ve left no room for winter layers. In that one specific case, sizing up is the smarter move.
Major Harness Brand Sizing Tendencies
Knowing the general fit profile of major brands can save you a ton of guesswork, especially if you’re buying online. It's the kind of insider knowledge that helps you narrow down the options and avoid a frustrating return.
This isn’t just anecdotal, either. The climbing gear industry is booming, projected to hit USD 1.95 billion by 2030, and a huge part of that growth is brands competing on fit. They are actively designing harnesses for specific body types, with some offering massive size ranges—think waist measurements from 64-102 cm and leg loops from 48-73 cm. For us, this means more choices, but it also means doing a bit more homework.
Here’s a quick-reference table based on years of fitting harnesses and hearing feedback from other climbers.
| Brand | General Fit Profile | Typical Waist Range (Medium) | Best For Climbers Who… |
|---|---|---|---|
| Petzl | Athletic, tapered cut with a slightly higher rise. Excellent mobility. | 29.9" – 32.7" (76-83 cm) | Prefer a performance fit and don't need a lot of padding. |
| Black Diamond | The reliable all-rounder. Generally accommodating and a safe bet for most body types. | 30" – 33" (76-84 cm) | Are buying their first harness or want a versatile option. |
| Arc'teryx | Highly anatomical and trim. Famous for wide, supportive (but less forgiving) waistbelts. | 32" – 35" (81-89 cm) | Match the brand's athletic cut and prioritize weight distribution. |
| Mammut | Balanced and highly adjustable. Often feels like a middle ground between Petzl and BD. | 30" – 33.9" (76-86 cm) | Need a single harness for all four seasons. |
Again, this is just a guide. Nothing beats trying a harness on in person, but if that’s not an option, use this to make a more educated guess.
Fixed vs. Adjustable Leg Loops
This is a key decision, and it comes down entirely to what kind of climbing you do most.
Fixed Leg Loops: These are fantastic for sport climbing and gym use. They're lighter, less bulky, and have a clean profile with nothing to snag. But that simplicity is their downfall for trad and alpine climbing. You can’t adjust them to fit over bulky softshell pants in the mountains or even just a pair of hiking pants on a cool day.
Adjustable Leg Loops: This is the non-negotiable choice for most trad climbers. The tiny weight penalty is a small price to pay for the incredible versatility. Being able to dial in the leg loop fit, whether you're in shorts in Indian Creek or bundled up on a snow-covered ledge, is critical. For anyone building their primary rack, we cover more on why adjustability is key in our complete guide on how to choose a trad harness.
Men's vs. Women's vs. All-Gender Designs
The difference between men's and women's-specific harnesses isn't just about color palettes; it’s about anatomy.
A women's-specific harness is typically engineered with:
- A Contoured Waistbelt: It's shaped to sit higher on the waist and above the iliac crest, preventing it from slipping down over the hips.
- A Different Waist-to-Leg-Loop Ratio: This reflects the anatomical average of a smaller waist relative to the thighs.
- A Longer Rise: The "rise" is the vertical distance between the leg loops and the waistbelt. A longer rise prevents the waistbelt from uncomfortably jamming into your ribs, a common complaint for women wearing men's or unisex models.
All that said, the label doesn't matter. The best harness for you is the one that fits your body. I know plenty of men who prefer the fit of a specific women's model and vice versa. Don't be shy—try on anything and everything to find what feels the most secure and comfortable.
Alright, you've done the research, taken your measurements, and have a few potential harnesses in mind. Now for the most critical part of the entire process: trying one on in a real shop. Just buckling it up and giving it a wiggle simply won't cut it. You need to put that harness through its paces before you ever hand over your cash.
This is your last line of defense against discovering a painful pressure point or, worse, a dangerously sloppy fit when you’re 100 feet up a route.

First Checks on Solid Ground
Before you even think about weighting the harness, run through these quick fit checks.
- Waistbelt Placement: The waistbelt needs to sit firmly above your iliac crest—that’s the bony ridge of your hips—not resting on it. After you’ve cinched it down, you should be able to slide two stacked fingers between the belt and your stomach. Any more space is too loose; any less is too tight.
- Belay Loop Position: Take a look down. Your belay loop should be perfectly centered on your torso. If tightening the waistbelt pulls it way off to one side, that’s a clear sign the harness is the wrong size for your proportions.
- Leg Loop Fit: Tighten the leg loops until they feel snug but not constricting. The classic test is to slide a flat hand between the strap and your thigh. This ensures they’re tight enough to catch you properly but won't cut off circulation during a long hanging belay.
Once those initial checks look good, it’s time to simulate what really matters.
The All-Important Hang Test
This is the moment of truth. Any decent climbing shop will have a rope or a dedicated anchor point for this exact purpose. If you don't see one, just ask. It’s a standard request. Clip in, lean back, and slowly lift your feet off the ground until the harness is holding your full body weight.
Now, just hang out for a minute or two. This is where you’ll feel the subtle issues that no tape measure could ever predict.
Make sure you stay weighted in the harness for at least 60 seconds. A harness can feel perfectly fine for a few seconds but become torture after a minute, which is exactly what a hanging belay feels like.
While you're hanging, pay close attention to how your body feels. Is the waistbelt digging into your ribs? Are the leg loops pinching your inner thighs? Give yourself a little squirm and twist your torso. A well-fitting harness should distribute your weight comfortably across both the waistbelt and leg loops, feeling more like a secure seat than a web of constricting straps.
The Trad Climber's Mobility Test
For those of us building a rack, the test doesn’t end with hanging. You need to know the harness moves with you, especially when it’s loaded down with a dozen cams and a set of nuts.
Get back on the ground for this part. If you can, clip a few pieces of gear to the loops to get a realistic feel.
- The High-Step: Bring one knee up towards your chest, as if you're making a high, committing foot placement. Does the leg loop bind or the waistbelt ride up? You can’t afford to be fighting your own harness when you’re going for a crux move.
- The Deep Squat: Drop into a full, deep squat. This position is common when you’re trying to get situated to place gear from an awkward stance. The harness shouldn’t pinch or limit your range of motion at all.
- Gear Loop Access: Now look down at your gear. Can you easily see and reach your cams? When you squat, does all your gear slide into a jumbled mess at the front, or does it stay relatively organized and accessible?
Modern harnesses have come a long way from the stiff, unforgiving designs of the 1980s. For trad climbers, a key test is making sure the leg loops, often in the 50-70 cm range, don't restrict a full squat, which is vital for placing gear efficiently. In fact, getting the sizing right on an ergonomic model can increase comfort by up to 40%—a massive benefit when you're trying to avoid chafing on a multi-pitch route. If you want to explore the options out there, you can find more details on how ergonomic fits enhance comfort and safety.
The 3 Harness Sizing Mistakes We See All The Time
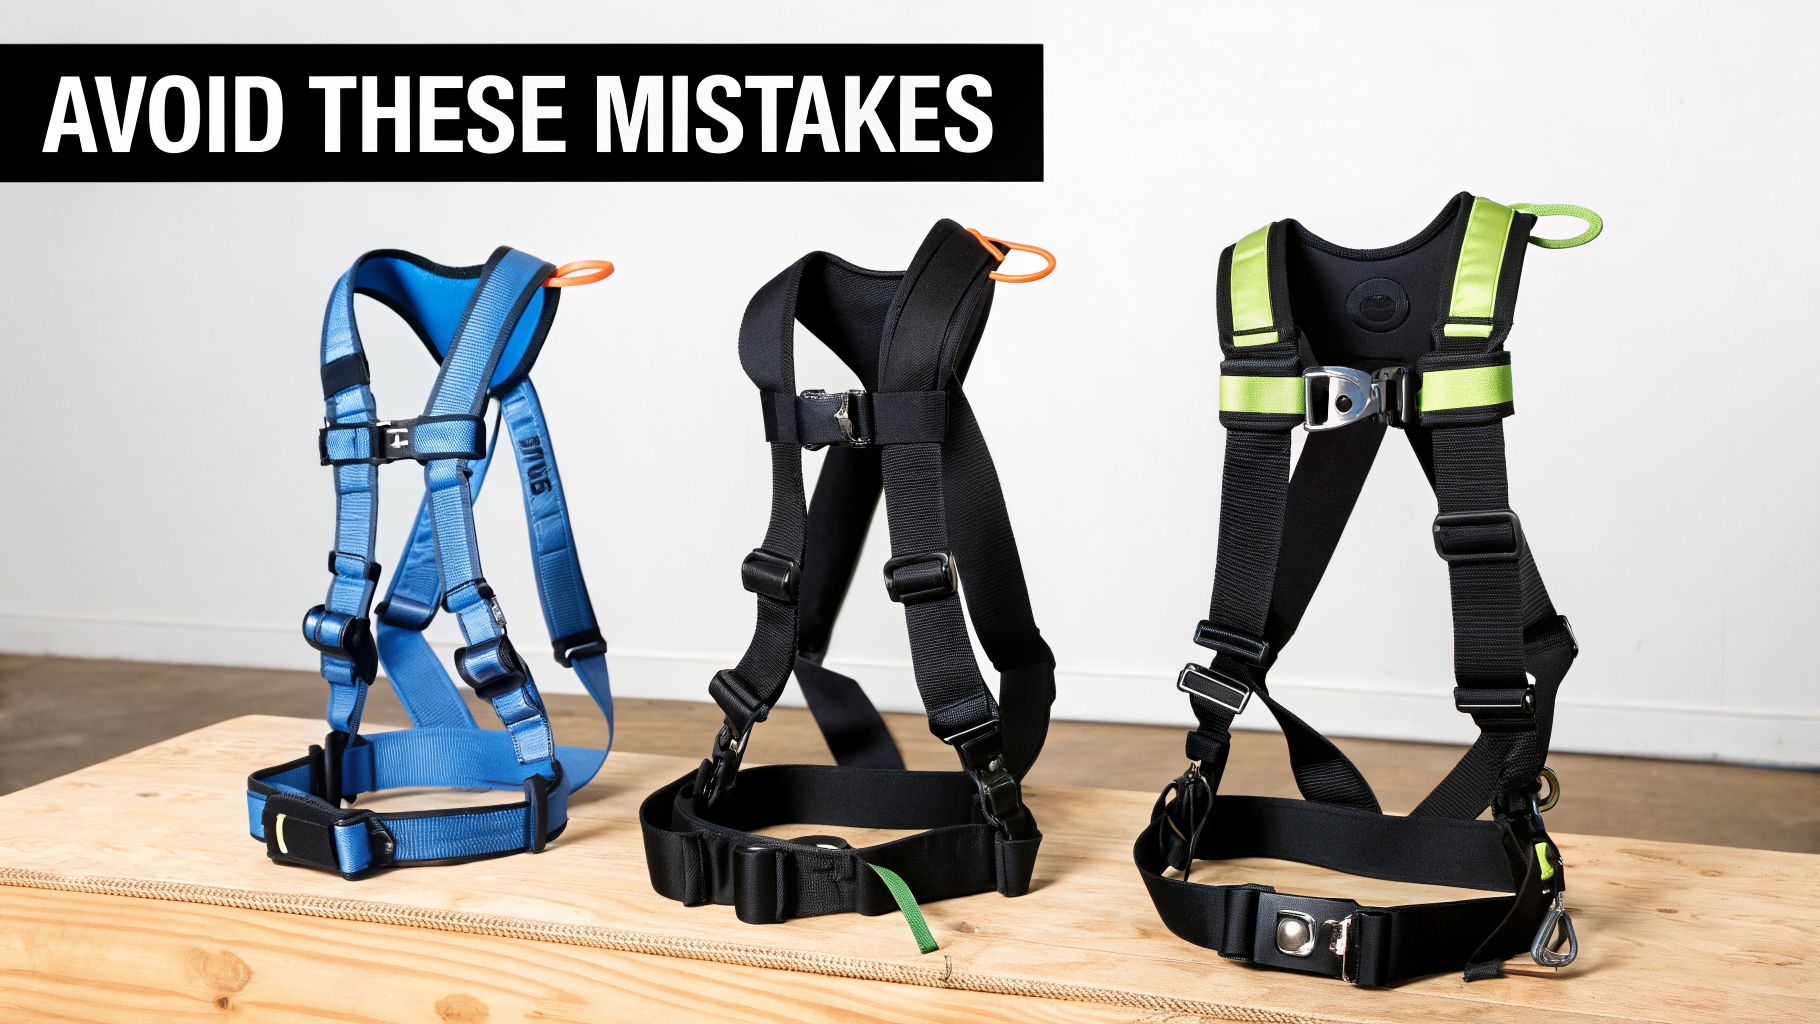
Even after years on the rock, it's surprisingly easy to get your harness fit wrong. A great day out can quickly turn uncomfortable—or even dangerous—because of a few common, completely avoidable sizing errors.
From my experience, it almost always boils down to one of three issues: the harness is too big, it’s painfully small, or it’s simply the wrong tool for the job. Let’s walk through how to spot these problems so your gear is always helping, never hindering.
The "Comfortably Loose" Fit That's Actually Dangerous
This is hands-down the most dangerous sizing mistake you can make. A harness that feels a bit loose when you're standing around might seem fine, but its flaws become terrifyingly clear in a fall. The biggest risk here is inversion.
If the waistbelt isn't cinched down securely above your iliac crest (the tops of your hip bones), a weird, head-first fall can cause the whole harness to ride up toward your ribs. In the worst-case scenario, it can slide completely over your hips, flipping you upside down and creating a very real risk of falling out of the harness entirely.
You can also spot a too-big harness if the belay loop is yanked way off to one side when you tighten the waistbelt. This isn't just a sign of a bad fit; it can mess with how the rope feeds through your belay device. It's a subtle thing, but it's annoying and inefficient.
Key Takeaway: After tightening your waistbelt over your usual climbing clothes, you should still have at least a few inches of tail webbing left over. If the buckle is almost at its tightest point, the harness is too big for you.
Squeezing Into a Harness That's Too Small
On the other end of the spectrum is the "I can make it work" approach to a harness that's clearly too small. While you definitely want a snug fit, an overly tight harness isn't just uncomfortable—it restricts your movement and can cause some serious problems.
When a harness is too tight, you'll feel it everywhere:
- Breathing Becomes a Chore: A waistbelt digging into your gut on a hanging belay is miserable. It can make it hard to take a full breath, which will only make you feel more tired.
- Circulation Gets Cut Off: Leg loops that feel like tourniquets will quickly numb your legs. Hanging for more than a few minutes can lead to that pins-and-needles feeling or, in more serious cases, contribute to dangerous "harness hang syndrome" (suspension trauma).
- Mobility Suffers: Your harness will fight you on every high-step, stem, or mantel. The rise (the distance from the leg loops to the waistbelt) might be too short, constantly pulling the waistbelt down, or the leg loops will bind up and stop you from lifting your knees.
I once belayed a partner who was struggling badly on a pitch, constantly fidgeting and unable to commit to a crucial high-step. Once they lowered, we figured it out: their brand-new harness was a size too small, and the leg loops were physically preventing them from lifting their leg high enough. A simple mistake that effectively ended their day.
Choosing the Wrong Tool for the Job
Think of your harness as a specialized tool. You wouldn't try to run a marathon in hiking boots, and you shouldn't take a minimalist sport harness on a big trad climb. It’s a classic mistake, often made to save a few bucks, but it always leads to frustration.
The most common mismatch we see is trying to load up a lightweight sport harness with a full trad rack. It just doesn't work.
| Feature | Sport Harness | Trad Harness |
|---|---|---|
| Gear Loops | 2-4 small, often flexible loops | 4+ large, rigid loops, plus often a haul loop |
| Padding | Minimal, designed for light weight | Substantial padding on waist and legs for comfort during long hangs |
| Adjustability | Often has fixed leg loops for simplicity | Almost always has adjustable leg loops for layering |
When you try to cram a full set of cams, nuts, and a dozen draws onto a sport harness, you get a tangled, inaccessible mess. The lack of padding becomes agonizing on a multi-pitch route with hanging belays, and fixed leg loops are a non-starter if you need to layer up for the mountains. Getting climbing harness sizing right also means matching the harness type to your climbing discipline.
Common Harness Sizing Questions, Answered
Okay, so you've measured your waist and legs, stared at a few sizing charts, and maybe even tried a harness on in the shop. But a few nagging questions might still be holding you back from making that final choice.
Let's clear up some of the most common hangups so you can buy your next harness with total confidence.
What Is the Real Difference Between Men's and Women's Harnesses?
It's not just about the color options. The real differences are in the geometry, and they can make or break your comfort on a long climb. Women-specific harnesses are engineered for a different anatomical reality.
These models typically have:
- A contoured, often tapered waistbelt that’s shaped to sit nicely above the hips, which stops it from sliding down.
- A different waist-to-leg-loop ratio to better fit bodies with wider hips relative to their waist measurement.
- A longer rise (the distance from your leg loops to your waistbelt). This is a huge one—it prevents the waistbelt from riding up and digging into your ribs, a common complaint from women using unisex or men's models.
That said, the "best" harness is the one that fits your body, period. I've known plenty of women who prefer a men's model and vice-versa. Don't get locked into a category; try on whatever feels right.
My Measurements Are Between Two Sizes. Should I Size Up or Down?
This is the classic dilemma, and the answer is almost always the same: size down.
Go with the smaller of the two sizes, as long as you can still comfortably pass the "two-finger" test at the waist. A harness that's on the upper end of its fit range will feel more precise and less bulky. You'll have less extra tail webbing flapping around, which loves to snag on gear and rock.
Sizing up is the real gamble. Over time, the foam padding will pack out and compress. A harness that felt just right in the store can become dangerously loose after a few months, especially when you're climbing in just a t-shirt. You have to be able to cinch that buckle down tight and still have room to double it back properly.
How Do I Know When It Is Time to Replace My Harness?
Retiring a harness comes down to two factors: age and wear-and-tear. Manufacturers generally suggest retiring a harness 10 years after its manufacture date, even if it's sat in a closet its whole life. But for any active climber, it’s going to be much, much sooner.
Get in the habit of giving your harness a quick but thorough once-over before you rope up.
Look for any fraying on the hard points (the two tie-in loops and the belay loop), fuzzy or abraded webbing at buckles, and significant fading from UV damage. Any cut, burn, or abrasion that exposes the white core threads is an immediate signal for retirement.
If you take a truly massive whip, just replace it. Even if you can't see any damage, there could be micro-tears in the webbing you'll never spot. Your harness is life-support equipment. When in doubt, throw it out.
Can I Use My Sport Climbing Harness for Trad Climbing?
You can, but you'll probably regret it on the first pitch. Sport harnesses are stripped-down for sending—they're lightweight and have minimal, often small, gear loops. A trad rack, on the other hand, is an entirely different beast of cams, nuts, and slings that's both heavy and bulky.
A dedicated trad harness will have four or more large, rigid gear loops to help you rack gear logically so you can find what you need without fumbling. They also have much beefier padding for comfort on hanging belays and almost always include a rear haul loop.
Trying to cram a full rack onto a flimsy sport harness is an exercise in frustration and discomfort. If you're getting serious about trad, investing in one of the best climbing harnesses built for the job isn't just a good idea—it's essential.
Recommended Products for Trad Climbing
These products can support safer climbing, belaying, rappelling, and emergency readiness.
Affiliate disclosure: As an Amazon Associate, TradClimbers may earn from qualifying purchases at no additional cost to you.
Keep exploring helpful trad climbing, gear, safety, and technique resources.
- A Climber’s Guide to Rock Climbing in Thailand
- A Trad Climber’s Guide to the Isle of Skye Ridge
- Hueco Tanks Rock Climbing: hueco tanks rock climbing Essentials
- A Climber’s Guide to The Nose of El Capitan
- The Top 8 Unforgettable Climbing Routes El Capitan Has to Offer in 2026
- Yoga for Climbers: Boost Strength, Flexibility, and Recovery | yoga for climbers