

You’re halfway up a pitch, your feet feel decent, and a clean crack opens in front of your face. You pause, scan the rock, and decide whether it’s a nut moment or a cam moment, because the next few moves might be where a fall happens.
Climbing chocks (often called nuts or stoppers) are simple pieces of passive protection: small metal wedges on wire. You slide one into a constriction in the crack, clip it, and it holds because the taper locks in when weighted. In other words, chocks give you a way to protect a fall without drilling bolts, and they also play a big role in building solid anchors at belays.
This post breaks down the main types of chocks you’ll actually see on racks, plus what each shape does well. You’ll learn how to spot a good placement, how to “set” a nut so it stays put, and how to clean it without welding it into the rock.
I will also cover a simple starter set that makes sense for newer trad climbers, along with a few safety basics that matter more than gear hype.
Climbing chocks, explained in plain English
Climbing chocks make trad climbing possible without damaging the rock. These small metal wedges, wired for easy handling, slide into narrow spots in cracks. Climbers also call them nuts or stoppers. The term “chock” nods to chockstones, natural rocks jammed tight in cracks that hold ropes safely.
Back in the 1960s and 1970s, pitons ruled but scarred routes badly. So climbers got creative. John Bragg crafted early metal chocks from scrap metal in 1972. Ray Jacobs launched the first commercial ones, RP nuts, in 1973.
Black Diamond’s Stoppers arrived in 1978 and set the standard. Today’s wired versions stay simple: no moving parts means they last forever, weigh next to nothing, and cost less than cams. You just need the right crack shape and a solid placement. Poor fits won’t hold, so practice matters.
Picture a tapered block that locks like a key in a slot. When you fall, it cams deeper using friction and shape. That’s the beauty.
How a chock holds a fall (the wedge, the constriction, and the direction of pull)
Chocks grip through a simple wedge action. You need a constriction, a spot where the crack pinches narrow like a bottle neck. The chock’s wide top sits against the rock, narrow bottom slides in. A tug seats it firm. Falls then drive it tighter.
Think of pushing a cork into a wine bottle. It sticks because the neck squeezes the sides. Parallel cracks lack that pinch, so chocks rely more on friction there and often slip easier. Always hunt constrictions first.
The best pull runs mostly down with a slight outward angle, back into the crack. That keeps the wedge locked. Straight-out pulls risk popping it loose. Rope drag changes everything, though. It yanks sideways over edges, twists the angle bad, and walks the chock deeper or out. Clip direct, extend runners if needed, and watch your line.
Chocks vs cams: when nuts are the smarter choice
Chocks offer passive protection. They hold purely by shape and friction, no springs or expansion. Cams provide active protection. Lobes push out against walls when loaded.
Nuts win on cost (under $100 for a set), weight (grams each), and speed. You slot them fast in constrictions or irregular cracks. Cams cost more, weigh extra, but expand to fit parallel cracks and pods better. Nuts shine where rock flares or pinches oddly; cams excel in smooth, straight features.
Here’s a quick side-by-side:
| Feature | Chocks/Nuts | Cams |
|---|---|---|
| Mechanism | Passive wedge, friction | Active expanding lobes |
| Best for | Constrictions, irregular | Parallel cracks, pods |
| Cost/Weight | Cheap, light | Pricier, heavier |
| Placement | Quick, any decent rock | Slower, needs solid walls |
Most racks mix both. Nuts handle flakey spots cams avoid. Grab nuts first if you’re lightpacking or budget-conscious.
Where chocks work best on real rock
Seek specific features for bomber holds. Constrictions top the list: cracks narrowing inward. Pin scars, old bolt holes, take small nuts perfectly. Tiny slots or flares work too, as long as rock rings solid when tapped.
Shallow pods with an overhanging lip grab the taper well. Horizontal cracks succeed with a constriction; the wire slings under for stability. Granite often suits best, but sandstone or limestone works if not crumbly. Always test: bounce the sling, tug three ways. Slick or loose rock fails fast, so skip it.
Know your options: the main types of climbing chocks and what they are for
Climbing chocks come in shapes that match common crack features. You will find a few main types on store shelves or partners’ racks. Each one fits specific spots, so pick based on the rock ahead. Start simple because these pieces form the core of any trad setup. In addition, they keep things light and cheap compared to cams. Let’s break down what you need to know.
Standard wired nuts (curved nuts) for everyday crack protection
Standard wired nuts feature a curved taper on both sides. One side bows out, the other in. This lets them contact rock at three points, so they bite hard into constrictions. As a result, they lock tight under load.
Sizes run small to medium, often from 4 to 10 or so. Colors code the range: gold for tiny, green for bigger. You can flip or rotate them for the best fit. Therefore, one nut works multiple ways in a crack.
These form the backbone of your rack. Clip them fast in vertical pinches or flares. Most routes offer spots for them, so carry doubles in popular sizes.
Offset nuts for flares, pin scars, and weird placements
Offset nuts taper unevenly from one side to the other. The narrow end slips into the tight part first. Then the wider part grabs the flare. Because of this, they excel in ugly cracks that standard nuts skip.
Picture a crack widening upward after a pinch, or an old pin scar with uneven lips. Offsets save the day there. They also fit shallow slots that wander. However, always check two or three contact points. Pull down firm and inspect rock quality. Flaky stone fails fast, so bail if it crumbles.
Carry a few for routes with mixed cracks. They add security without much weight.
Hexes, tri-cams, and other specialty chocks (when you might want them)
Hexes offer larger passive protection with six sides. Slot them into wider parallel cracks. If the pull shifts, they rotate a bit and lock deeper. So they handle sizes beyond small nuts.
Tri-cams work in pockets or certain horizontals. Pull the sling, and the three cams expand to grip. They shine in shallow spots or flakey rock. But expect a learning curve; practice on the ground first.
Add these when standard nuts fall short. For example, take hexes for mid-sized cracks on longer pitches. Skip them at first unless your local crags demand it.
Tube chocks and ultra-wide protection (why most climbers rent or borrow first)
Tube chocks handle very wide cracks, from 3 to 12 inches. Twist the collar to expand the tube against parallel walls. They hold multidirectional pulls well. However, they stay niche because few routes need them.
Ask if your local climbs feature offwidths or chimneys. Most granite sport climbs skip wide gear. Instead, rent or borrow to test. Train with a partner who knows placements; they prevent stuck pieces.
Focus on basics first. Wide protection comes later with experience.
How to place climbing chocks that actually stay put
You rack your climbing chocks and spot a promising crack. Now comes the key part: slotting them so they grip like they belong there. Bad placements fail fast, but good ones build confidence pitch after pitch. Follow this routine every time, and your nuts hold firm. Practice on the ground first to make it second nature. In addition, always check rock quality before you commit.
A simple placement checklist: pick a size, find a constriction, seat it, then clip it
Start with size. Grab a bigger nut first; it often fits constrictions better because smaller ones slip through. If it wobbles, downsize next. Test fits quick on your rack without yanking pieces off.
Hunt a constriction next, where the crack tapers down like a funnel. Slide the narrow end in first. Orient the nut so the curved side faces the fall line; the cable points down and slightly out. That sets the direction of pull right from the start.
Seat it with a firm downward tug on the wire. Feel it bind at multiple points. Don’t overdo the yank, though; that can kink the wire or pop it loose. Clip a quickdraw or alpine draw right away. Extend longer pieces to cut rope drag, which twists nuts sideways over time.
Remember the DCS rule: Direction down and out, Constriction for taper, Surface contact flush against rock. Repeat these steps, and your placements stick.
What a good nut placement looks and feels like
Look for even contact at three or four points. The nut sits flush, not tipped or perched. Rock touches the wide top and sides without gaps. It stays away from crumbly crystals or loose flakes that blow out under load.
Stable nuts match the crack taper perfectly. No rocking when you inspect from angles. The wire hangs straight, ready for your clip.
Tug downward and outward lightly. It holds without shifting. A good one feels solid, like it grew there. You don’t need to body-weight every piece; that risks pulling it early. Test thoughtfully instead, then trust it and climb past.
Common mistakes that lead to bad chock placements
Parallel cracks kill holds first. Chocks slip without taper; switch to a cam or hunt a pinch nearby.
Place too shallow, and it plucks right out. Push deeper into the constriction for grip.
Wrong size leaves gaps. Go bigger initially, then adjust down.
Bad pull direction walks it loose. Clip so rope runs down and back; extend draws to fix angles.
Rope drag rotates nuts over edges. Use longer slings or alpine draws to keep the line straight.
Behind loose rock spells disaster. Tap the stone; skip if it flexes.
Over-camming happens when you yank too hard. It binds wrong and fails. Tug firm but controlled.
Here is how to fix most issues quick:
- Parallel? Try an offset nut or cam.
- Shallow? Find deeper taper.
- Drag? Extend the piece.
- Loose? Move on.
Spot these early, and you save gear and nerves.
How to remove chocks without getting them stuck (and without dropping them)
The follower cleans gear. Reverse placement: pull the cable upward while wiggling side to side. That breaks the wedge hold gently.
Stuck nuts need a nut tool. Tap upward from below to loosen. Control the wire so it slides toward you, not rockets down.
Change angles if it binds. Use micro-movements and patience; force welds it worse. Rock the tool slow.
Drop nothing. Coil the rope below first. Practice cleaning on toprope to build the skill.
Leave gear only as last resort. It’s bad etiquette and costs everyone. Ask locals for tips on tough routes
Building a smart starter chock rack and taking care of it
You know the types of climbing chocks now. You can spot good placements too. So let’s build a rack that fits your climbs without wasting cash. Start small because most routes use a handful of sizes. Then keep your gear in top shape so it lasts seasons. A smart setup grabs the right nut fast mid-pitch. Plus, quick checks prevent failures.
What to buy first: a simple, versatile set that covers most climbs
Grab one set of standard wired nuts first. Sizes 4 to 13 handle most cracks you meet. They fit constrictions from small pinches to medium flares. In addition, these cover granite slabs or sandstone towers well.
Next, add doubles in your favorite sizes. For example, take two each of 6 through 9 if local routes run medium. That doubles protection without bulk. Match gear to what you climb. Tight cracks need smaller nuts; wider ones call for bigger. Check route topos for crack sizes and rock type before shopping.
Offsets come later if flares or scars pop up often. Skip them unless your area demands it. So you save money and weight. Practice on boulders to learn fits. Your rack stays light and ready.
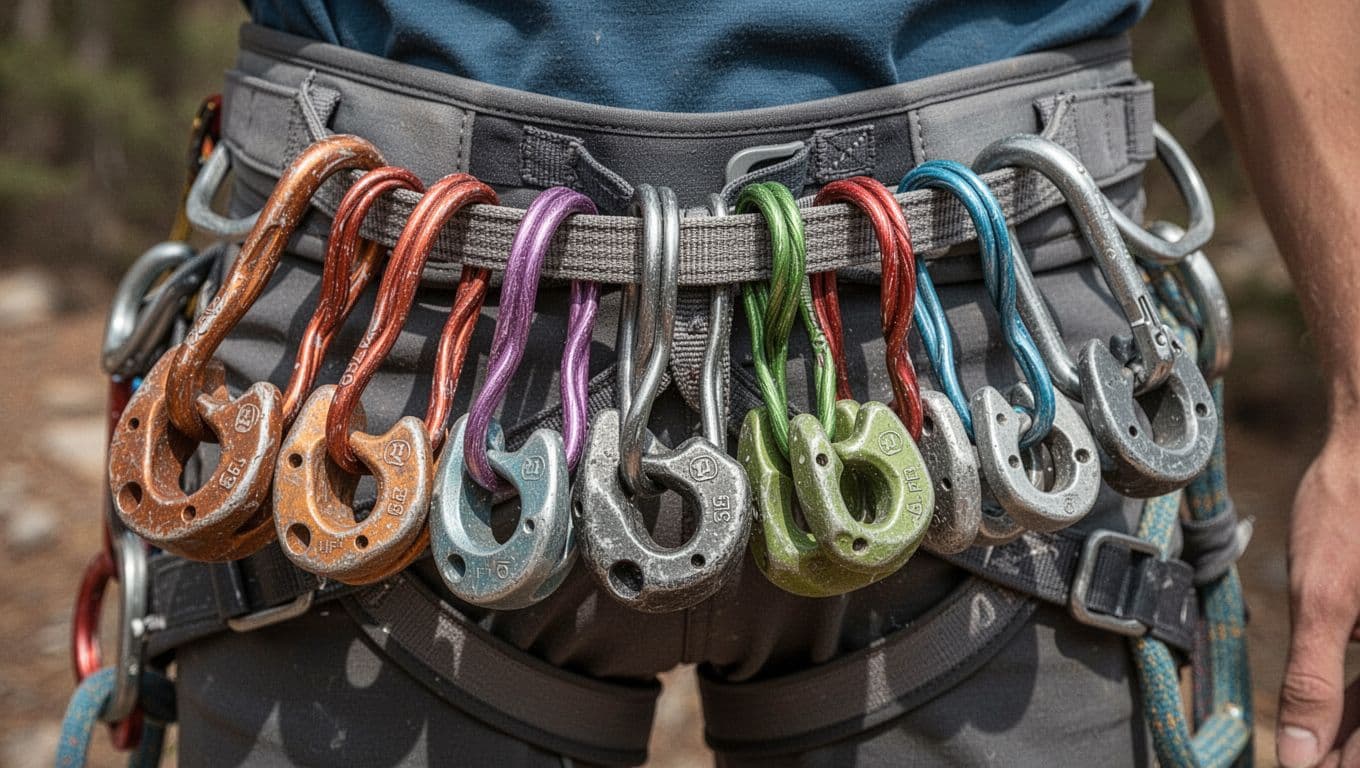 climbing harness gear loop, captured in natural daylight with soft shadows and detailed textures."/>
How to rack chocks so you can find the right size fast
Rack nuts by size on one or two carabiners. Put small ones (gold, silver) on the first; medium (green, red) on the second. Colors give quick cues as you reach. Therefore, you grab without looking down.
Keep tiny nuts separate to avoid fumbles at stances. Clip the carabiner to your harness gear loop. Orient wires away from buckles so they slide easy. Never cross-load; that weakens holds.
Test your setup on short routes. You will clip faster and climb smoother. In short, good racking builds flow
Care, inspection, and when to retire a nut
Inspect every nut before climbs. Check wires for frays, kinks, or broken strands. Look at swages for damage; they crimp the cable tight. Feel edges for sharpness that cuts ropes.
Deep grooves mean retire it now. Tap the nut; mushroomed metal fails fast. Clean dirt and salt with water after use. Dry fully because rust weakens steel.
Store in a ventilated bag away from chemicals. Hang dry after wet days. So gear stays reliable.
Retire suspect pieces right away. Safety beats saving bucks. Replace annually or after big falls.

Conclusion
Climbing chocks deliver reliable passive protection through simple wedge action in tapering cracks. Standard wired nuts handle most constrictions, while offsets tackle flares and scars. Hexes and tri-cams fill gaps for wider or pocketed spots, but start with basics.
Solid placements demand a constriction, the right size, and downward pull. Follow the DCS rule: direction down and out, constriction taper, surface contact flush. Rack sizes 4 to 13 on color-coded biners for quick grabs, and inspect wires often to keep them bomber.
Build your starter set now. Grab one versatile range, add doubles in mediums, and practice at the crag base. Get feedback from an experienced partner or guide. Focus on clean, well-seated placements before harder leads. You’ll climb safer and smoother.
Back to Climbing Nut Reviews
Recommended Products for Trad Climbing
These products can support safer climbing, belaying, rappelling, and emergency readiness.
Affiliate disclosure: As an Amazon Associate, TradClimbers may earn from qualifying purchases at no additional cost to you.
Keep exploring helpful trad climbing, gear, safety, and technique resources.
- A Climber’s Guide to Rock Climbing in Thailand
- A Trad Climber’s Guide to the Isle of Skye Ridge
- Hueco Tanks Rock Climbing: hueco tanks rock climbing Essentials
- A Climber’s Guide to The Nose of El Capitan
- The Top 8 Unforgettable Climbing Routes El Capitan Has to Offer in 2026
- Yoga for Climbers: Boost Strength, Flexibility, and Recovery | yoga for climbers