

So, you’re thinking about trying out the campus board? It’s a pretty intense bit of kit, not gonna lie. People use it to get stronger, faster, and more accurate on the wall, which is pretty cool. But it’s not for everyone, especially if you’re just starting out. You gotta have some solid climbing strength already. This guide is all about helping you figure out if Campus Board Training is right for you and how to do it without hurting yourself. We’ll go over the basics, some moves, how to set it up, and most importantly, how to stay safe. Let’s get you climbing harder!
Key Takeaways
- Campus Board Training is best for climbers who can already boulder V4 or harder and have good technique. It’s not for beginners.
- Always warm up properly before using the campus board, and do it when you’re fresh, not after a hard climbing session, to avoid injuries.
- Use an open-hand or half crimp grip. Never use a full crimp, as this is a quick way to get injured. Also, make sure your shoulders are engaged throughout each move.
- Start with your feet on the kickboard or use larger holds to get a feel for the movements before trying harder moves without foot support.
- Campus Board Training should be done in blocks of 4-6 weeks on, followed by 4-6 weeks off, to allow your body to recover and adapt.
Mastering Campus Board Training Fundamentals
So, you’re thinking about getting on the campus board? Awesome. It’s a pretty intense tool, but man, can it make a difference in your climbing. If you’ve been hitting a wall on boulders or routes, this might be your next step. Wolfgang Gullich, a total legend, invented it back in the day to build serious power, and it worked for him on some of the hardest climbs around. Basically, it’s a wall with evenly spaced wooden rungs, usually a bit overhanging. You’ll find different sizes, from big jugs to tiny crimps, and sometimes even slopers and pinches.
Understanding Campus Board Suitability
First things first, the campus board isn’t for beginners. You need a solid base of climbing strength before you even think about jumping on it. If you’re just starting out, stick to the regular climbing wall and build up your power there. The campus board is demanding, and jumping on too early can lead to injuries. It’s best for climbers who have been at it for a while and are looking to break through a strength plateau.
The Importance of Proper Warm-Up
Seriously, don’t skip this part. You wouldn’t try your hardest boulder problem cold, right? The campus board is even more intense. You need to get your body ready. A good warm-up could involve some easy climbing, gradually increasing the difficulty until you feel warm and your muscles are ready to work. Some people like to do a bit of hangboarding too, just to get their fingers and forearms primed. A thorough warm-up is non-negotiable for preventing injuries and getting the most out of your session.
When to Incorporate Campus Board Sessions
Campus board training is powerful stuff, and you can’t just do it all the time. Think of it in blocks. A common approach is to train on the campus board for 4-6 weeks, then take a break for a similar period. This allows your body to adapt and recover, so you can actually see the gains. It’s also generally recommended to do campus board sessions before your main climbing workout, not after. Doing it when you’re already tired from climbing can really up the risk of getting hurt. So, plan your sessions wisely – maybe once or twice a week during your training block, and always when you’re feeling fresh.
Essential Campus Board Techniques
Alright, so you’re ready to get on the campus board. That’s awesome! But before you start flinging yourself between rungs like a squirrel on espresso, let’s talk about how to actually do it right. This isn’t just about brute strength; it’s about technique, control, and not wrecking yourself.
Grip Types: Open Hand and Half Crimp
First things first: how you grab those rungs matters. You absolutely must avoid full crimping on a campus board. Seriously. It’s a fast track to finger injuries. Stick to two main grips: the open hand and the half crimp. The open hand is pretty self-explanatory – your fingers are mostly straight, just hooked over the edge. The half crimp involves bending your fingers at the second knuckle, creating a bit more power but still keeping things safer than a full crimp. If you can’t comfortably hold a rung with one of these grips, you’re probably not ready for the campus board yet. It’s better to build up that contact strength on smaller holds elsewhere first.
Utilizing the Kickboard for Beginners
If you’re new to the campus board, don’t just jump straight to hanging by your fingertips. That’s where the kickboard comes in handy. This is usually a lower section with small footholds or even just the bottom rungs of the board. Using the kickboard lets you practice the movements and get a feel for the dynamic nature of campusing without putting full stress on your arms and fingers. You can use your feet on the kickboard to help propel yourself up or stabilize, making the whole process much more manageable as you build confidence and strength. It’s a smart way to ease into the training.
Alternating and Matching Holds
Campus board workouts aren’t just about going up. You’ll be doing a lot of alternating moves, where you move from one hand to the next, often with a dynamic pull. But you’ll also encounter situations where you need to match holds – meaning both hands end up on the same rung. For beginners, practicing matching holds can be a good way to control the movement and build strength. As you progress, you’ll focus more on alternating moves, which requires more coordination and power. Think about how you’d move between holds on a difficult climb; it’s that kind of controlled explosiveness you’re aiming for. This kind of training can really help with power and accuracy on the wall.
The key is to move with intention. Every pull, every reach, should be controlled. Don’t just flail. Focus on engaging your shoulders and core throughout the movement. It’s about quality over quantity, especially when you’re starting out. If your form breaks down, stop. It’s better to do fewer reps correctly than many reps poorly.
Campus Board Training for Power and Accuracy
So, you’ve been climbing for a while, and maybe you’re hitting a wall on those powerful boulder problems. That’s where the campus board really shines. It’s not just about pulling harder; it’s about generating that explosive force and hitting holds with precision. This training tool is designed to build raw power and improve your ability to stick dynamic moves. It’s intense, though, so make sure you’re properly warmed up and have a solid base of strength before you even think about jumping on it. Beginners should definitely start with feet on the kickboard to get a feel for the movements without the full strain.
Single-Arm Bump and Taps Exercises
These exercises are fantastic for building unilateral power and improving your contact strength – that feeling of sticking a hold. The single-arm bump involves moving one arm up the rungs, one hold at a time, then bringing the other arm up to match. You’ll want to drop down and repeat with the other arm. Taps are a bit different; you’ll reach for a higher rung, then quickly tap it and return to the lower one, or vice versa. It’s all about controlled, explosive movements.
Here’s a breakdown:
- Single-Arm Bump:
- Start with one arm on a lower rung.
- Bump that arm up to the next hold.
- Once you reach your max rung, bring your other arm up to match.
- Drop down and switch arms.
- Taps:
- Reach for a higher rung with one hand.
- Quickly tap the hold and return to your starting position, or move to a lower rung.
- Repeat until you’ve tapped your highest reachable rung.
- Switch arms.
Remember to focus on the quality of each movement. It’s not about speed; it’s about controlled power. You can find some great examples of these exercises in action online, which can really help visualize the technique like those used by elite climbers.
Jump Catch and Double Campus Drills
Once you’re comfortable with the basic movements, you can start working on more dynamic drills. The jump catch is exactly what it sounds like: you jump from one hold to another, aiming to catch it securely. This is brilliant for developing explosive power and the ability to react quickly. Double campus drills involve moving both arms simultaneously or in quick succession between holds. These are great for building overall power and coordination.
The campus board is a high-intensity tool. It’s best used in focused blocks of training, not as a daily routine. Think 4-6 weeks on, then a similar period off, to allow your body to adapt and recover. This prevents burnout and injury.
Progressing to Single-Arm Max Attempts
This is where things get really challenging. Single-arm max attempts involve reaching for the furthest possible hold with one arm, often with a dynamic movement. This requires immense strength and control. It’s vital to maintain perfect form here; if your form breaks down, stop. Always use an open-hand or half crimp grip – never a full crimp, as this is a fast track to pulley injuries. If you’re looking to push your limits and see how strong you really are, this is the drill for you. Just be sure you’re ready for it and have built up to this level gradually.
Building Endurance with Campus Board Ladders
Alright, so you’ve been hitting the campus board, getting stronger, and feeling that power build. That’s awesome! But what about keeping that strength going, especially when you’re climbing for a while? That’s where campus board ladders come in. They’re not just about brute force; they’re about building stamina and making sure your fingers and arms don’t give out halfway through a tough route.
Executing Ladder Repetitions
Think of a ladder as a continuous movement up and down the campus board, focusing on smooth transitions and controlled hangs. The basic idea is to alternate hands, moving from one rung to the next, and then repeating the process back down. The key is to maintain tension and avoid dead hangs whenever possible.
Here’s a breakdown of how to do a standard ladder:
- Start with your feet on the kickboard or the lowest rung, hands on the starting rungs (usually the largest ones).
- Reach up with your right hand to the next rung.
- Simultaneously, reach up with your left hand to the same rung, matching your right hand. This is called matching.
- From the matched position, repeat the process, reaching up with your left hand first, then matching with your right.
- Continue this alternating pattern all the way to the top of the board.
- Once at the top, you can either rest briefly or immediately start descending, again alternating hands.
- Descend by reaching down with one hand, then the other, until you’re back at the starting position.
It sounds simple, but doing this for multiple rounds, especially on smaller holds, really taxes your forearms and shoulders. It’s a fantastic way to build that endurance needed for longer climbs.
Remember, the goal here isn’t just to get to the top as fast as possible. It’s about controlled movement and building the capacity to keep pulling for longer periods. Focus on the quality of each move, not just the quantity.
Variations for Grip Training
Once you’ve got the hang of the basic ladder, you can start tweaking it to target different aspects of your grip and endurance. This is where you can really tailor the workout to your specific weaknesses.
- Varying Rung Size: Start with the largest rungs and gradually move to smaller ones as you get tired. This progression helps you adapt to different hold types and builds resilience.
- Alternating Grip Types: Mix in half crimps and open-hand grips on the same ladder. This challenges your fingers in different ways and prepares you for varied climbing surfaces.
- Adding a Pull-Up at the Top: After reaching the top rung, perform a controlled pull-up before starting your descent. This adds an extra strength component to the endurance work.
- Tempo Control: Try to control the speed of your movements. For example, do a slow, controlled ascent and a faster, but still safe, descent, or vice versa. This changes the stimulus on your muscles.
Building endurance on the campus board is a game-changer for climbers looking to push past their limits. It takes dedication, but the payoff in terms of sustained power and grip strength is huge. Don’t forget to check out resources on campus board training tools to see how they can fit into your overall plan.
Optimizing Your Campus Board Setup
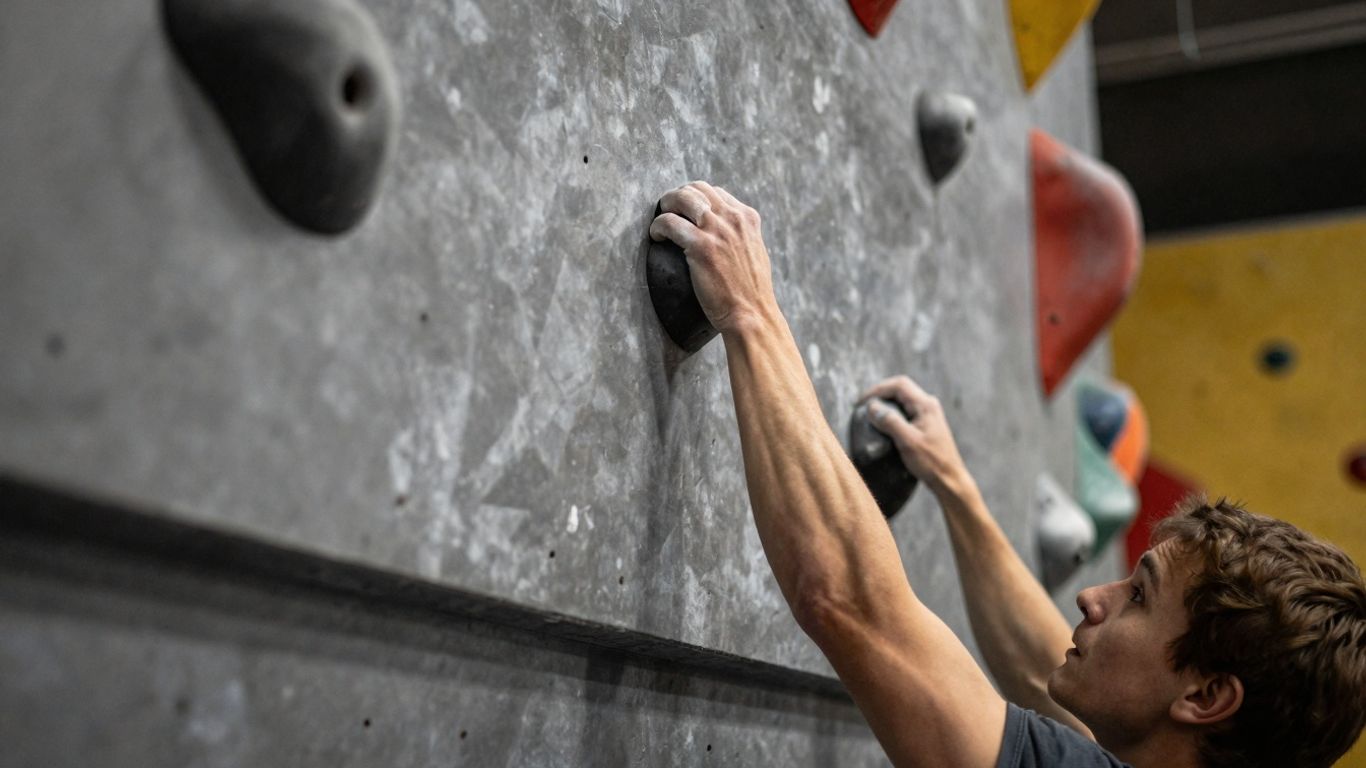
Getting your campus board set up right is pretty important if you want to get the most out of your training without hurting yourself. It’s not just about slapping some wood on a wall; there are specific things to consider. Think of it like tuning a guitar – get it right, and it sounds amazing. Get it wrong, and it’s just noise.
Ideal Rung Sizes and Spacing
When you look at a campus board, the rungs are the main event. You don’t want just one size. Having a mix is key. Generally, you’ll see rungs around 28-30mm and then smaller ones at 23-25mm. This variety lets you train different grips and makes your fingers work in different ways. The spacing between these rungs is also a big deal. Most standard boards have about 11cm between them. This spacing is usually set up so you can make dynamic moves without your legs getting in the way too much.
| Rung Size (mm) | Recommended Spacing (cm) |
|---|---|
| 28-30 | 11 |
| 23-25 | 11 |
Setting the Correct Wall Angle and Kickboard Depth
The angle of the wall matters a lot for how hard the training feels. A steeper angle means more of your body weight is pulling down, making it tougher. Most campus boards are set between 13 and 17 degrees of overhang. This gives a good balance for developing power without being ridiculously steep right away. The kickboard is that bit at the bottom where you can put your feet. Setting the depth right, usually between 500-600mm from the bottom of the campus board rungs to the top of the kickboard, helps beginners get a feel for the movement and build some initial strength using their feet. It’s a good way to ease into it.
Considerations for Home Campus Board Construction
If you’re thinking about building your own campus board at home, you’ve got to be precise. You can’t just guess the measurements. Using standard dimensions means you can train effectively and then go to a gym and still be able to perform. You’ll need to get the rung sizes and spacing right, and the wall angle is important too. Don’t forget about the kickboard setup. Getting these details correct means your home setup will actually help your climbing progress, rather than hindering it or, worse, causing an injury.
Building your own campus board requires attention to detail. Standard measurements for rung size, spacing, and wall angle are available and recommended. This ensures consistency and safety, allowing you to replicate gym training effectively in your home environment. Don’t overlook the kickboard; its placement is vital for proper form and progression, especially for those new to campus training.
- Rung Sizes: Aim for at least two different sizes (e.g., 28-30mm and 23-25mm).
- Rung Spacing: Keep approximately 11cm between rungs.
- Wall Angle: A 13-17 degree overhang is a good starting point.
- Kickboard Depth: Ensure a gap of 500-600mm between the bottom of the campus board and the kickboard.
- Foot Rungs: If adding foot rungs, make them 10-15mm deep with about 150mm spacing.
Injury Prevention and Balanced Training
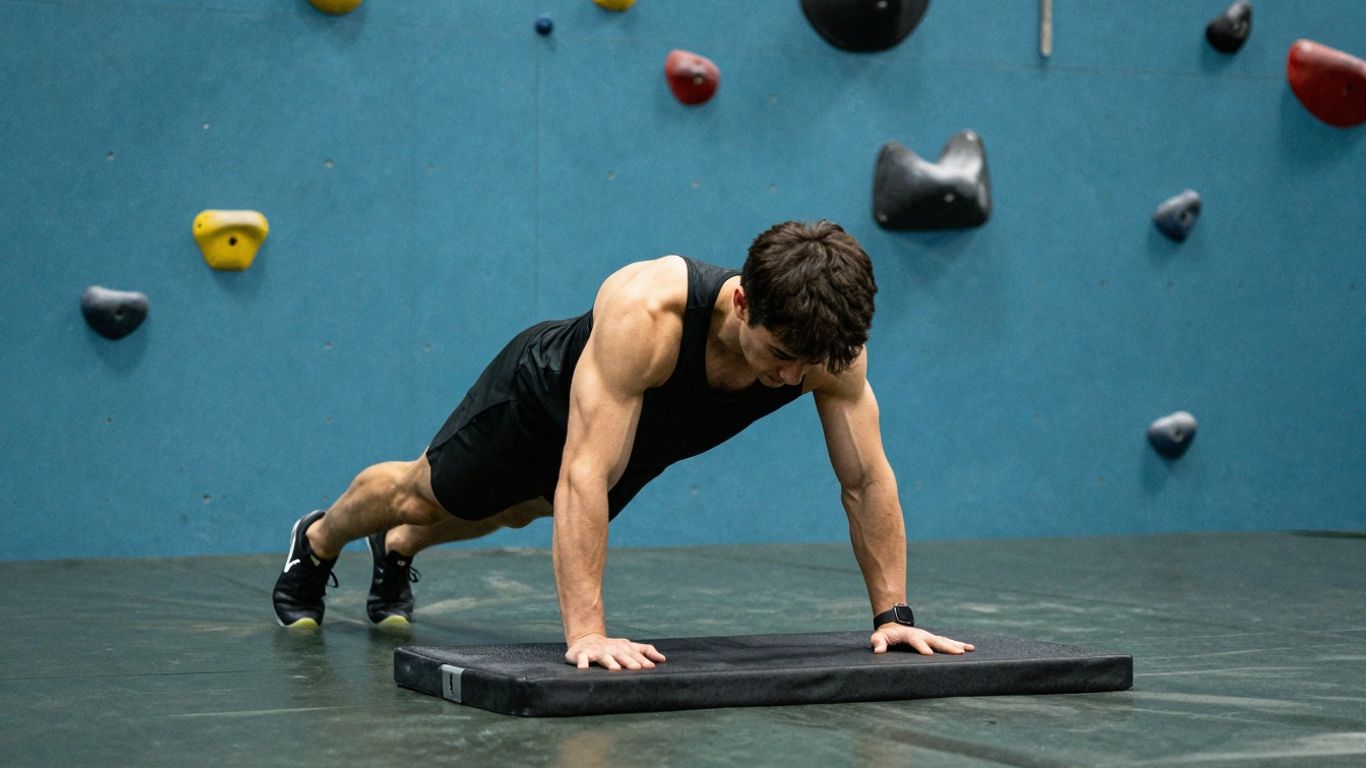
Maintaining Proper Form Throughout Workouts
Look, nobody wants to get hurt. It’s the worst. You spend all this time training, building up strength, and then BAM! A stupid injury sidelines you for weeks, maybe months. It really stinks. The campus board, while awesome for building power, can be pretty rough on your body if you’re not careful. Paying attention to how you move is super important. Think about keeping your shoulders packed – that means pulling them down and back, away from your ears. This helps protect your shoulder joint. Also, try not to lock out your elbows completely when you’re hanging or moving. Keeping a slight bend, or ‘soft elbows,’ takes some pressure off the joint. It’s all about controlled movements, not just flailing around.
The Role of Skin Care and Taping
Your skin is your first line of defense, right? If your fingertips are ripped up, you can’t grip anything. So, taking care of your skin is a big deal. Regularly file down those gnarly calluses so they don’t tear. Seriously, a nail file works wonders. And keep your skin moisturized, but not so much that it gets soft and weak. There are tons of climbing-specific balms out there. If you do get a little tear or a ‘flapper,’ taping it up can help protect it while it heals. It’s not a magic fix, but it lets you keep training without making it worse.
Balancing Muscle Development with Both Arms
It’s easy to favor one arm, especially if it’s stronger. You might find yourself doing extra reps on one side or just generally feeling more comfortable. But this can lead to imbalances that might cause problems down the line.
Try to be mindful of this. If you notice you’re always stronger on your left, make a conscious effort to focus on your right during certain exercises. Maybe do an extra set on the weaker side, or use a slightly lighter weight on the stronger side to even things out. It’s about building a solid, symmetrical foundation so you don’t end up with weird aches or weaknesses.
Training on the campus board is intense. It’s designed to push your limits, which is great for power, but it also means you need to be extra vigilant about how your body is responding. Listen to those little twinges before they become big problems. A little extra rest or a modification to an exercise is way better than a long break due to injury.
Here’s a quick rundown on how to approach your training load:
- Beginner: Focus on technique. Maybe two sessions a week on a spray wall, plus one light fingerboard session. Gradual gains are key.
- Intermediate: Add a bit more volume. Two climbing/board sessions and one fingerboard session focusing on max hangs. You can add light campus work here too.
- Advanced: This is where you get serious with power blocks, campus boards, and max strength on the fingerboard. More frequent sessions, but remember to deload regularly.
Remember to space out your high-intensity sessions. Your fingers and tendons need time to recover. Don’t just hammer them day after day. That’s a recipe for disaster.
Wrapping Up Your Campus Board Journey
So, that’s the lowdown on campus board training. It’s a pretty intense way to build serious climbing power, but it’s definitely not for everyone, especially if you’re just starting out. Remember to warm up right, use good form, and listen to your body – seriously, don’t push it too hard or too often, or you’ll end up with injuries instead of gains.
Stick to those training blocks, give your body plenty of rest, and you’ll start seeing some real progress. It might seem a bit daunting at first, but with consistent, smart training, you can definitely use the campus board to push past those climbing plateaus and reach new heights. Now go get strong!
Frequently Asked Questions
Who should use a campus board?
Campus boards are best for climbers who have already built a good amount of strength, typically those who can boulder at a V4 level or higher. It’s a tough workout, so it’s not recommended for beginners or anyone still working on basic climbing strength. Make sure you’re warmed up and ready before you start!
What’s the right way to grip the holds?
When you’re on the campus board, always use an open-hand or half-crimp grip. Never use a full crimp, as this can really hurt your fingers and lead to injuries. Focus on keeping your shoulders and shoulder blades engaged to protect yourself.
How often should I train on the campus board?
Campus board training is intense, so it’s best done in short bursts. Try training for about 4 to 6 weeks, then take a break for a similar amount of time. This helps your body recover and get stronger. Beginners should probably only do it once a week, while more advanced climbers might do it two or three times a week.
Can I use my feet on the campus board?
Yes, especially when you’re starting out! Many campus boards have a ‘kickboard’ at the bottom, which is a place to put your feet. Using your feet can help you get a feel for the movements and build strength without putting too much stress on your fingers right away.
What if my skin gets sore?
Campus boarding can be really hard on your skin, especially when you’re trying to reach for holds. If you notice your skin getting raw or developing ‘flappers’ (torn skin), consider using athletic tape to protect your fingers and hands. It can make a big difference.
How do I avoid getting hurt?
Listen to your body! Always warm up thoroughly before you start. Never train when you’re already tired from climbing. Make sure you’re using the correct grips and keeping your shoulders engaged. If your form starts to break down, it’s time to stop. Balancing workouts for both arms is also key to preventing injuries.
Recommended Products for Bouldering
These products can support climbing-specific strength, technique, and conditioning.
Affiliate disclosure: As an Amazon Associate, TradClimbers may earn from qualifying purchases at no additional cost to you.
Keep exploring helpful trad climbing, gear, safety, and technique resources.