

You’ve hit a pin scar, that’s an old piton hole, or a shallow seam too thin for micro cams or small nuts. They either won’t fit, or they feel shaky at best. In trad climbing, where you place removable gear to protect falls, this spot screams for something specialized.
Enter the CAMP Ball Nut, a small active protection device with spring-loaded balls that expand to grip the rock. You pull a trigger to loosen them, seat it in the crack, and release so the balls press outward for a solid hold. It shines in parallel cracks from 3 to 18 mm, places like nuts but grips like a mini cam, and packs 8 kN strength across sizes.
Climbers carry them because they’re light (1 to 2.5 ounces), cheap, and fit super-narrow spots on alpine routes or desert towers where aid climbing—using gear for upward steps—might otherwise rule. Rack a few sizes 2 through 4, and you’re set for sketchy leads.
In this post, you’ll learn exactly how it works, when it’s your best tool, safe placement steps, and how it stacks up against micro cams or nuts. Stick around; these little guys can save your lead.
What a CAMP Ball Nut is, and how it holds in a crack
You already know the CAMP Ball Nut fits tight spots, but let’s break down its parts and action. It packs a thin steel wedge body with a sloped ramp inside, two spring-loaded steel balls, a thin steel cable stem, and a trigger bar up top. Pull the trigger first; that drops the balls down the ramp so the whole unit narrows for easy insertion into narrow parallel cracks from 3 to 18 mm.
Next, seat it in and release the trigger. A quick downward yank on the stem slides the balls up the ramp. They expand outward, pressing hard against the rock walls to create grip through friction and a wedging effect. As one of the smallest active protections, it reaches pin scars or shallow seams that block bigger gear. Still, you must nail the placement; poor ones won’t hold your weight.
The simple physics, why the balls grab when you weight it
Think of the balls like fingers squeezing a slippery rope; they grab tighter under load. When you pull down or inward on the stem, force cams the balls higher up the ramp. This expansion boosts contact with the rock, so friction locks it in place.
However, direction matters a lot. A downward tug tightens the hold, because it drives the balls outward more. Upward or outward pulls can make it slip or walk out instead.
A bomber placement feels rock-solid; it won’t budge when you tug-test it hard. You see good ball-rock contact, and it sits snug in a parallel section. Common fails include crumbly rock that flakes off, flaring cracks that let it shift, or balls not fully seated from a weak yank.
Where it fits on your rack, between nuts and micro cams
Rack the CAMP Ball Nut as a specialty piece for thin seams and pin scars where other gear quits. It slots right between passive nuts and micro cams on your harness. Passive nuts weigh less overall, yet they rely on tight constrictions for friction alone; no active expansion helps them.
Micro cams place faster in some spots, but their bulk skips super-shallow or narrow cracks. In contrast, the Ball Nut stays slim and grips actively without much depth. Experienced trad leaders love them for sketchy leads. Aid climbers grab them to step up on desert towers. Climbers on thin crack routes rack them to fill gaps.
Ball nut sizing basics in plain English (and what the numbers mean)
CAMP numbers Ball Nuts from #1 to #5; smaller numbers fit tinier cracks. Each size handles a narrow range, but the balls expand roughly 2:1 once set. That means a #1 starts at about 3 mm narrow and grips up to 6 mm wide.
Overall, they cover 3 to 18 mm across all sizes. Here’s a quick size chart to match cracks fast:
| Size | Range (mm) | Strength |
|---|---|---|
| #1 | 3-6 | 8 kN |
| #2 | 4-8 | 8 kN |
| #3 | 6-10 | 8 kN |
| #4 | 8-14 | 8 kN |
| #5 | 10-18 | 8 kN |
This table shows even coverage with full strength every size. If you’re new to them, start with middle sizes like #2 and #3. Those see action most on common thin routes, so they build your confidence first.
Choosing the right CAMP Ball Nut size for the crack you have
You spot a thin seam. How do you pick the perfect CAMP Ball Nut fast? First, estimate the crack width. Pinch your fingers to match the opening, or compare it to everyday items: a guitar pick for #1, a pen for #2, a Sharpie for #3. Next, glance at your cheat sheet.
Retract the trigger fully so balls drop; the unit needs to slide in narrow with zero force. If it binds retracted, go smaller. Once seated, yank down hard. Balls should expand fully against both walls without blowouts.
Common mistakes kill placements. Too small? Balls won’t contact rock enough, so it walks under load. Too big? It jams retracted and stresses the trigger. Always test in good granite or sandstone; soft rock fools your eyes. Practice at home on a crack replica. You’ll size right every time, so your pro stays bomber.
Quick size and range cheat sheet (3 mm to 18 mm)
Keep this table handy on your phone or rack. It lists precise ranges from CAMP specs, plus inches for quick reference. Weights stay low across the board, and every size hits 8 kN strength. Numbers vary a bit by batch, but these guide you spot-on.
| Size | Range (mm) | Range (in) | Weight (g / oz) |
|---|---|---|---|
| #1 | 3-6 | 0.12-0.24 | 31 / 1.1 |
| #2 | 4.5-9 | 0.18-0.35 | 39 / 1.4 |
| #3 | 6-12 | 0.24-0.47 | 47 / 1.7 |
| #4 | 7.6-12.9 | 0.30-0.51 | ~52 / ~1.8 |
| #5 | 10.6-16 | 0.42-0.63 | ~65 / ~2.3 |
Scan left to right as cracks widen. Start here, then confirm with a test pull.
When to use a ball nut instead of forcing in a micro cam
CAMP Ball Nuts beat micro cams in spots where cams fail or feel sketchy. They slip into shallow or parallel features without bulk. Here are prime scenarios:
- Shallow placements: Less than 1 cm deep; cam lobes bottom out or spin.
- Pin scars: Old piton holes with smooth, tight walls; perfect passive grip.
- Parallel-sided seams: Straight, uniform cracks under 16 mm; balls conform exactly.
- Cam walk zones: Spots where lobes slip outward under pull; balls lock via ramp.
Skip them in bad rock, however. They demand solid constriction:
- Do not use in crumbly rock; flakes destroy ball contact.
- Avoid strong flares; expansion pulls them deeper instead of holding.
- Stay away from very irregular cracks; uneven walls prevent even pressure.
Choose based on rock type first. Solid granite rewards you most.
Building a small, smart set without overbuying
Don’t rack a full set yet. Start lean to match your routes. Prices run about $50 per Ball Nut, same as one mid-size cam. So buy what you clip. A full #1-5 rack weighs under 250 grams total. That’s lighter than two large cams, with no rack penalty on thin leads.
Here are smart starters:
- Core duo (#2 and #3): Covers 4.5-12 mm, your most common thin cracks. Total 86 grams. Ideal for crack pitches or aid solos.
- Thin route add (#1 + #2 + #3): Tackle pencil seams. 117 grams. Great for desert towers or alpine splits.
- Wide scar rack (#2 + #3 + #4 + #5): Hits up to 16 mm pin ladders. Around 200 grams. Perfect for Yosemite scars.
Test on local crags. Add sizes as gaps show in your logbook. You’ll climb lighter and place surer.
How to place a CAMP Ball Nut so it feels solid
You want every CAMP Ball Nut to grab like it means business. Slow down at the crag. Pick solid rock first. Then follow these steps. A solid placement starts with the right crack and ends with a tug test that won’t budge it. Practice builds speed, but care keeps you safe.
Step by step placement: set the balls, seat it, then test it
Follow this sequence every time. It takes seconds but pays off big.
- Pick the crack. Look for parallel sides in solid rock. Avoid flares or loose flakes.
- Retract with trigger. Pull the trigger fully so balls drop at least 70% down the ramp. The unit narrows for easy slide-in.
- Insert to the right depth. Push it in until balls can expand without bottoming out. Leave room for them to move up the ramp.
- Release slowly. Let the trigger go so balls press against walls. Wiggle side to side to seat them snug.
- Do a firm downward tug test. Yank hard on the stem. It should lock tight, no movement. Check ball contact visually.
Always align the stem with your expected pull direction. That keeps force downward for max grip. In longer runs, extend with a sling. It cuts rope drag and stops walking.
Reading the crack: parallel, flared, shallow, and pin scar shapes
Good cracks make CAMP Ball Nuts shine. Parallel sides with consistent width work best. Solid rock holds the balls firm. Bumps or ripples add extra bite through friction.
Shallow seams suit them perfect. They grip where micro cams need more depth to set lobes. You save space and weight.
Strong flares spell trouble, however. As load hits, balls can pop deeper instead of holding. Skip those spots.
Pin scars often look smooth and oval. Pick the size that fills it snug without forcing the balls too far. Test twice; they hold well in good stone.
Common mistakes that make ball nuts fail (and how to avoid them)
Everyone slips up at first. Spot these, fix them quick, and your gear stays bomber. Here’s the top list with easy outs.
- Wrong size: Balls don’t touch or overstress. Fix: Retract fully, slide in easy, then expand.
- Placing in a flare: It walks out under pull. Fix: Hunt parallel sections only.
- Not fully seated: Weak hold from lazy yank. Fix: Tug down firm every time.
- Sideways loading: Stem twists, balls slip. Fix: Align stem to rope path.
- Grabbing trigger while weighting: Balls retract mid-test. Fix: Hands off trigger after release.
- Soft or hollow rock: Flakes away on load. Fix: Tap walls first, skip crumbly stuff.
- Not extending: Rope drags it up and out. Fix: Add a quickdraw or sling.
Stay honest with tests. Good habits beat close calls.
When to back it up, and how to build confidence safely
Build skills smart, not solo. Start on the ground. Place and yank CAMP Ball Nuts on crack replicas. Feel the difference.
Next, top-rope when you can. Bounce test gently. Watch for movement.
Back up early pieces. Clip another nut or cam below if the route fits. No single small pro carries the rack alone.
Treat them as a system. Stack sizes for overlaps. Solid granite rewards the effort. Your confidence grows with each clean pull.
Real world use: trad leads, aid climbing, and tough crack projects
CAMP Ball Nuts prove their worth on real routes, not just crag practice. They fill gaps where cams and nuts fall short, so you push harder on thin leads or big walls. Let’s look at key spots where they shine, plus smart limits to avoid extra weight.
Trad climbing: saving the day in thin seams and awkward stances
Picture this: you’re runout above a tiny stance on a steep trad pitch. The crack pinches to a seam too narrow for your smallest cam, and no bulge works for a nut. Tension builds because a fall means decking out.
That’s when a CAMP Ball Nut steps in. Pull the trigger, slide it into the parallel sides, and yank down. The balls expand for instant grip in that 3-9 mm slot. It creates a usable piece where nothing else fits, so you clip and keep moving.
Experienced leaders clip sizes #2 and #3 ready on their rack. Placements take seconds with practice. They save leads on desert cracks or alpine splits, but skip soft sandstone; it crumbles under load and adds dead weight.
Aid climbing: cleaner protection in pin scars (less need for pitons)
Aid climbers love CAMP Ball Nuts for old pin scars on big walls. These smooth holes demand protection without constant hammering, which scars rock and slows you down. Ball nuts slip in clean and hold firm.
They act as a secret weapon in thin aid sections. Retract, insert into the scar, and tug; balls press out for 8 kN strength. You bounce test, then step up in your aiders with less noise and effort.
However, always test hard and back them up. Pair with a cam below if the scar flares. They cut piton use on Yosemite classics, yet stay home for deep cracks; larger gear works better there.
How it compares to Black Diamond Ball Nuts and other micro options
CAMP Ball Nuts match the original Black Diamond design closely. Both cover 3-18 mm with five sizes and 8 kN ratings. Black Diamond’s version is discontinued now, so CAMP fills that role with proven reliability and no major changes through February 2026.
Small spec tweaks exist by source, like exact weights from 29-73 grams for CAMP. Climbers note similar performance in parallel cracks. Check this quick side-by-side:
| Feature | CAMP Ball Nut | Black Diamond (discontinued) | Micro Cams/Offsets |
|---|---|---|---|
| Size Range | 3-18 mm (#1-5) | 3-15 mm (similar #1-5) | 5-20 mm (bulkier) |
| Strength | 8 kN (all sizes) | 7-8 kN | 5-10 kN (varies) |
| Speed | Fast in parallels | Same | Slower, needs depth |
| Best Fit | Pin scars, seams | Parallels | Flares, irregulars |
CAMP edges out in availability and wide small-size range. Compared to micro cams, ball nuts place quicker in shallow spots because they need less depth. Offsets work constrictions better, but ball nuts build more confidence in uniform cracks. Rack CAMP for speed on tough projects; save cams for flares.
Care, inspection, and retirement: keeping a CAMP Ball Nut safe over time
Your CAMP Ball Nut takes abuse on rough routes, so care for it right. Grit jams the action, damage hides in plain sight, and one bad piece spells trouble. Follow simple habits after each climb, check it before heading up, and retire it without doubt. You’ll extend its life and climb safer. These steps fit your travel bag perfectly.
After climb cleaning: grit is the enemy of smooth action
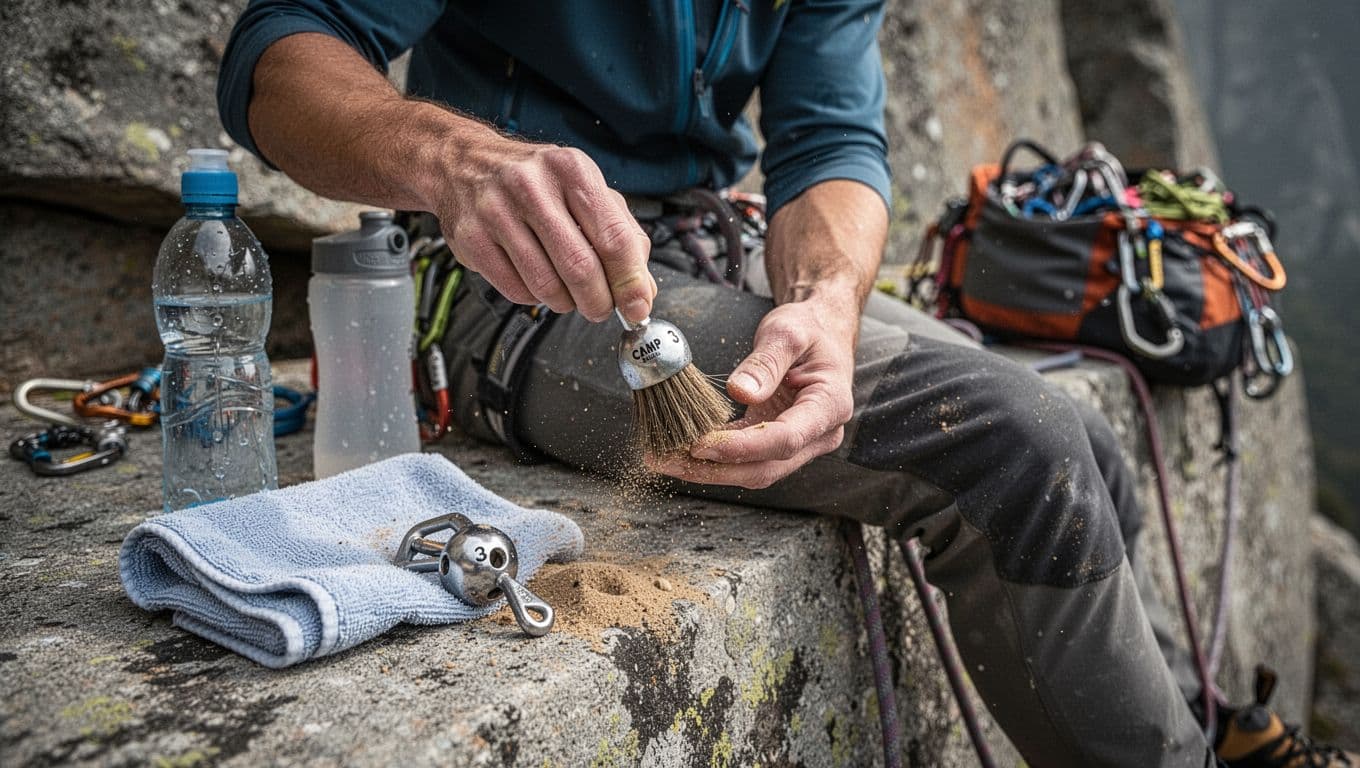
Grit kills smooth ball movement fast, so clean right after you lower. Sit on the belay ledge and brush off sand or dirt with a soft nylon brush. Focus on the balls, ramp, and trigger; loose particles grind metal over time.
Rinse under a stream or water bottle with mild soap if mud sticks. Never soak it long. Then dry it fully with a clean towel, because water rusts steel quick. Shake out extras and air dry in shade. Store it dry in your gear bag, away from sun or chemicals. Climbers on road trips love this; no special tools needed, and it packs light.
Pre climb inspection checklist for wires, balls, and trigger movement
Inspect every CAMP Ball Nut before you rack up. Do it quick at home or the crag. Pull the trigger fully and work the action; it must move free without stick. Test in good light for these red flags:
- Frayed or kinked cables: Thin steel wires snap under load.
- Bent stems or wires: They twist and fail to align right.
- Cracks in metal parts: Check ramp, body, and balls for splits.
- Sticky trigger: Won’t retract balls 70% or more; lube lightly if needed.
- Damaged balls: Deformed, flattened, or mushroomed shapes.
- Sharp edges or deep grooves: Wear that cuts ropes or fingers.
If it binds, looks off, or feels rough, skip it. No piece is worth the risk; grab a fresh one instead
When to retire it, and what to do if it gets stuck in the rock
Retire your CAMP Ball Nut at these clear signs, because worn gear fails quiet. Toss it after big falls, visible cracks or bends, severe rust, or rough action over many uses. Deformed balls or bent ramps mean it’s done; replacement costs less than a slip.
Stuck pieces happen in tight scars, so stay calm. First, reduce load by slacking the rope. Lift your weight slightly to ease pressure. Then use a nut tool to gently tap the trigger or wiggle the stem straight out. Never yank sideways; that binds it worse. If it fights, leave it and downclimb safe. Gear stays cheap; your life doesn’t.
Prevent stuck triggers and missed damage with these habits. Wipe dry after rain. Apply dry lube or climber’s wax yearly on the ramp. Store in a cool, dry bag. Log inspections in your journal. Check after every trip:
- Trigger fully retracts balls.
- Balls roll free on ramp.
- No new dents or pits.
Solid care keeps your rack bomber for seasons.
Conclusion
CAMP Ball Nuts fill a key gap on your rack for thin parallel cracks and pin scars where cams or nuts won’t bite.
They excel in those spots because the spring-loaded balls grip tight under downward pull, delivering 8 kN strength across all sizes.
However, success hinges on picking the right size and nailing placement every time; a firm tug test confirms it’s bomber.
Start smart by practicing on low-risk ground or crack replicas to build feel.
Carry #2 and #3 first; they cover most common seams without extra weight.
In short, clean them after trips, inspect before leads, and retire worn ones fast.
Next, grab one or two for your next thin-gear route. Test placements at the base, then clip with confidence. Your leads just got safer.
Back to Climbing Nut Reviews
Recommended Products for Trad Climbing
These products can support safer climbing, belaying, rappelling, and emergency readiness.
Affiliate disclosure: As an Amazon Associate, TradClimbers may earn from qualifying purchases at no additional cost to you.
Keep exploring helpful trad climbing, gear, safety, and technique resources.
- A Climber’s Guide to Rock Climbing in Thailand
- A Trad Climber’s Guide to the Isle of Skye Ridge
- Hueco Tanks Rock Climbing: hueco tanks rock climbing Essentials
- A Climber’s Guide to The Nose of El Capitan
- The Top 8 Unforgettable Climbing Routes El Capitan Has to Offer in 2026
- Yoga for Climbers: Boost Strength, Flexibility, and Recovery | yoga for climbers